Final Cut Pro X User Guide
- Welcome
-
- What’s new in Final Cut Pro 10.4.9
- What’s new in Final Cut Pro 10.4.7
- What’s new in Final Cut Pro 10.4.6
- What’s new in Final Cut Pro 10.4.4
- What’s new in Final Cut Pro 10.4.1
- What’s new in Final Cut Pro 10.4
- What’s new in Final Cut Pro 10.3
- What’s new in Final Cut Pro 10.2
- What’s new in Final Cut Pro 10.1.2
- What’s new in Final Cut Pro 10.1
- What’s new in Final Cut Pro 10.0.6
- What’s new in Final Cut Pro 10.0.3
- What’s new in Final Cut Pro 10.0.1
-
- Intro to effects
-
- Intro to transitions
- How transitions are created
- Add transitions
- Set the default transition
- Delete transitions
- Adjust transitions in the timeline
- Adjust transitions in the inspector and viewer
- Merge jump cuts with the Flow transition
- Adjust transitions with multiple images
- Modify transitions in Motion
-
- Add storylines
- Use the precision editor
- Conform frame sizes and rates
- Use XML to transfer projects
-
-
- Intro to media management
-
- View a clip’s information
- Override a clip’s metadata
- Locate source media files
- Relink clips to media files
- Consolidate projects and libraries
- Back up projects and libraries
- Create optimized and proxy files
- Create a proxy-only project
- Manage render files
- View background tasks
- Convert incompatible media
- Create camera archives
- Glossary
- Copyright

Wide-gamut HDR tips in Final Cut Pro
The following tips can help you streamline your wide-gamut HDR workflow:
On a system with a Pro Display XDR, Final Cut Pro provides the maximum color and brightness accuracy in HDR video playback. This makes the Pro Display XDR the ideal professional reference monitor for critical work such as color correction. See Color correct HDR video with Pro Display XDR and Final Cut Pro.
On a system with macOS Catalina 10.15 or later, an SDR display, and Final Cut Pro 10.4.7 or later, the HDR image in the Final Cut Pro viewer is tone mapped to fit the properties of the SDR display. See View HDR video in the Final Cut Pro viewer.
Important: When using Final Cut Pro on a system with an SDR display, you can use the A/V Output feature with an external reference HDR video monitor to accurately play back the wider range of colors in an HDR project. See Play media on an external display in Final Cut Pro.
You can use the HDR Tools effect to convert between color spaces and HDR standards, or to limit the brightness of a clip to a specific level. See Convert or adjust HDR clips in Final Cut Pro.
You can fix missing or incorrect color space metadata using the Color Space Override pop-up menu in the Info inspector. See Change a clip’s color space metadata.
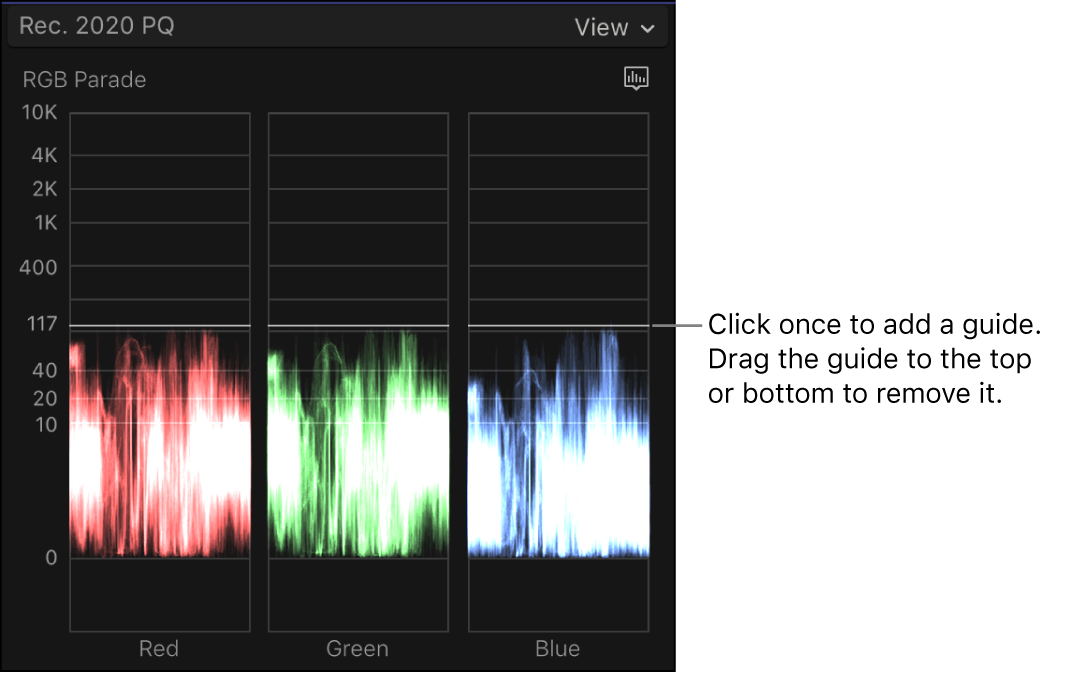
You can use guides in the waveform monitor to precisely measure and set video levels. Guides are useful as a quick annotation or reference point. To add a horizontal guide, click once anywhere in the waveform monitor. To remove the guide, drag it off the top or bottom of the waveform monitor.

Because the library color-processing setting affects all projects and media in the library, it’s a good idea to create a separate library for each project or deliverable. This prevents accidental color space crossover issues. See Create a new library in Final Cut Pro.