Final Cut Pro X User Guide
- Welcome
-
- What’s new in Final Cut Pro 10.4.9
- What’s new in Final Cut Pro 10.4.7
- What’s new in Final Cut Pro 10.4.6
- What’s new in Final Cut Pro 10.4.4
- What’s new in Final Cut Pro 10.4.1
- What’s new in Final Cut Pro 10.4
- What’s new in Final Cut Pro 10.3
- What’s new in Final Cut Pro 10.2
- What’s new in Final Cut Pro 10.1.2
- What’s new in Final Cut Pro 10.1
- What’s new in Final Cut Pro 10.0.6
- What’s new in Final Cut Pro 10.0.3
- What’s new in Final Cut Pro 10.0.1
-
- Intro to effects
-
- Intro to transitions
- How transitions are created
- Add transitions
- Set the default transition
- Delete transitions
- Adjust transitions in the timeline
- Adjust transitions in the inspector and viewer
- Merge jump cuts with the Flow transition
- Adjust transitions with multiple images
- Modify transitions in Motion
-
- Add storylines
- Use the precision editor
- Conform frame sizes and rates
- Use XML to transfer projects
-
-
- Intro to media management
-
- View a clip’s information
- Override a clip’s metadata
- Locate source media files
- Relink clips to media files
- Consolidate projects and libraries
- Back up projects and libraries
- Create optimized and proxy files
- Create a proxy-only project
- Manage render files
- View background tasks
- Convert incompatible media
- Create camera archives
- Glossary
- Copyright

Change metadata for shared items in Final Cut Pro
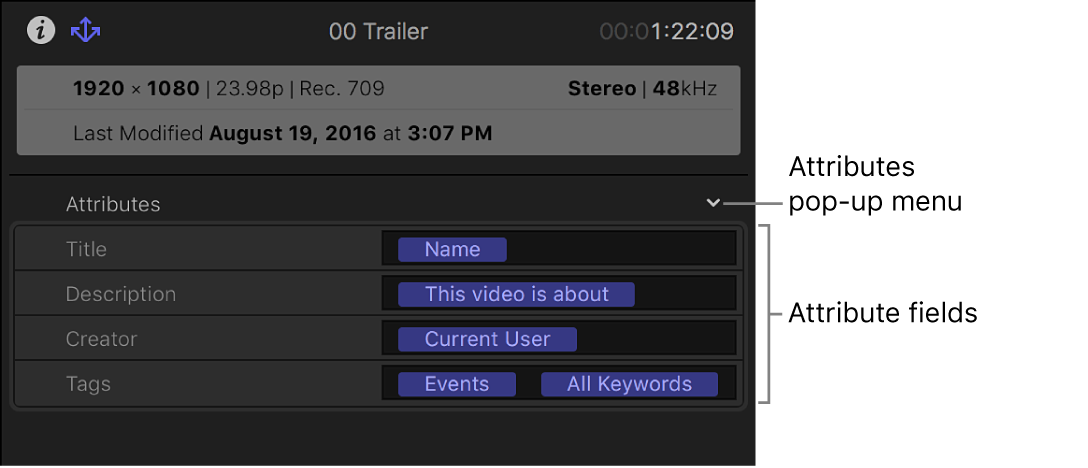
In Final Cut Pro, you can customize the metadata—also called attributes—included with exported files. You can view and modify metadata for a shared project or clip in the Attributes section of the Share inspector.

Change metadata to be shared with a project or clip
In Final Cut Pro, select a project or clip.
If the inspector isn’t already shown, do one of the following:
Choose Window > Show in Workspace > Inspector (or press Command-4).
Click the Inspector button on the right side of the toolbar.

Click the Share button at the top of the inspector.

In the Share inspector, type new text in an attribute field.
If you type a word or phrase that has been defined as an attribute, the attribute (a word or phrase in a blue bubble) appears after you finish typing.

Choose the fields that appear in the Share inspector
In Final Cut Pro, select a project or clip.
Open the Share inspector.
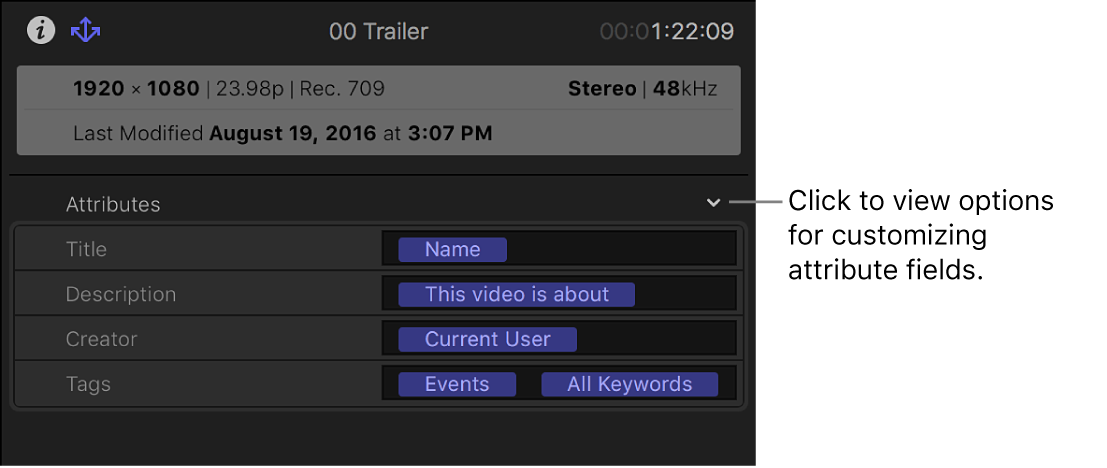
The Share inspector contains a pop-up menu you can use to customize attribute fields.

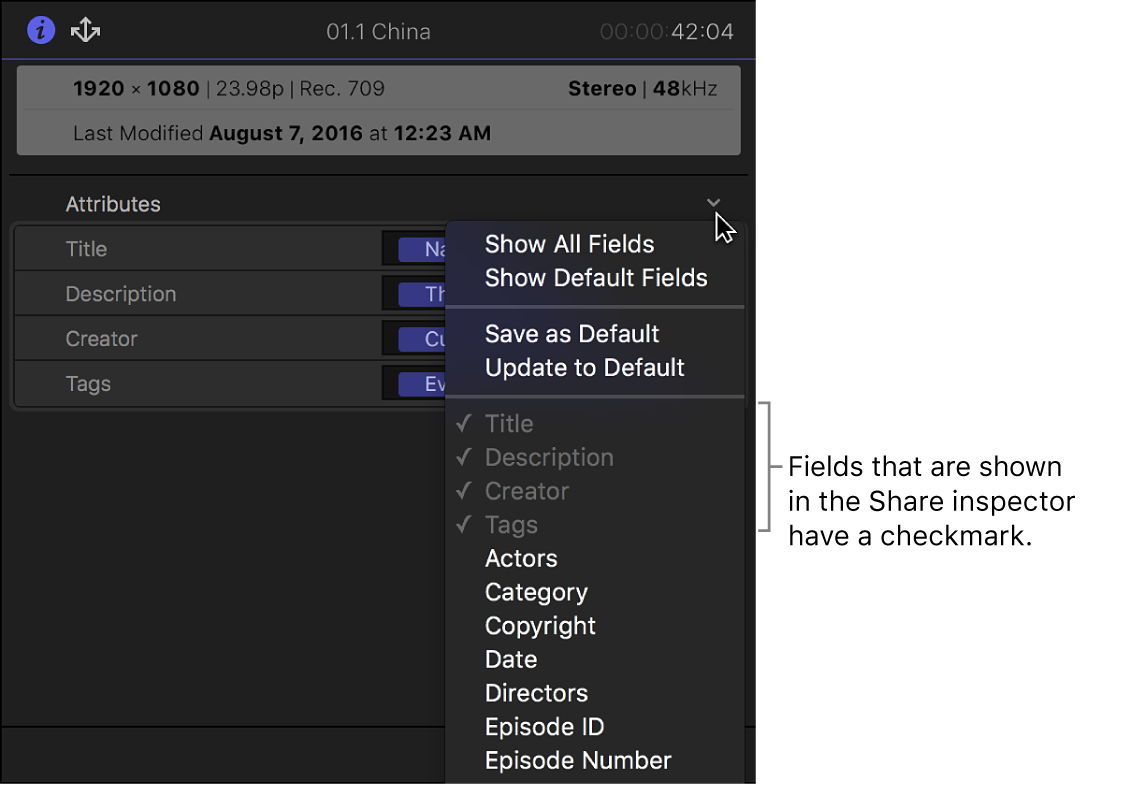
Using the Attributes pop-up menu, do any of the following:
Add an attribute field: Choose the field name (so that there’s a checkmark next to it).
Fields with a checkmark are shown in the Share inspector, and the contents of those fields are exported with your project or clip as metadata.

Remove an attribute field: Choose the field name (so that there’s no checkmark next to it).
Show only the Final Cut Pro default attribute fields: Choose Show Default Fields.
Choosing this option displays only the Title, Description, Creator, and Tags fields.
Important: The default fields can’t be removed.
Save the selected attribute fields as your default set: Choose Save as Default.
Display your default set of attribute fields: Choose Update to Default.
Select the attributes that appear in a Share inspector field
You can set the attributes that appear automatically in an attribute field.
In Final Cut Pro, select a project or clip.
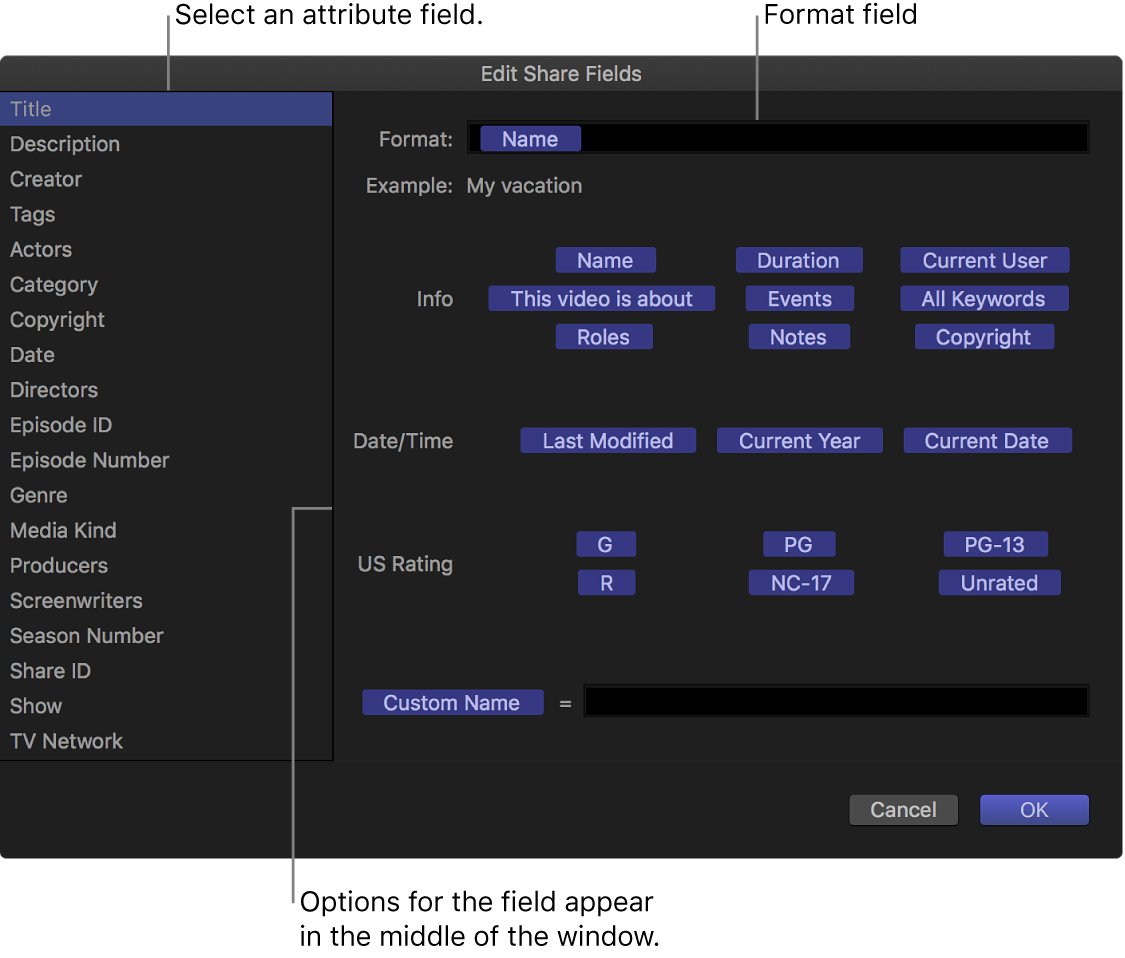
Open the Share inspector, then click the Attributes pop-up menu and choose Edit Share Fields.
In the Edit Share Fields window, select an attribute field from the list on the left.
The attributes assigned to the selected field appear in the Format field.

To edit the selected attribute field, do any of the following:
Add an attribute: Drag an attribute (a word or phrase in a blue bubble) from the middle of the window to the Format field. You can also type the attribute name in the field.
Add text: Type a word or phrase in the Format field.
Create a custom name attribute: Enter a word or phrase in the Custom Name field at the bottom of the window, then drag the Custom Name attribute to the Format field.
Tip: Because the custom name attribute appears in the Format field as “Custom Name,” you can use it for long phrases or sentences and still easily view the other attributes and text in the Format field.
Remove an attribute or text: Select the attribute or text, then press Delete.
As you add and remove attributes, the example (below the Format field) shows your changes.
When you’re finished, click OK.