Print a spreadsheet in Numbers on iPad
You can print a Numbers spreadsheet from a printer you set up to work with your iPhone or iPad. To learn about setting up a printer, see the instructions in the user guide for your device or see the Apple Support article About AirPrint.
Print a spreadsheet
Go to the Numbers app
 on your iPad, then open a spreadsheet.
Tap
 in the toolbar, then tap Print.
To set the orientation, tap Portrait or Landscape in the bottom-left corner of the screen.
If necessary, drag the slider at the bottom of the screen to adjust the scale.
By default, Numbers scales your content so that it fits the width of one page. To display content across multiple pages, drag the slider at the bottom of the screen to adjust the scale (this turns off automatic scaling). To turn automatic scaling back on, tap Auto Fit. If you open a spreadsheet from Numbers ‘09, Auto Fit isn’t on by default.
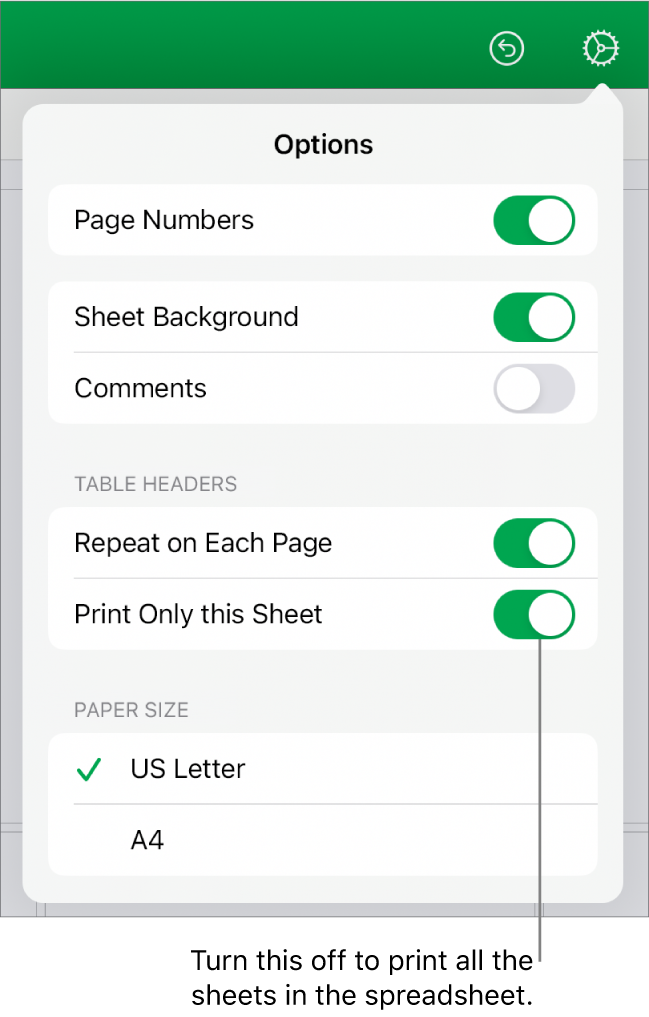
To print page numbers, sheet backgrounds and comments; choose whether table headers appear on every page; choose which sheets to print; and change the paper size, tap
 and turn on the options you want.
Note: If you turn off sheet backgrounds, all text colours for the sheet are changed to black.

When Page Numbers is turned on, sheets are numbered top to bottom, then left to right.
When Print Only This Sheet is turned on, only the selected sheet is printed. To print the entire spreadsheet, tap to turn off Print Only This Sheet.
When Comments is turned on, comments appear on a separate page that follows the sheet. Comment flags on the sheet are numbered to correspond with the comments on the comment page.
Tap outside the options to close them.
Tap Print at the bottom of the screen, then if no printer is selected, tap Printer.
Your device automatically searches for any nearby AirPrint printers. Tap a printer in the list to select it.
Set the page range, number of copies and so on, then tap Print at the top of the print options.
Tap Done at the top of the screen to close Print view and return to the spreadsheet.
To cancel printing at any time, tap Done in the toolbar.