Set up a new class with a Managed Apple ID in Classroom
If you’re using iPadOS 14.5 or later or macOS 11.3 or later, you can connect to classes in nearby, remote, and hybrid configurations in Classroom using your Managed Apple ID from Apple School Manager and then invite other teachers and students to the class. No mobile device management (MDM) solution is required, although integrating with one can change how the student devices function in the classes. These classes are also not compatible with the education configuration profile from your MDM solution that creates MDM-synced classes.
Note: You can create nearby classes using iOS 14 and macOS 11.
For more information, see Classroom requirements for classes synced with Apple School Manager.

Features
Classes synced with Apple School Manager offer the following features:
You can create classes in the latest versions of Classroom or Schoolwork if you have the appropriate privileges in Apple School Manager.
You can see any existing classes created in Apple School Manager by other accounts with the appropriate privileges to create classes.
Classes appear automatically and can be used on the same device, regardless of how they were created.
Classes sync to all devices with a Managed Apple ID.
Class names also don’t have to be unique. For example, you could have two classes named “Science” in the same location with one class for seventh-grade students and the other class for eighth-grade students.
Available actions
While the class is active, you can perform the following actions:
View and lock students’ screens (nearby classes only)
Mute student devices (nearby classes only)
AirPlay a single student’s screen (nearby classes only)
Locations
When you create a class, you must select an Apple School Manager location you’re associated with for the class and you must have the ability to create, edit, and delete classes in that location. Because these classes can’t be moved from location to location, if you need to move a class from one location to another, you must delete the class and add another one in the new location.
Students and additional teachers
After you create your class and select a location, you can invite students. Students must be associated with the same location in Apple School Manager where the class was created. When students are added, those classes appear in their class list.
You can also add additional teachers to the class. The teachers must also be associated with the same location where the class was created.
Classes that interact with Apple School Manager can’t use student images. Instead, that space shows students’ initials.
Prepare students in a one-to-one iPad deployment
Make sure students can use their iPad to sign in to iCloud with their Managed Apple ID.
Prepare students who use Mac computers
Make sure students can use their Mac to sign in to iCloud with their Managed Apple ID.
Enter your information and create your first class
Choose System Preferences > Apple ID, then sign in with your Managed Apple ID.
Launch the Classroom app
 on your Mac, then click Continue.
Do one of the following:
If you’ve never created a class, click Create Class, then proceed to step 4.
If you’ve created classes before, those classes appear. You can add or remove students.
Click Create Class, enter the name for your class, select a location, icon, and background color for that class, then click Done.
Note: The location of the class in Apple School Manager appears under the class name.
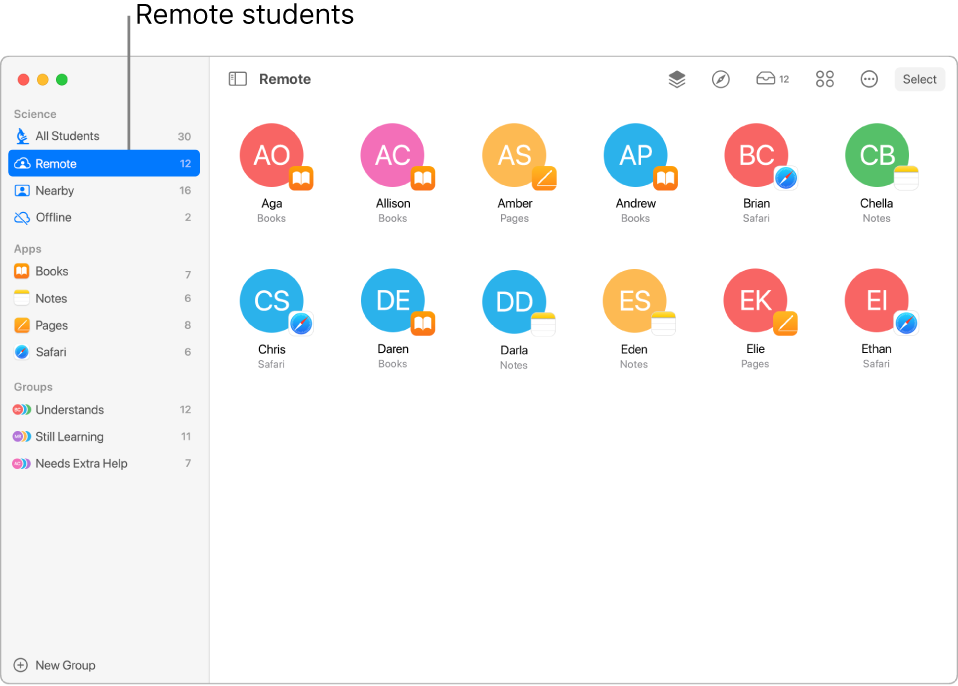
Invite only remote students to join your new class
In Classroom
 , select a class in the sidebar, click the Actions button
  , then select Add Students.
Select each student you want to invite to the class, then click Add.
A checkmark
 appears for each student you select.
Click the Actions button
 , then click Connect.
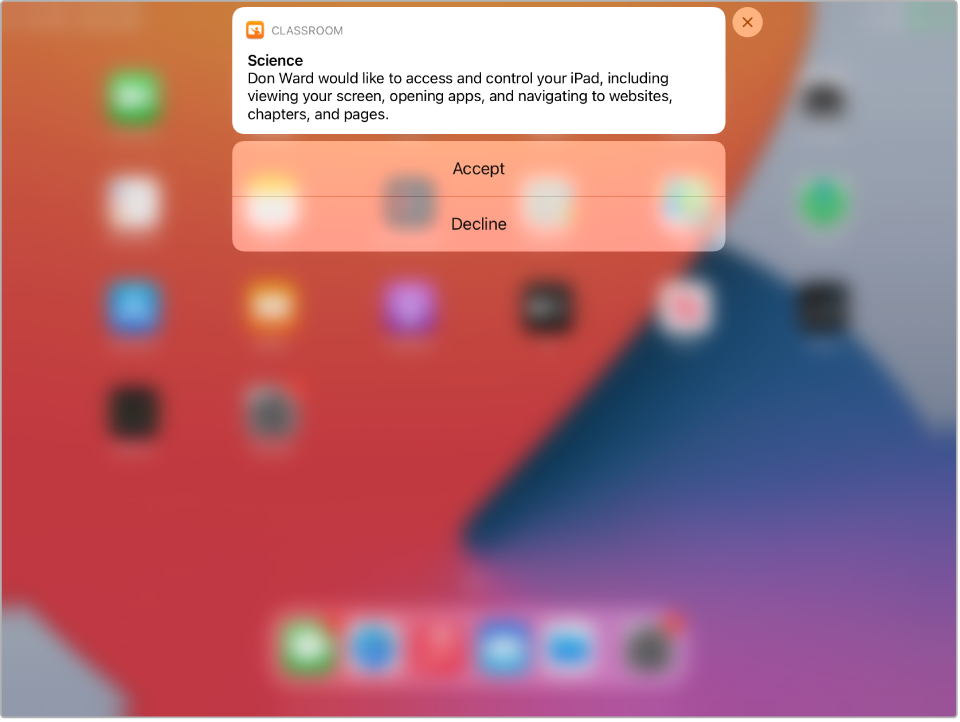
Each remote student receives a notification to join your class.

After the students connect, click Done.
To add more students, repeat this task.
Invite only remote students to an existing class
If you already have an existing class with students in it, you can reinvite all students, some students, or a single student.
In Classroom
 , select a class in the sidebar.
Do one of the following:
Select All Students in the sidebar.
Select a specific group in the sidebar.
Manually create a group, then select it in the sidebar.
Click Select in the upper-right corner of the screen, select specific students, then click Done.
Click the Actions button
 , then click Connect.
Each remote student receives a notification to join your class.

After the students connect, click Done.
To add more students, repeat this task.
Invite remote students and have nearby students join your new class
In Classroom
 , select a class in the sidebar, click the Actions button
  , then select Add Students.
Select each student you want to invite to the class, then click Add.
A checkmark
 appears for each student you select.
Click Done.
If nearby students have their devices turned on and are signed in with their Managed Apple ID, they are automatically added to the class.
Click the Actions button
 , then click Connect.
Each remote student receives a notification to join your class.
To add more students, repeat this task.
Invite remote students and have nearby students join an existing hybrid class
If you already have an existing class with students in it, you can reinvite all students, some students, or a single student.
In Classroom
 , select a class in the sidebar.
Do one of the following:
Select All Students in the sidebar.
Select a specific group in the sidebar.
Manually create a group, then select it in the sidebar.
Click Select in the upper-right corner of the screen, select specific students, then click Done.
Click the Actions button
 , click Connect, then click Done.
Each remote student receives a notification to join your class. If nearby students have their devices turned on and are signed in with their Managed Apple ID, they are automatically added to the class.
To add more students, repeat this task.
Disconnect remote students from a class
You can disconnect all students, some students, or a single student from your remote class.
In Classroom
 , select a class in the sidebar.
Do one of the following:
Select All Students in the sidebar.
Select a specific group in the sidebar.
Manually create a group, then select it in the sidebar.
Click Select in the upper-right corner of the screen, select specific students, then click Done.
Click the Actions button
 , then click Disconnect.
After the students disconnect, click Done.
Remove students from your class
In Classroom
 , select a class in the sidebar.
Do one of the following:
Select All Students in the sidebar.
Select a specific group in the sidebar.
Manually create a group, then select it in the sidebar.
Click Select in the upper-right corner of the screen, select specific students, then click Done.
Click the Actions button
 , click Remove, then click Remove again.
After you have students in your class, you can now manage the class experience. See the following: