Filter data in Numbers on iPad
You can filter the data in a table to show only the data you’re interested in seeing. You filter data by creating rules that determine which rows in a table are visible.
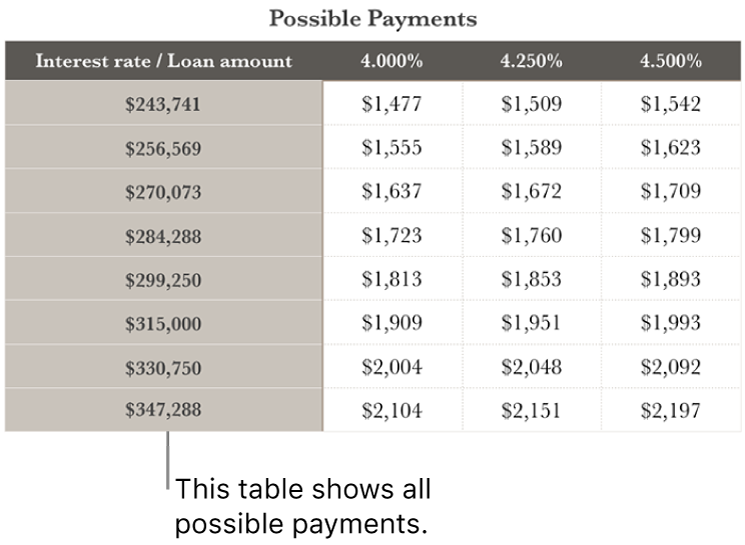
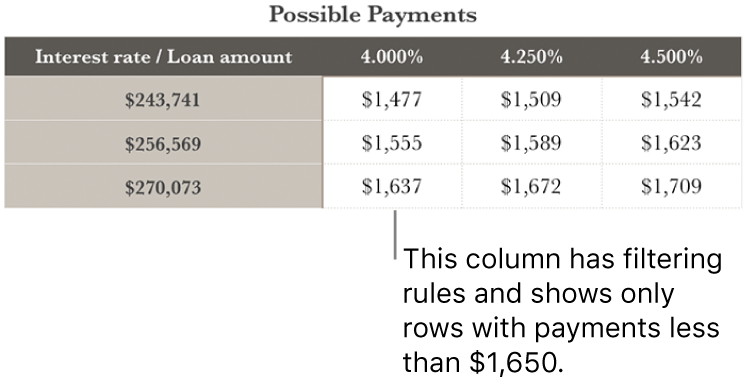
For example, if you’re looking at a table of possible monthly mortgage payments for a loan with various interest rates, you can filter the table to show only the loans you can afford.


Note: You can also quickly filter a table. Select a column or cell, tap ![]() or
or ![]() at the bottom of the screen, tap Quick Filter, then choose an option.
at the bottom of the screen, tap Quick Filter, then choose an option.
Create a filtering rule
You can create filtering rules based on the values in a column. Only rows with the specified values in that column appear.
Tap the table, tap
 , then tap Filter.
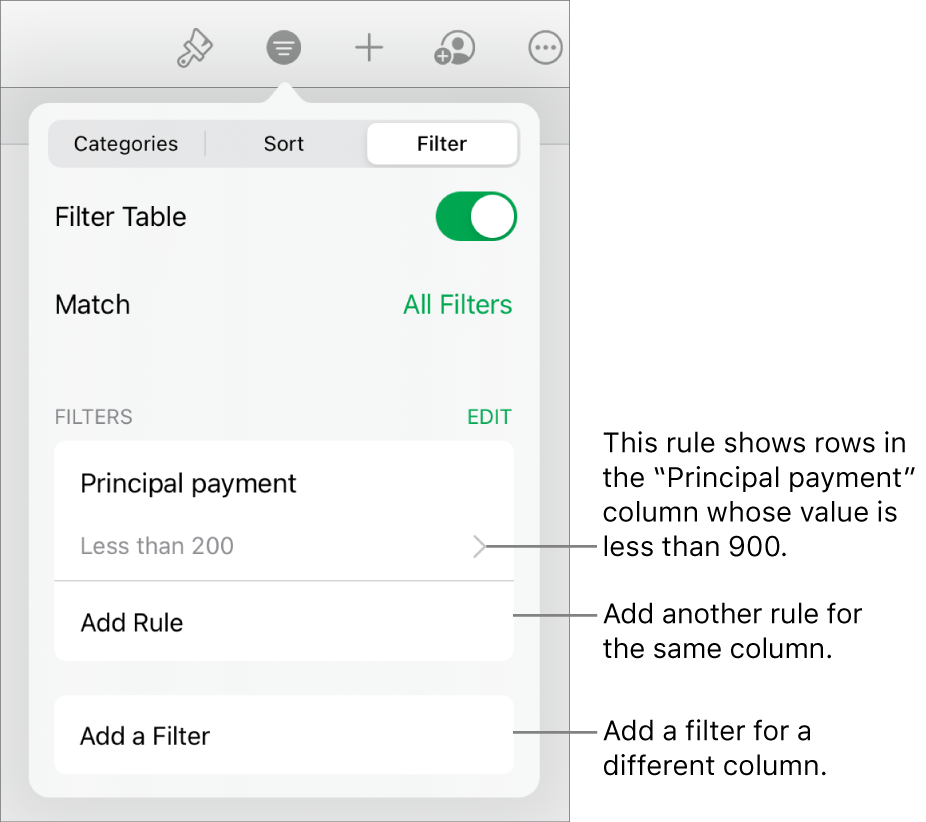
Tap Add a Filter, then tap a column to filter by.
Tap the type of filter you want (for example, Text), then tap a rule (for example, “starts with”).
Enter values for your rule; for example, if you select “is not,” type text such as “due by.”
Tap Done.
To add another rule for the same column, tap Add Rule, then choose a new filtering rule.
You can have multiple rules for a column, for example, “Show rows that have ‘yes’ or ‘maybe’ in Column C.”

To add a filter to a different column, tap Add a Filter and choose another filtering rule.
In a table with multiple filtering rules, to show rows that match all filters or any filter, tap All Filters or Any Filter.
When you add rows to a filtered table, the cells are populated to meet the existing filtering rules.
Turn off filters or delete a rule
You can turn off all filters for a table without deleting them. You can turn them back on later if necessary. If you don’t need a filter, you can delete it.
Tap the table, tap
 , then tap Filter.
Do either of the following:
Turn off all filters: Turn off Filter Table.
Delete a rule: Swipe left on a rule, then tap Delete. To delete a filter, delete all its rules.