
Use Hide My Email on Mac
With Hide My Email, you can generate unique, random email addresses that forward to your personal email account, so you don’t have to share your real email address when filling out a form on the web or signing up for a newsletter. You can choose to forward emails to your iCloud Mail address or any email address associated with your Apple Account.
To learn what you can do with Hide My Email on your iPhone and iPad and on iCloud.com, see Set up and use Hide My Email in iCloud+ on all your devices.
To use Hide My Email, you need to subscribe to iCloud+ or to Apple One, which includes iCloud+ and other services. See the Apple Support article Bundle Apple subscriptions with Apple One.
Note: iCloud+ may not be available in all countries or regions, and iCloud+ features may vary by area. See the macOS Feature Availability webpage.
Automatically create a new address in Safari or Mail
In Safari and Mail, you can automatically generate a unique, random address by clicking an email address field on a web page or the From field in a message, then choosing Hide My Email. See Hide your personal email address in Safari.
Manually create a new address in iCloud settings
Go to the System Settings app
 on your Mac.
Click your name at the top of the sidebar.
If you don’t see your name, click “Sign in,” enter your Apple Account email address or phone number, then enter your password.
Click iCloud, then click Hide My Email.
Click
 in the lower-left corner.
A dialog appears and displays a randomly created iCloud email address.
Tip: To generate a new random iCloud email address, click
 .
.Enter a label for your email and a note to help you remember how you use this email address, then click Continue.
When you’re finished, click Continue, then click Done.
Change the forwarding address for Hide My Email
If you have more than one personal email address, you can select which one you want email forwarded to.
Go to the System Settings app
on your Mac.Click your name at the top of the sidebar.
If you don’t see your name, click “Sign in,” enter your Apple Account email address or phone number, then enter your password.
Click iCloud, then click Hide My Email.
Click
 in the lower-left corner, then click Change Forwarding Address.
Select the address that Hide My Email should forward mail to, then click Done.
Copy, edit, or deactivate addresses created with Hide My Email
You can copy an address, edit labels and notes, and deactivate an address to stop receiving messages sent to it.
Go to the System Settings app
on your Mac.Click your name at the top of the sidebar.
If you don’t see your name, click “Sign in,” enter your Apple Account email address or phone number, then enter your password.
Click iCloud, then click Hide My Email.
Select an address on the left, then do any of the following:
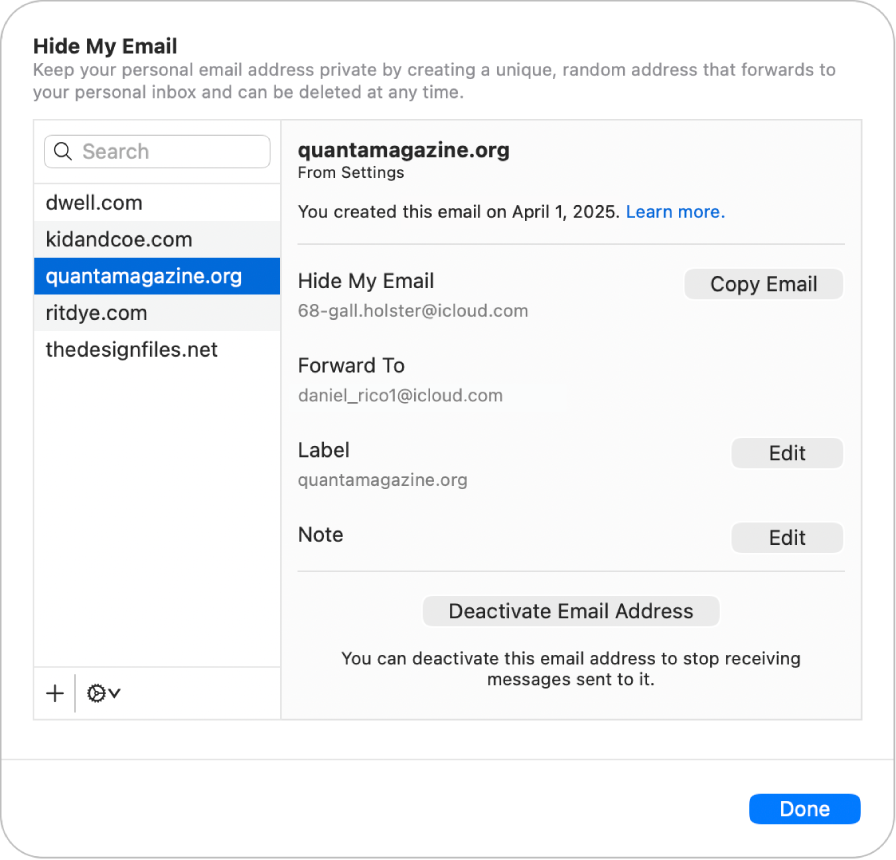
Copy an address: Click Copy Email.
Edit a label: Click Edit next to Label, make changes to the label, then click Done.
Edit a note: Click Edit next to Note, make changes to the note, then click Done.
Deactivate an address: Click Deactivate Email Address, then click Deactivate.
Click Done.
Reactivate or delete inactive addresses
After you deactivate an address, you can reactivate it if you want to start receiving messages again. You can also permanently delete inactive addresses.
Go to the System Settings app
on your Mac.Click your name at the top of the sidebar.
If you don’t see your name, click “Sign in,” enter your Apple Account email address or phone number, then enter your password.
Click iCloud, then click Hide My Email.
Click
in the lower-left corner, then click Show Inactive Addresses.Select an inactive address in the list on the left, then do any of the following:
Reactivate an inactive address: Click Reactivate Address, then click Reactivate.
Delete an inactive address: Click Delete Address, then click Delete.
Click Done, then click Done again.