Logic Pro User Guide for iPad
- What’s new in Logic Pro 1.1
-
- What is Logic Pro?
- Working areas
- Work with function buttons
- Work with numeric values
-
- Intro to tracks
- Create tracks
- Create tracks using drag and drop
- Choose the default region type for a software instrument track
- Select tracks
- Duplicate tracks
- Reorder tracks
- Rename tracks
- Change track icons
- Change track colors
- Use the tuner on an audio track
- Show the output track in the Tracks area
- Delete tracks
- Edit track parameters
- Start a Logic Pro subscription
- How to get help
-
- Intro to recording
-
- Before recording software instruments
- Record software instruments
- Record additional software instrument takes
- Record to multiple software instrument tracks
- Record multiple MIDI devices to multiple tracks
- Record software instruments and audio simultaneously
- Merge software instrument recordings
- Spot erase software instrument recordings
- Replace software instrument recordings
- Capture your most recent MIDI performance
- Use the metronome
- Use the count-in
-
- Intro to arranging
-
- Intro to regions
- Select regions
- Cut, copy, and paste regions
- Move regions
- Remove gaps between regions
- Delay region playback
- Trim regions
- Loop regions
- Repeat regions
- Mute regions
- Split and join regions
- Stretch regions
- Separate a MIDI region by note pitch
- Bounce regions in place
- Change the gain of audio regions
- Create regions in the Tracks area
- Convert a MIDI region to a Drummer region or a pattern region
- Rename regions
- Change the color of regions
- Delete regions
- Create fades on audio regions
- Access mixing functions using the Fader
-
- Intro to Step Sequencer
- Use Step Sequencer with Drum Machine Designer
- Record Step Sequencer patterns live
- Step record Step Sequencer patterns
- Load and save patterns
- Modify pattern playback
- Edit steps
- Edit rows
- Edit Step Sequencer pattern, row, and step settings in the inspector
- Customize Step Sequencer
-
- Effect plug-ins overview
-
- Instrument plug-ins overview
-
- ES2 overview
- Interface overview
-
- Modulation overview
-
- Vector Envelope overview
- Use Vector Envelope points
- Use Vector Envelope solo and sustain points
- Set Vector Envelope segment times
- Vector Envelope XY pad controls
- Vector Envelope Actions menu
- Vector Envelope loop controls
- Vector Envelope release phase behavior
- Vector Envelope point transition shapes
- Use Vector Envelope time scaling
- Use the Mod Pad
- Modulation source reference
- Via modulation source reference
-
- Sample Alchemy overview
- Interface overview
- Add source material
- Save a preset
- Edit mode
- Play modes
- Source overview
- Synthesis modes
- Granular controls
- Additive effects
- Additive effect controls
- Spectral effect
- Spectral effect controls
- Filter module
- Low and highpass filter
- Comb PM filter
- Downsampler filter
- FM filter
- Envelope generators
- Mod Matrix
- Modulation routing
- Motion mode
- Trim mode
- More menu
- Sampler
- Copyright
Quick Sampler One Shot mode in Logic Pro for iPad
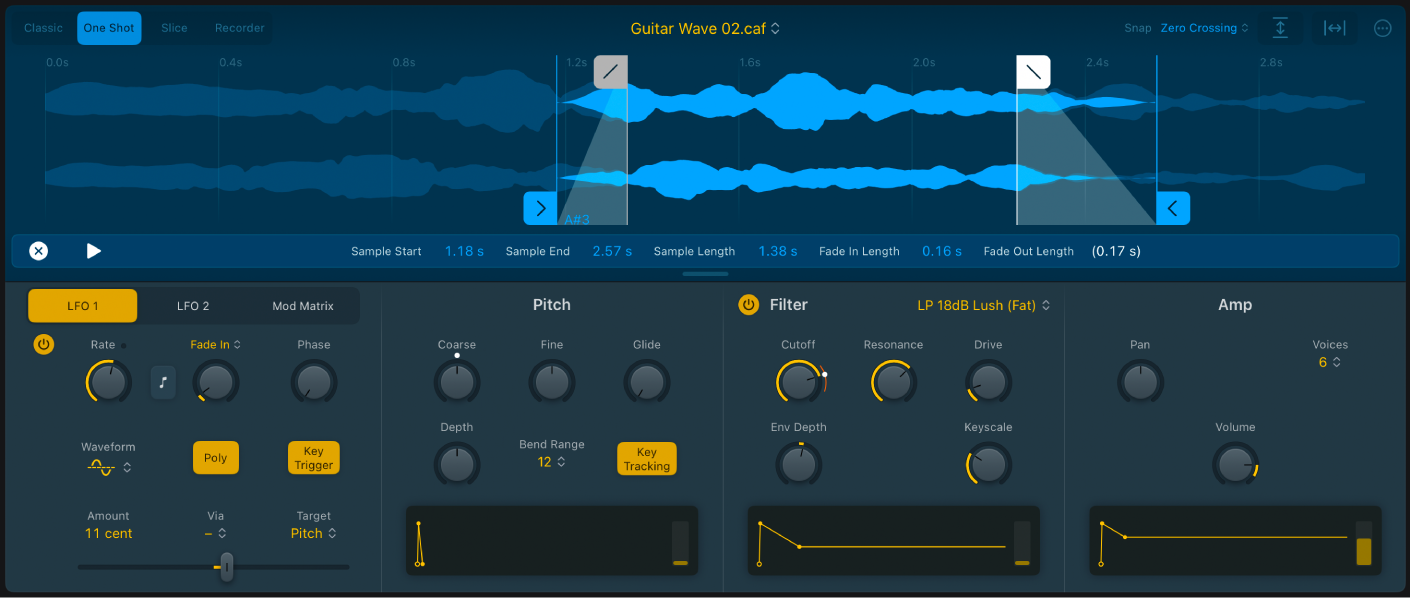
Use Quick Sampler One Shot mode to play an audio file, or a portion of it. It provides fade in and fade out parameters. Notes run from the Sample Start to the Sample End marker regardless of when the played note is released on the keyboard.
One Shot mode is useful for adding effects such as a reversed portion of a sample played alongside the original, or fading in a slightly detuned version to double parts. Use Classic mode if you want to loop part or all of the sample.

Quick Sampler One Shot mode parameters
Fade in/fade out markers: Drag the gray fade in or fade out marker to adjust the length of the fade at the beginning and end of the audio file segment between the start and end markers.
Tip: You can tap any marker handle to permanently display parameter values below the waveform display. Tap
 at the left of the parameter display bar to revert to the default behavior and parameter view.
Start and end markers: Drag the blue start and end markers to set the sample start and end points for playback.
Root Key pop-up menu: Drag vertically to choose a keyboard note value that is used to play the sample at the original pitch. Keys below this will play the sample at a lower pitch and slower speed. Keys above this will play the sample at a higher pitch and faster speed.
Tune field: Drag vertically to set a tuning value for the assigned root key in cents (1/100 of a semitone).
Playback mode buttons: Enable Forward or Reverse playback between the start and end marker positions. Loop markers are ignored.
Flex On/Off button: Turn Flex mode on or off. If Flex mode is turned on, an audio sample is played at its original speed for all note pitches. See Use Flex in Quick Sampler.
Follow Tempo button: When Flex mode is active, turn on to follow the project tempo.
Tip: The Functions > Derive Tempo from Loop Length command in the More menu calculates a tempo for the audio file based on the Loop Length. If using the Follow Tempo button does not yield the desired results, you can choose this option to calculate a revised tempo at which the loop is aligned to the beat. See Quick Sampler More menu.
(Flex) Speed pop-up menu: When Flex mode is active, choose a playback speed division or multiplication value.
Tip: Flex Speed is also available as a modulation target.
Download this guide: PDF