Final Cut Pro X User Guide
- Welcome
-
- What’s new in Final Cut Pro 10.4.9
- What’s new in Final Cut Pro 10.4.7
- What’s new in Final Cut Pro 10.4.6
- What’s new in Final Cut Pro 10.4.4
- What’s new in Final Cut Pro 10.4.1
- What’s new in Final Cut Pro 10.4
- What’s new in Final Cut Pro 10.3
- What’s new in Final Cut Pro 10.2
- What’s new in Final Cut Pro 10.1.2
- What’s new in Final Cut Pro 10.1
- What’s new in Final Cut Pro 10.0.6
- What’s new in Final Cut Pro 10.0.3
- What’s new in Final Cut Pro 10.0.1
-
- Intro to effects
-
- Intro to transitions
- How transitions are created
- Add transitions
- Set the default transition
- Delete transitions
- Adjust transitions in the timeline
- Adjust transitions in the inspector and viewer
- Merge jump cuts with the Flow transition
- Adjust transitions with multiple images
- Modify transitions in Motion
-
- Add storylines
- Use the precision editor
- Conform frame sizes and rates
- Use XML to transfer projects
-
-
- Intro to media management
-
- View a clip’s information
- Override a clip’s metadata
- Locate source media files
- Relink clips to media files
- Consolidate projects and libraries
- Back up projects and libraries
- Create optimized and proxy files
- Create a proxy-only project
- Manage render files
- View background tasks
- Convert incompatible media
- Create camera archives
- Glossary
- Copyright

Add speed transitions in Final Cut Pro
When two adjacent speed segments are set to play at different speeds, you can control how smoothly the video switches between playback speeds. When there’s no transition between the segments, playback shifts suddenly from one speed to another. By adding a transition between the segments, you can create a more gradual, or ramped, effect. You can also control how quickly that transition takes place.
When you apply effects that create speed segments in a clip (such as Speed Ramp, Instant Replay, and Hold), transitions are automatically added between the newly created segments. A transition appears as a shaded bar on either side of the border between speed segments.

When you create speed segments manually, you can add speed transitions individually, or you can add them to all the speed segments in a clip at once.
Note: You can’t add transitions between forward-playing segments and reverse-playing segments (or vice versa).
Add transitions between all speed segments in a clip
Remove transitions from all speed segments in a clip
Remove individual speed transitions
To add transitions between some speed segments in a clip and not others, you must turn on Speed Transitions in the Retime pop-up menu and then remove the transitions you don’t want.
In the Final Cut Pro timeline, select a clip that has speed segments.

Click the Retime pop-up menu below the viewer and choose Speed Transitions, so that there’s a checkmark next to the menu item.

Speed transitions are added to all speed segments in the clip.
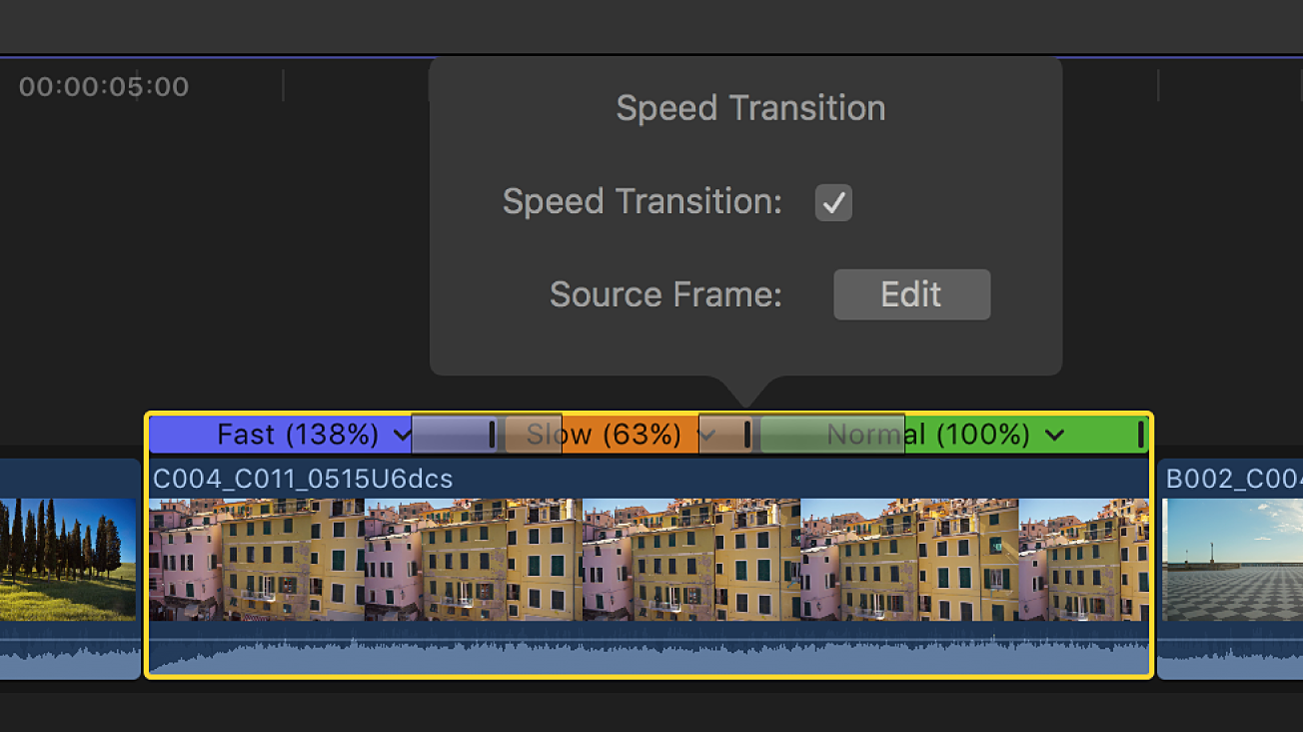
To remove a transition between speed segments, double-click the last frame of the outgoing speed segment in the retime editor.

Deselect the Speed Transition checkbox in the Speed Transition window, then click anywhere outside the window to dismiss it.
The transition is removed.

Change the duration of a speed transition
After a speed transition is applied, you can change its duration. The shorter the transition, the more quickly the speed ramps from one value to another. The longer the transition, the slower the ramp.

