Final Cut Pro X User Guide
- Welcome
-
- What’s new in Final Cut Pro 10.4.9
- What’s new in Final Cut Pro 10.4.7
- What’s new in Final Cut Pro 10.4.6
- What’s new in Final Cut Pro 10.4.4
- What’s new in Final Cut Pro 10.4.1
- What’s new in Final Cut Pro 10.4
- What’s new in Final Cut Pro 10.3
- What’s new in Final Cut Pro 10.2
- What’s new in Final Cut Pro 10.1.2
- What’s new in Final Cut Pro 10.1
- What’s new in Final Cut Pro 10.0.6
- What’s new in Final Cut Pro 10.0.3
- What’s new in Final Cut Pro 10.0.1
-
- Intro to effects
-
- Intro to transitions
- How transitions are created
- Add transitions
- Set the default transition
- Delete transitions
- Adjust transitions in the timeline
- Adjust transitions in the inspector and viewer
- Merge jump cuts with the Flow transition
- Adjust transitions with multiple images
- Modify transitions in Motion
-
- Add storylines
- Use the precision editor
- Conform frame sizes and rates
- Use XML to transfer projects
-
-
- Intro to media management
-
- View a clip’s information
- Override a clip’s metadata
- Locate source media files
- Relink clips to media files
- Consolidate projects and libraries
- Back up projects and libraries
- Create optimized and proxy files
- Create a proxy-only project
- Manage render files
- View background tasks
- Convert incompatible media
- Create camera archives
- Glossary
- Copyright

Use the precision editor in Final Cut Pro
You can fine-tune the edit point between two clips in the timeline using the precision editor, which provides an expanded view of the clips on either side of the edit point as well as the unused portions of each clip. You can trim or extend the end of one clip and the beginning of the next, either separately or together. As you make changes, you can instantly see how your edits affect the cut or transition from one clip to the next.
You can also see a “two-up” display in the viewer as you trim edit points in the timeline. See Show trimming details in the Final Cut Pro viewer.
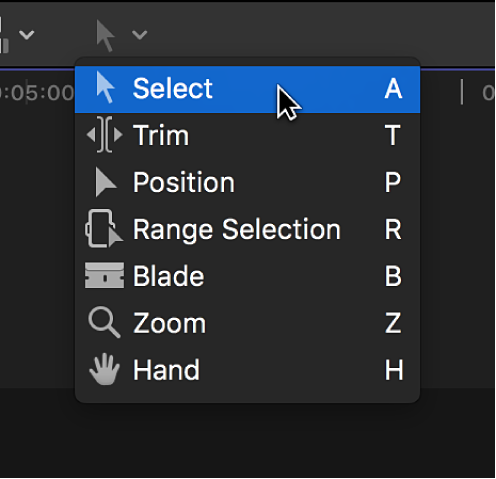
In Final Cut Pro, click the Tools pop-up menu in the top-left corner of the timeline and choose either the Select tool
 or the Trim tool
  .
.
Double-click the edit point you want to trim in the timeline.

The precision editor appears, presenting an expanded view of your outgoing and incoming shots. The edit point is represented by a vertical line in the center of the precision editor. The outgoing clip and the clips before it appear in the top part of the storyline. The incoming clip and the clips after it appear in the bottom part.
The dimmed portions of clips to the right and left of the edit line are the unused portions of media that are available for trimming (called media handles). You can skim over these areas to view and play back the media as you decide where to trim.
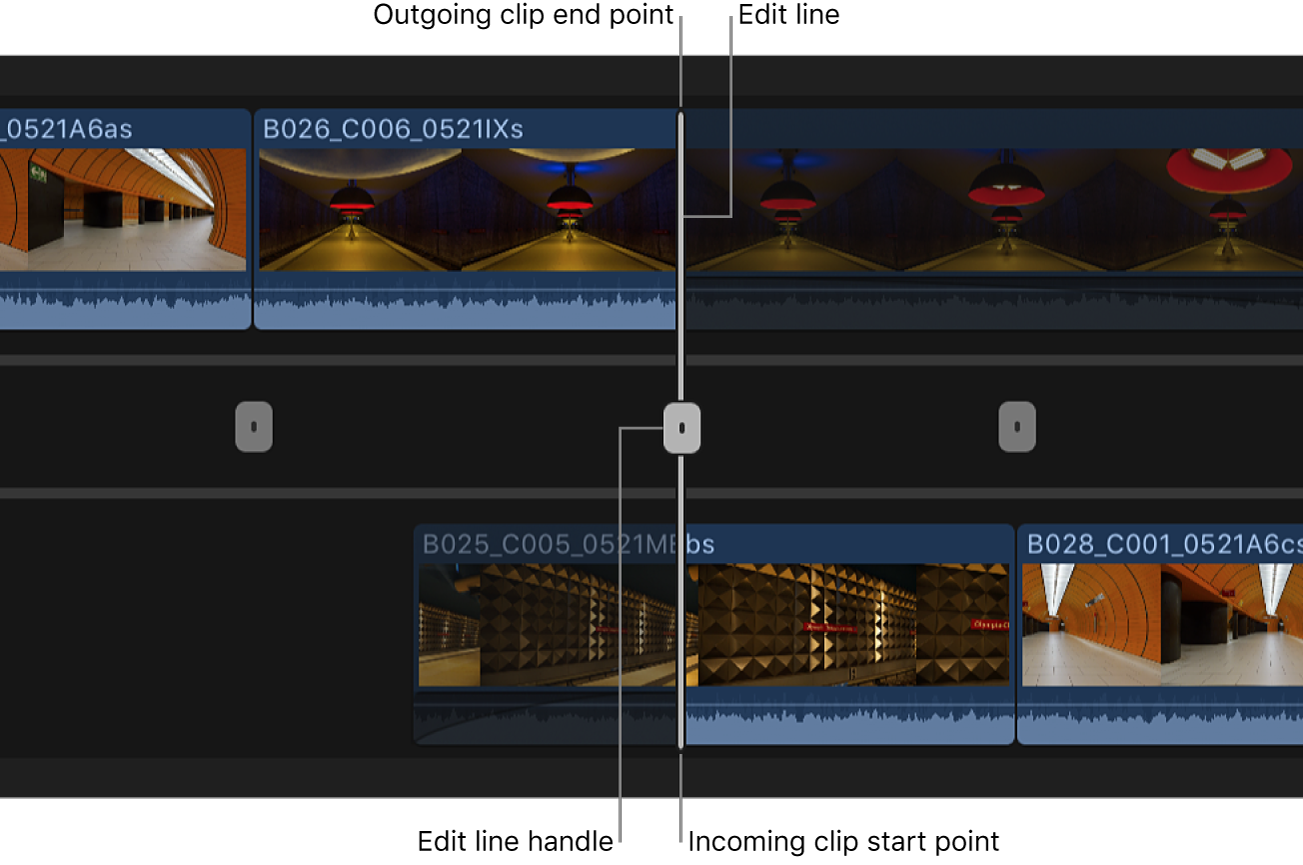
To adjust the edit point, do any of the following:
Move the edit line in the center of the precision editor by dragging its handle left or right.
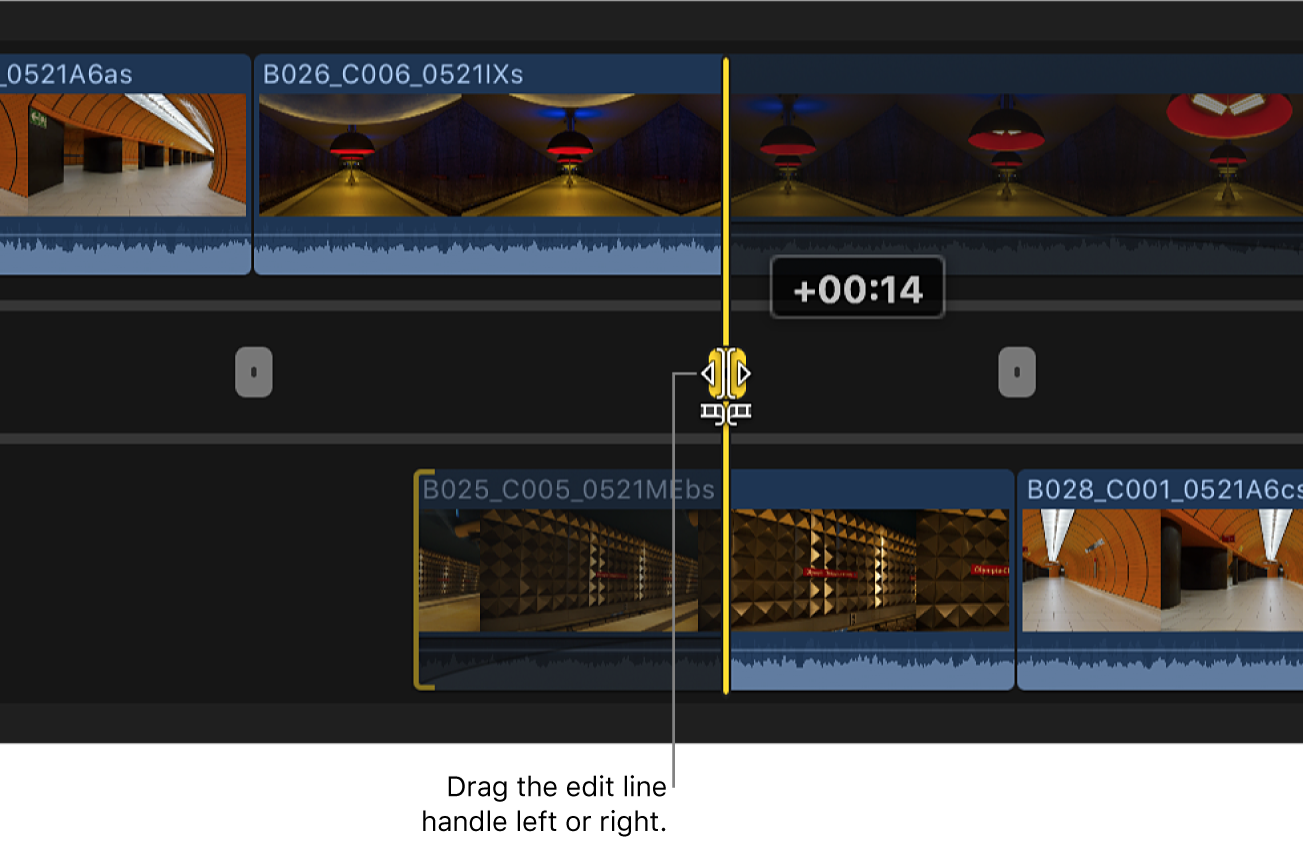
Moving the entire edit line performs a roll edit.
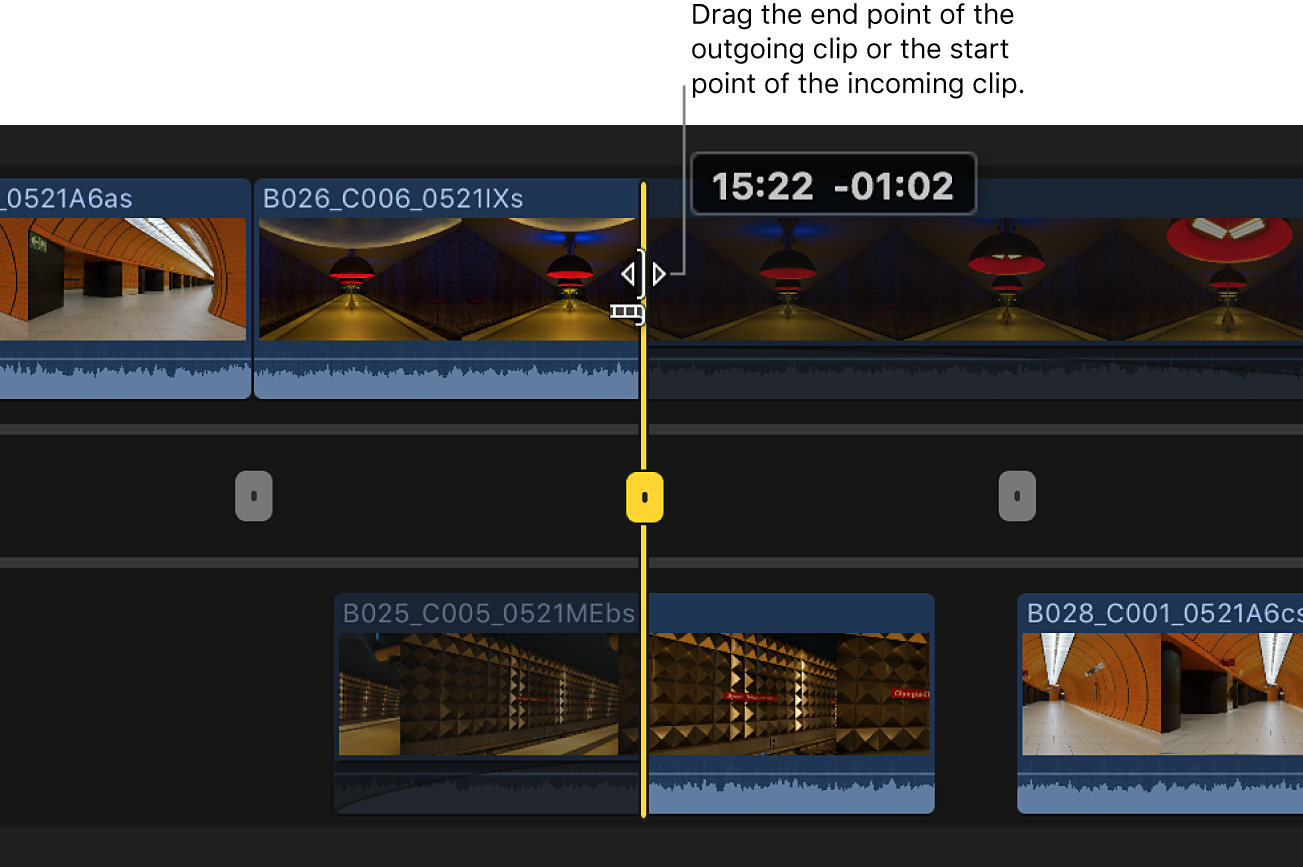
Drag the end point of the outgoing clip or the start point of the incoming clip. This performs a ripple edit.
Note: You can drag the edit line or individual edit points to the extent that there are media handles available. When you extend a clip to its maximum length in either direction, the clip edge turns red.
Skim over and click the outgoing clip or the incoming clip at any point.
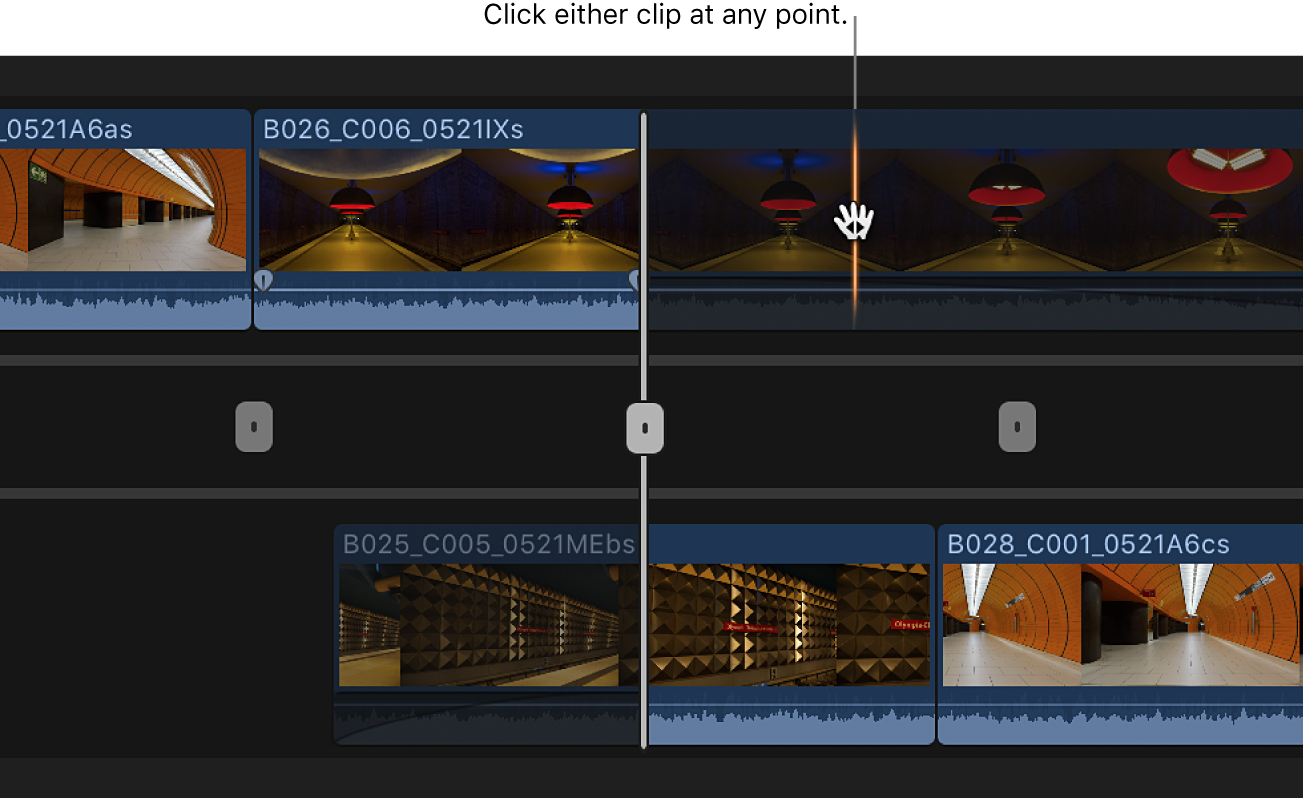
The clip’s edit point is adjusted to the frame you click. This is the equivalent of a ripple edit.
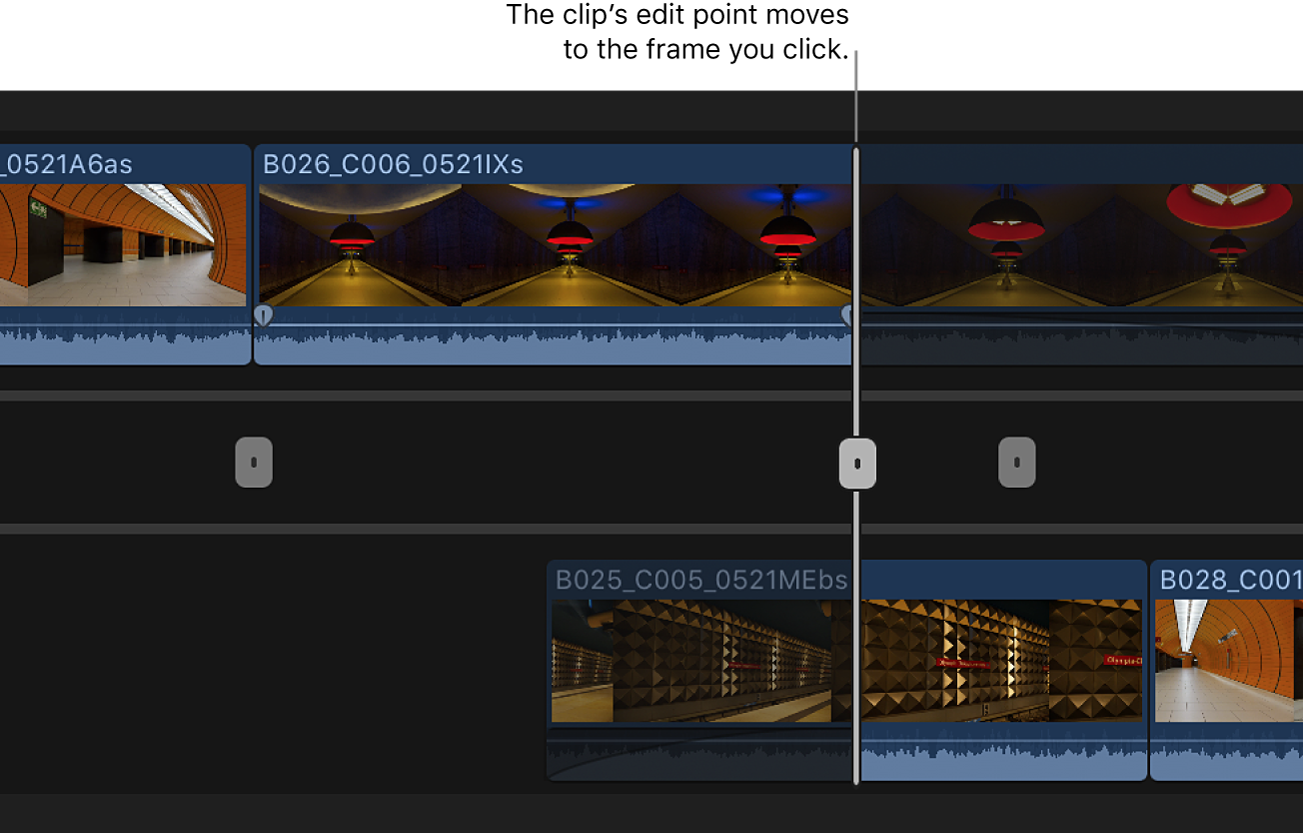
You can also enter a timecode value to adjust the edit point numerically. If you select either the end point of the outgoing clip or the start point of the incoming clip, a ripple edit is performed. Otherwise, a roll edit is performed.
To navigate to another edit point, do one of the following:
Go directly to an edit point: Click the other edit point.
Go to the next or previous edit point: Press the Up Arrow or Down Arrow key.
To close the precision editor, double-click the current edit point, or press the Esc (Escape) key.