Adjust ProRes RAW camera settings in Final Cut Pro for iPad
Apple ProRes RAW brings to RAW video the same great performance, quality, and ease of use that Apple ProRes has brought to conventional video, in a format ideal for HDR content creation. ProRes RAW captures RAW sensor data from compatible cameras, letting you adjust camera settings in Final Cut Pro without losing quality.
With standard RAW conversion, you can view and adjust the ISO setting, exposure, and color temperature of ProRes RAW media using controls in the inspector.
For ProRes RAW video that was recorded on iPhone, you can adjust even more settings, including color temperature, tint, and advanced demosaicing.
Adjust ProRes RAW camera settings for standard conversion
You can use standard RAW conversion in Final Cut Pro with ProRes RAW video from any camera.
Go to the Final Cut Pro app on your iPad.
Import ProRes RAW media into Final Cut Pro.
See Import media.
Open a project, tap
 in the toolbar, then tap a ProRes RAW clip in the browser to select it.
Tap Inspect in the lower-left corner of the screen.
In the Settings section of the inspector, tap
 to the right of Processing, then tap Standard (if it’s not already selected).
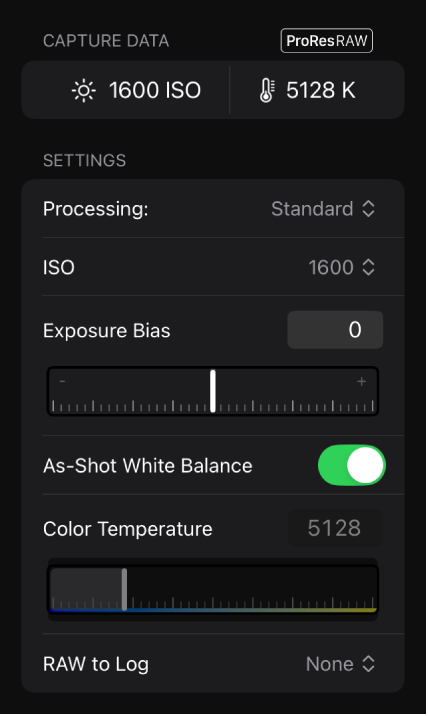
Adjust any of the following:
Note: These settings appear only if the corresponding information is found in the clip metadata.
ISO: Adjust the ISO setting of ProRes RAW clips.
Exposure Bias: Adjust the ISO setting of ProRes RAW clips up or down by as much as one stop.
As-Shot White Balance: Turn on to use the original camera white balance setting. Turn off this setting to make adjustments to Color Temperature.
Color Temperature: Adjust the camera white balance setting for ProRes RAW clips (available only for clips shot with supported cameras). This setting is adjustable only when As-Shot White Balance is turned off.
RAW to Log: Convert RAW video to various log formats for use in log-based workflows. Choose the setting that corresponds to your log workflow.
Adjust camera settings for ProRes RAW video recorded on iPhone
Go to the Final Cut Pro app on your iPad.
Import ProRes RAW media shot on iPhone into Final Cut Pro. (ProRes RAW capture requires supported iPhone models.)
See Import media.
Open a project, tap
in the toolbar, then tap a ProRes RAW clip in the browser to select it.Tap Inspect in the lower-left corner of the screen.
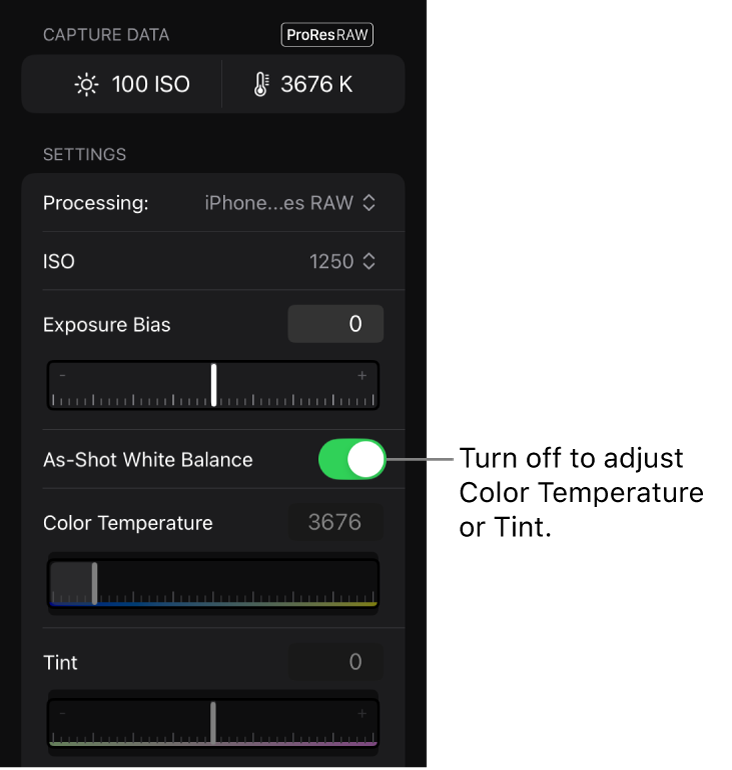
In the Settings section of the inspector, tap
to the right of Processing, then tap iPhone ProRes RAW (if it’s not already selected).Adjust any of the following:
ISO: Adjust the ISO setting of ProRes RAW clips.
Exposure Bias: Adjust the ISO setting of ProRes RAW clips up or down by as much as one stop.
As-Shot White Balance: Turn on to use the original camera white balance setting. Turn off this setting to make adjustments to Color Temperature and Tint.
Color Temperature: Adjust the camera white balance setting for ProRes RAW clips along the blue-amber axis (available when As-Shot White Balance is turned off).
Tint: Adjust the camera white balance setting for ProRes RAW clips along the green-magenta axis (available when As-Shot White Balance is turned off). Increase the value to add a magenta tint to the image, or decrease the value to add a green tint.
Demosaic: Choose the method for transforming RAW sensor data into a standard full-color RGB image:
Standard: Uses the same demosaicing algorithm as the standard conversion. Playback occurs in real time.
Custom: Enables manual demosaicing adjustments using the Color Noise, Edge Contrast, and Detail Enhancement sliders. Playback may be slower than real time.
Color Noise: Drag the slider to suppress color noise artifacts (available when Demosaic is set to Custom).
Edge Contrast: Drag the slider to increase contrast between objects (available when Demosaic is set to Custom).
Detail Enhancement: Drag the slider to increase sharpening for the overall image (available when Demosaic is set to Custom).
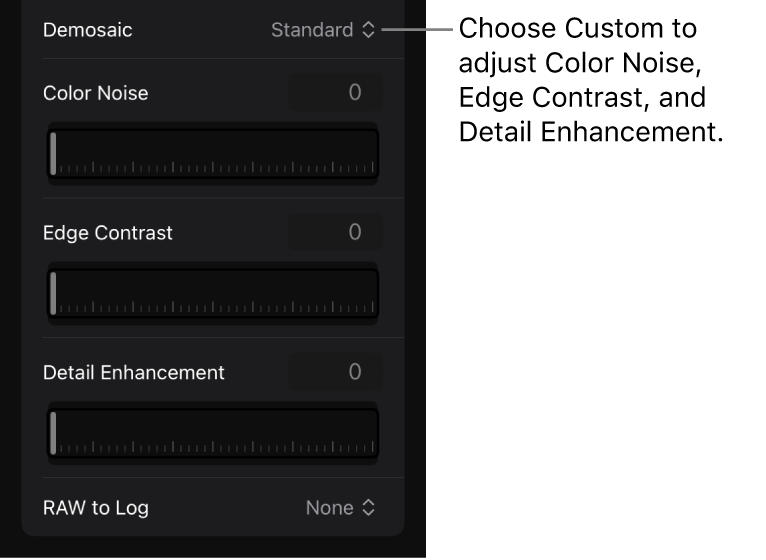
RAW to Log: Convert RAW video to Apple Log or Apple Log 2 for use in log-based workflows.
None: Represents light values as they exist in the real world, with pixel values proportional to the actual intensity of light captured by the sensor. Choose this option for color correction in Final Cut Pro for iPad.
Apple Log: Preserves highlight and shadow detail by using a logarithmic transfer function to capture a wider dynamic range. This option creates a flat, desaturated image for use in log-based workflows.
Apple Log 2: Preserves highlight and shadow detail but with a wider color gamut than Apple Log. This option creates a flat, desaturated image for use in log-based workflows.


Note: In the iPhone ProRes RAW conversion, if the media contains lens distortion metadata, geometric lens distortion correction is applied automatically to rectify the distortions introduced by the optical properties of camera lenses.