Final Cut Pro User Guide for Mac
- Welcome
- What’s new
-
- Intro to effects
-
- Intro to transitions
- How transitions are created
- Add transitions and fades
- Quickly add a transition with a keyboard shortcut
- Set the default duration for transitions
- Delete transitions
- Adjust transitions in the timeline
- Adjust transitions in the inspector and viewer
- Merge jump cuts with the Flow transition
- Adjust transitions with multiple images
- Modify transitions in Motion
-
- Add storylines
- Use the precision editor
- Conform frame sizes and rates
- Use XML to transfer projects
- Glossary
- Copyright

Import into Final Cut Pro for Mac from Final Cut Camera
You can import video clips that you recorded with Final Cut Camera, an app that lets you record professional video on iPhone or iPad. Final Cut Camera serves as a remote camera for the Live Multicam feature in Final Cut Pro for iPad as well as a standalone video camera app.
Transfer using AirDrop, then import into Final Cut Pro
Open Final Cut Camera on the iPhone you want to transfer from.
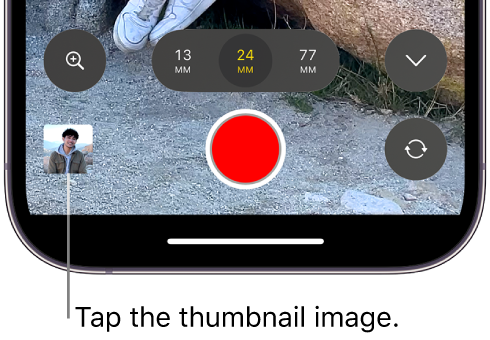
Tap the thumbnail image at the bottom of the screen.

Do one of the following:
Transfer a single clip: Tap a thumbnail to select it.
Transfer multiple clips: Tap All Media, tap Select, then tap clips to select them.
Tap the Share button
 .
.Tap AirDrop, then, in the Devices list, tap the Mac you want to transfer clips to. (Make sure the Mac you’re sharing with has AirDrop turned on.)
Open Final Cut Pro on your Mac, then import the transferred video files.
Record to an external storage device, then import into Final Cut Pro
With Final Cut Camera and iPhone 15 Pro or later, record video directly to an external solid-state drive (SSD).
Disconnect the external drive from the iPhone and connect it to your Mac.
Open Final Cut Pro on your Mac, then import the transferred video files.
Download this guide: PDF