Final Cut Pro User Guide
- Welcome
- What’s new
-
- Intro to effects
-
- Intro to transitions
- How transitions are created
- Add transitions and fades
- Quickly add a transition with a keyboard shortcut
- Set the default duration for transitions
- Delete transitions
- Adjust transitions in the timeline
- Adjust transitions in the inspector and viewer
- Merge jump cuts with the Flow transition
- Adjust transitions with multiple images
- Modify transitions in Motion
-
- Add storylines
- Use the precision editor
- Conform frame sizes and rates
- Use XML to transfer projects
- Glossary
- Copyright

Pan and zoom clips in Final Cut Pro for Mac
The Ken Burns effect creates a pan and zoom effect using the start and end positions you define. The Ken Burns effect is actually a Crop effect with two crop settings, one at the clip start and another at its end.
You can further customize the Ken Burns effect by controlling the smoothness of the animation. The motion applied to a clip when you create a Ken Burns effect is automatically smoothed so that the movement accelerates slowly as the animation starts, and decelerates slowly as the clip comes to rest at the end of the animation. This simulates the effects of friction and inertia that occur in the real world. In visual effects software, this trick is commonly called ease out and ease in.
By default, a Ken Burns animation performs both of these smoothing operations (Ease Out and Ease In), but you can customize the effect to limit the result to just easing out, just easing in, or making a linear movement with no simulated inertia or friction.
Adjust the Ken Burns effect
Select a clip in the Final Cut Pro timeline.
Position the playhead over the clip in the timeline so that the clip’s video is displayed in the viewer.
To access the Ken Burns controls, do one of the following:
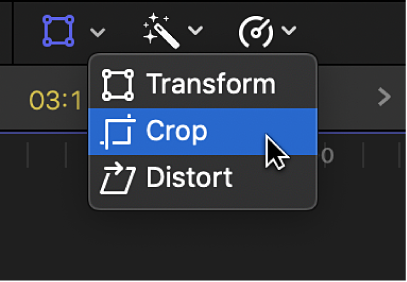
Click the pop-up menu in the lower-left corner of the viewer and choose Crop (or press Shift-C).

Control-click in the viewer and choose Crop.
Click the Ken Burns button at the bottom of the viewer.
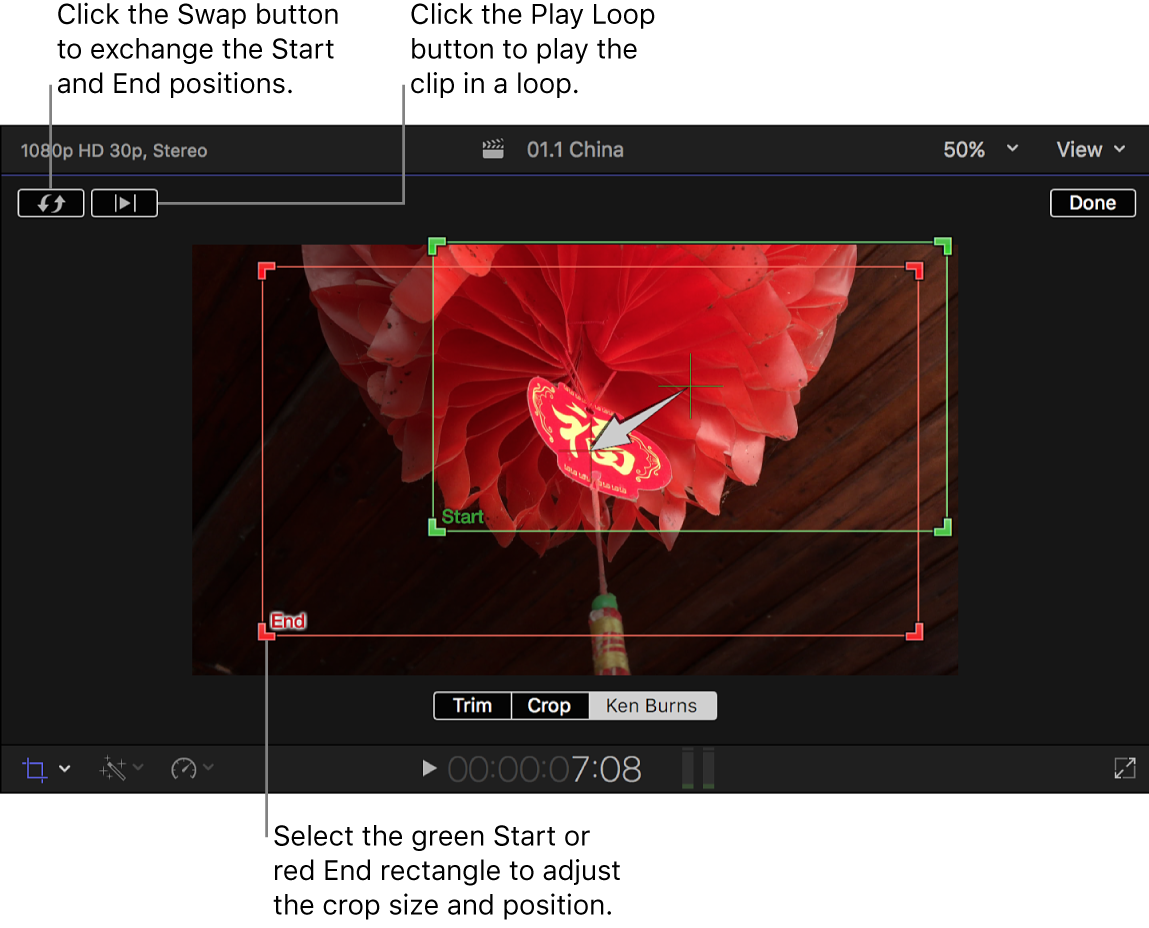
Two rectangles appear in the viewer: a green one that defines the position and size for the start of the clip and a red one that defines the position and size for the end of the clip.

The default start and end settings result in a small zoom to the center of the image.
To choose the part of the image that appears at the start of the effect, drag the green handles to change the crop size of the image, and drag the window to set its position.
To choose the part of the image that appears at the end of the effect, drag the red handles to change the crop size of the image, and drag the window to set its position.
A superimposed arrow shows the direction the image travels when the clip is played.
To have the clip with the effect play in a loop, click the Play Loop button.
To exchange the start and end positions, click the Swap button.
Click Done.
Customize the smoothness of a Ken Burns animation
By default, a Ken Burns animation performs both smoothing operations (Ease Out and Ease In), but you can customize the effect.
In the Final Cut Pro timeline, select a clip with the Ken Burns effect enabled.
Position the playhead over the clip in the timeline so that the clip’s video is displayed in the viewer.
To access the Ken Burns controls, do one of the following:
Click the pop-up menu in the lower-left corner of the viewer and choose Crop (or press Shift-C).

Control-click in the viewer and choose Crop.
Click the Ken Burns button at the bottom of the viewer.
Two rectangles appear in the viewer: a green one that defines the position and size for the start of the clip and a red one that defines the position and size for the end of the clip.
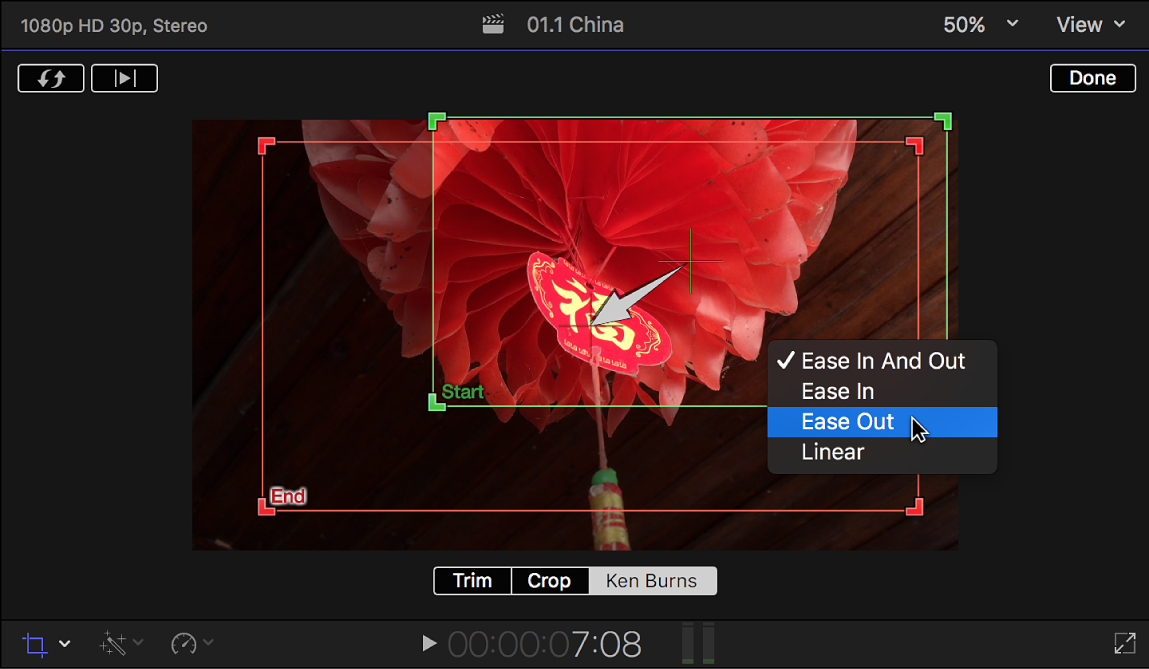
In the viewer, Control-click anywhere in the image and choose an option:
Ease In and Out: Applies the easing effect to the beginning and the end of the animation.
Ease In: Limits the easing effect to the end of the animation.
Ease Out: Limits the easing effect to the beginning of the animation.
Linear: Removes all easing effects.

Tip: Use the Crop effect and intermediate keyframes to create a Ken Burns–style effect that follows a more complicated path.
For details on working with built-in effects, see Work with built-in effects in Final Cut Pro for Mac.
Download this guide: Apple Books | PDF