Final Cut Pro User Guide
- Welcome
-
- What’s new in Final Cut Pro 10.5
- What’s new in Final Cut Pro 10.4.9
- What’s new in Final Cut Pro 10.4.7
- What’s new in Final Cut Pro 10.4.6
- What’s new in Final Cut Pro 10.4.4
- What’s new in Final Cut Pro 10.4.1
- What’s new in Final Cut Pro 10.4
- What’s new in Final Cut Pro 10.3
- What’s new in Final Cut Pro 10.2
- What’s new in Final Cut Pro 10.1.2
- What’s new in Final Cut Pro 10.1
- What’s new in Final Cut Pro 10.0.6
- What’s new in Final Cut Pro 10.0.3
- What’s new in Final Cut Pro 10.0.1
-
- Intro to effects
-
- Intro to transitions
- How transitions are created
- Add transitions
- Set the default transition
- Delete transitions
- Adjust transitions in the timeline
- Adjust transitions in the inspector and viewer
- Merge jump cuts with the Flow transition
- Adjust transitions with multiple images
- Modify transitions in Motion
-
- Add storylines
- Use the precision editor
- Conform frame sizes and rates
- Use XML to transfer projects
-
- Glossary
- Copyright

Add keywords to clips in Final Cut Pro
You can apply keywords to your clips to help you quickly locate the clips you need to compose your movie. After you apply a keyword to a clip or clip range, the clip or range is marked with a blue line in the browser. (Clips that have analysis keywords, which are automatically applied after certain types of analysis, are marked with a purple line. See Intro to analyzing media in Final Cut Pro.)
Additionally, when a keyword is applied to a clip or clip range, a Keyword Collection appears in the Libraries sidebar. A Keyword Collection contains pointers (aliases) to clips tagged with a specific keyword. For example, if you apply the keyword “water” to all clips containing water, you can then select the “water” Keyword Collection in the Libraries sidebar to view all clips containing the “water” keyword in the browser.
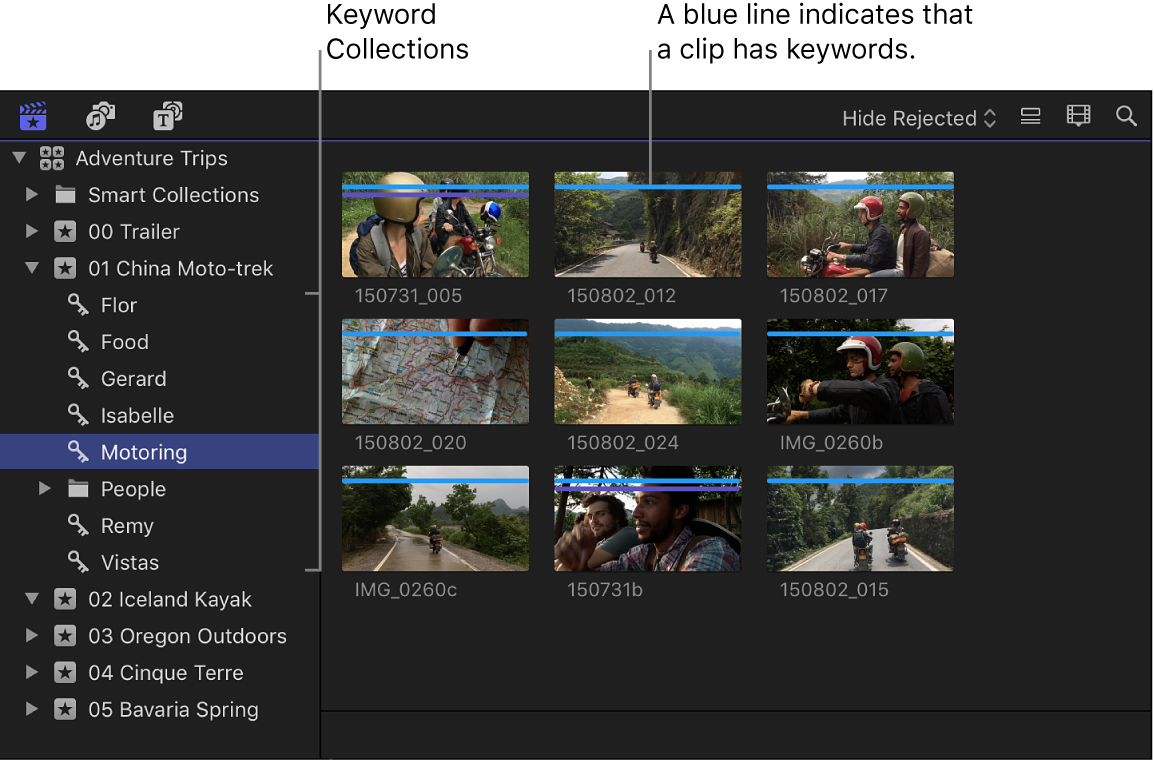
You can apply one or more keywords to a range within a clip, a whole clip, or a group of clips in an event.
Note: If you used project folders in the Project Library in previous versions of Final Cut Pro and you updated those projects to Final Cut Pro 10.1 or later, the projects have keywords reflecting the names of the project folders.
Add keywords using the keyword editor
In the browser in Final Cut Pro, select a range or one or more clips to which you want to add keywords.
To open the keyword editor, click the Keywords button in the toolbar.

At the top of the keyword editor, type the keyword or keyword phrase you want to apply to the selection, then press Return.
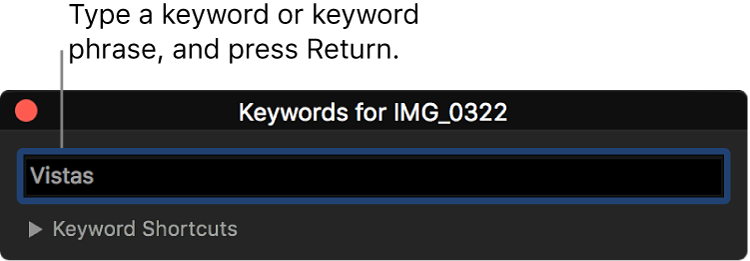
Repeat step 3 for each keyword or keyword phrase you want to add to the selection.
A blue line appears at the top of the selection in the browser, indicating that keywords have been applied to it.

When you’re finished adding keywords, close the keyword editor.
Add keywords using keyboard shortcuts
To add keyword phrases to your clips using keyboard shortcuts, you must first assign keywords and keyword phrases to the keyboard shortcuts.
If the keyword editor isn’t open in Final Cut Pro, click the Keywords button in the toolbar.

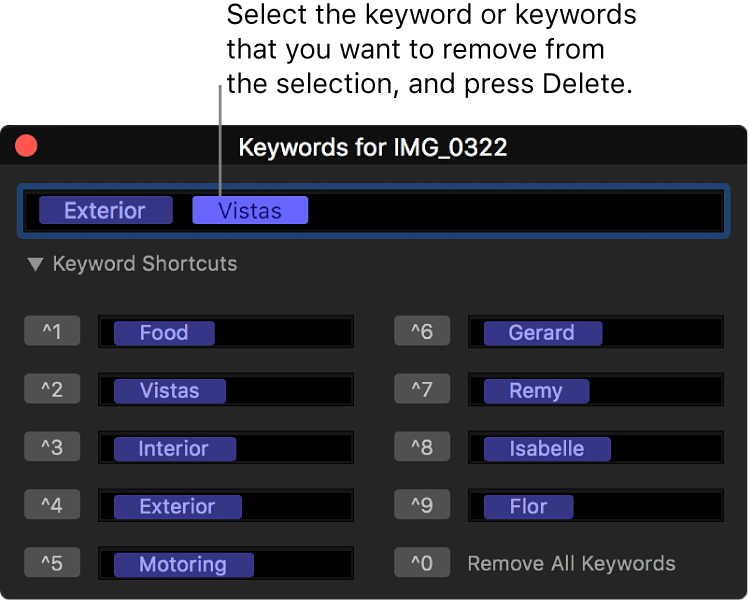
In the keyword editor, click the disclosure triangle to the left of Keyword Shortcuts to reveal the keyword shortcut fields.
Type a keyword or phrase in each shortcut field, then press Return.
To reassign a keyboard shortcut, select the shortcut text in the field and type the new keyword.
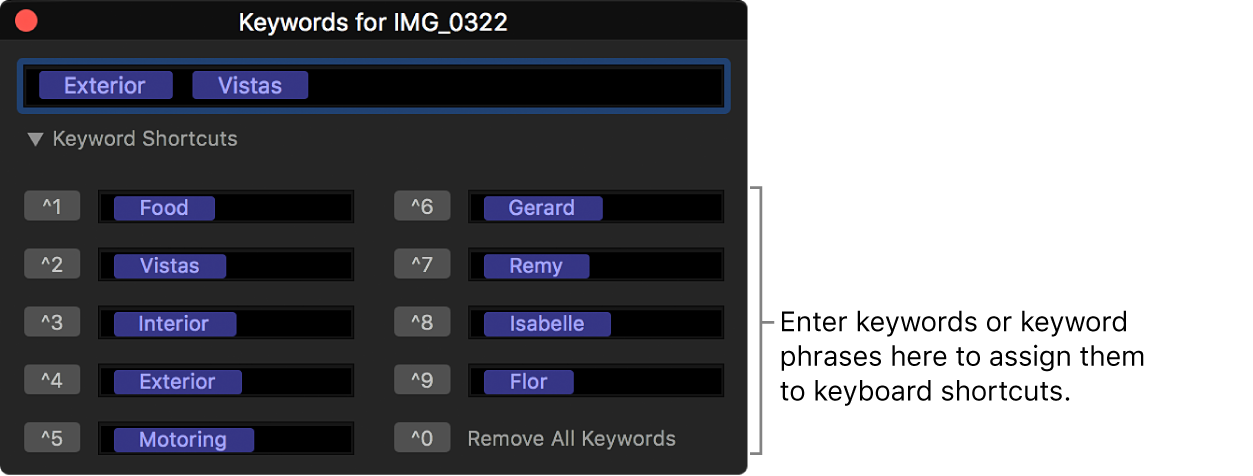
To use a keyboard shortcut, select a range or one or more clips to which you want to add keywords, then press Control and the corresponding number key (1 through 9).
Add keywords by dragging clips to Keyword Collections
A quick and easy way to add keywords to one or more clips is to drag the clips from the browser to existing Keyword Collections.
To create a Keyword Collection, see Add keywords using the keyword editor, above.
In the Libraries sidebar in Final Cut Pro, select the event that contains the clips you want to add keywords to.
In the browser, select the clip or clips that you want to apply the keyword to.
Drag the selection to the Keyword Collection in the Libraries sidebar that corresponds to the keyword you created.
The keyword is applied to the clips. Instances of the clips appear in the Keyword Collection.
View keywords applied to clips
In Final Cut Pro, do any of the following:
Quickly identify clips that have keywords: Select an event in the Libraries sidebar.
Clips that have one or more keywords appear in the browser marked with a blue line at the top.
You can also create a Smart Collection for all clips that have keywords applied.
View all keywords applied to a clip: Choose View > Browser > Skimmer Info (or press Control-Y), then skim the clip in the browser.
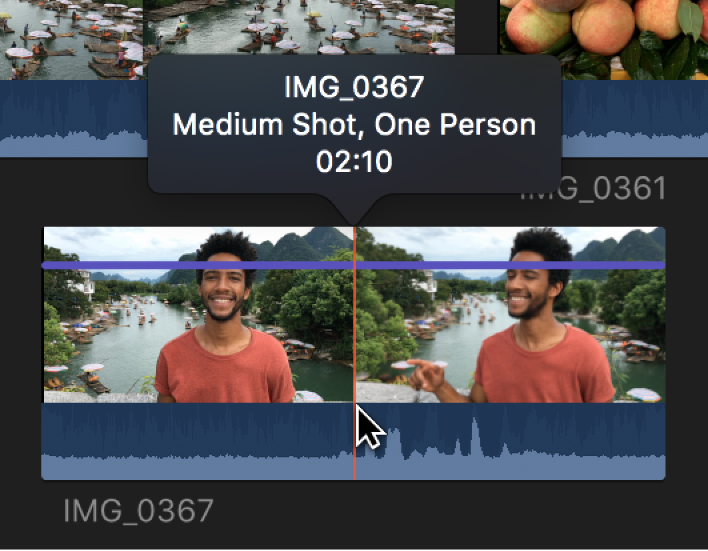
You can also view a clip’s keywords by selecting the clip in the browser and clicking the Keywords button in the toolbar (or pressing Command-K).

The keywords applied to the clip are shown in the keyword editor.

View all the clips that have a specific keyword: Select a Keyword Collection in the Libraries sidebar.
The clips with that keyword appear in the browser.
Remove all keywords from a selection
In the browser in Final Cut Pro, select a range or one or more clips from which you want to remove keywords.
A blue line at the top of the clips indicates the portions of the clips that have keywords applied.
Choose Mark > Remove All Keywords (or press Control-0).
Remove a subset of keywords from a selection
In the browser in Final Cut Pro, select a range or one or more clips from which you want to remove specific keywords.
A blue line at the top of the clips indicates the portions of the clips that have keywords applied. Each keyword assigned to a clip also appears in the browser in list view.
Click the Keywords button in the toolbar (or press Command-K) to open the keyword editor, then select the keyword or keywords you want to remove and press Delete.
Tip: To create a Keyword Collection for an entire library, create a library Smart Collection using one or more keywords as the search criteria.