macOS User Guide
- Welcome
-
- Connect to the internet
- Browse the web
- Adjust the volume
- Take a screenshot or screen recording
- View and edit files with Quick Look
- Jot a Quick Note
- Set up Screen Time for yourself
- Set up a Focus to stay on task
- Edit photos and videos in Photos
- Use Visual Look Up for your photos
- Get directions in Maps
- Create a recording in Voice Memos
- Use trackpad and mouse gestures
- Use the Touch Bar
- Use Touch ID
- Use keyboard shortcuts
- Get macOS updates
-
- What is Family Sharing?
- Set up Family Sharing
- Set up other users on your Mac
- Set up Screen Time for a child
- Share purchases with your family
- Make a FaceTime call
- Use SharePlay to watch and listen together
- Send text messages
- Share a calendar with your family
- Find what people shared with you
- Find your family and friends
- Play games with your friends
-
- Use Continuity to work across Apple devices
- Stream audio and video with AirPlay
- Use a keyboard and mouse or trackpad across devices
- Use your iPad as a second display
- Hand off tasks between devices
- Insert photos and documents from iPhone or iPad
- Insert sketches from iPhone or iPad
- Copy and paste between devices
- Use Apple Watch to unlock your Mac
- Make and receive phone calls on your Mac
- Send files between devices with AirDrop
- Sync music, books, and more between devices
-
- Manage cookies and other website data in Safari
- Use Private Browsing in Safari
- View privacy reports in Safari
- Understand passwords
- Reset your Mac login password
- Create and autofill strong passwords
- Keep your Apple ID secure
- Set up your Mac to be secure
- Use Mail Privacy Protection
- Guard your privacy
- Pay with Apple Pay in Safari
- Use Sign in with Apple for apps and websites
- Protect your Mac from malware
- Control access to the camera
- Find a missing device
-
- Change your display’s brightness
- Connect a wireless keyboard, mouse, or trackpad
- Connect other wireless devices
- Connect a display, TV, or projector
- Add a printer
- Use the built-in camera
- Use AirPods with your Mac
- Save energy on your Mac
- Optimize storage space
- Burn CDs and DVDs
- Control accessories in your home
- Run Windows on your Mac
- Resources for your Mac
- Resources for your Apple devices
- Copyright

Print pages upside down or in reverse order on Mac
You can use the Print dialog on your Mac to print a document upside down or in reverse order.
Print a document upside down
If you’re trying to print on material that you can’t insert into your printer in the direction you want, you can insert it in the opposite direction and then print your document upside down. For example, you can use this method to print on an envelope that won’t fit into the printer top first, or to print on unusually shaped paper.
With a document open on your Mac, choose File > Print.
If you see a Show Details button, click it to show more print options.
Click the print options pop-up menu (at the top of the light gray box), then choose Layout.
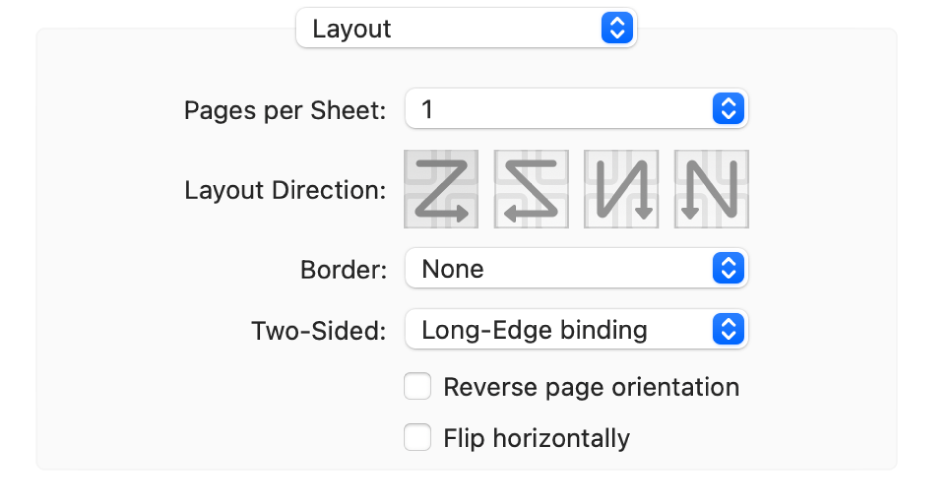
Select “Reverse page orientation.”
Print pages in reverse order
When you print a document, you can choose to have it print from the last page to the first.
With a document open on your Mac, choose File > Print.
If you see a Show Details button, click it to show more print options.
Click the print options pop-up menu (at the top of the light gray box), then choose Paper Handling.

Click the Page Order pop-up menu, then choose Reverse.
Click Print.