Final Cut Pro User Guide for Mac
- Welcome
- What’s new
-
- Intro to effects
-
- Intro to transitions
- How transitions are created
- Add transitions and fades
- Quickly add a transition with a keyboard shortcut
- Set the default duration for transitions
- Delete transitions
- Adjust transitions in the timeline
- Adjust transitions in the inspector and viewer
- Merge jump cuts with the Flow transition
- Adjust transitions with multiple images
- Modify transitions in Motion
-
- Add storylines
- Use the precision editor
- Conform frame sizes and rates
- Use XML to transfer projects
- Glossary
- Copyright

Export MXF files in Final Cut Pro for Mac
MXF is an industry-standard file format for video and audio. Like QuickTime files, MXF files contain information about the media inside. This information, also called metadata, can include frame rate, frame size, creation date, and custom data added by a camera operator, an assistant, or an archivist.
When you export MXF files, you can use audio roles to configure industry-standard channel layouts.
In Final Cut Pro, do one of the following:
Select one or more projects or clips in the browser.
Note: You can’t mix projects and clips in a batch share. Your selection must contain only projects or only clips. See Batch sharing in Final Cut Pro for Mac.
Select ranges in one or more clips in the browser.
See Set multiple ranges in the browser in Final Cut Pro for Mac.
Select a range in a project in the timeline.
Note: To share just a portion of a project, you must make a range selection. A clip selection is not sufficient. You can use the I and O keys to set the range start and end points.
If you’re sharing a project that is set to use proxy media for playback, open it in the timeline, then click the View pop-up menu in the top-right corner of the viewer and choose Optimized/Original.
This ensures the highest quality in the exported file. When you choose this setting, Final Cut Pro uses optimized media to create the shared file. If optimized media doesn’t exist, the original media is used. For more information about optimized and proxy media, see Control playback quality in Final Cut Pro for Mac.
Do one of the following:
Choose File > Share > Export File (or press Command-E).
Click the Share button in the toolbar, then click Export File.

In the Share window that appears, do any of the following:

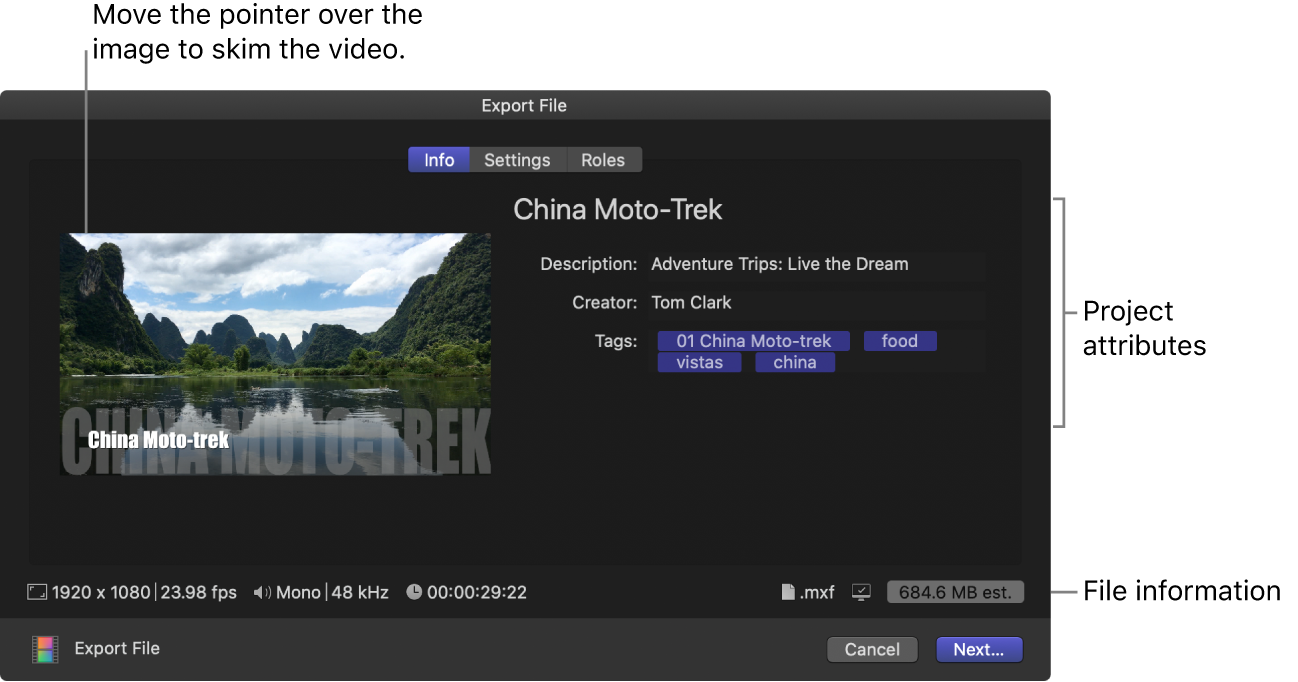
Move the pointer over the image to skim the video.
If you’re batch sharing (exporting multiple items), the image is replaced by a list of the items you’re exporting.
In the Info pane, view and modify project or clip attributes, such as the title and description.
See Change metadata for shared items in Final Cut Pro for Mac. All of the attributes associated with the project or clip are included in the output file.
Important: By default, the title field lists the project or clip name. Changing the title does not change the project or clip name, which is the name used for the exported file.
At the bottom of the window, view information about the file that will be exported, including frame size and frame rate, audio channels and sample rate, duration, output file type, and file size.
For some destinations, you can also view a list of devices that will play the exported file. To view the compatible devices, move the pointer over the Compatibility icon in the lower-right corner.
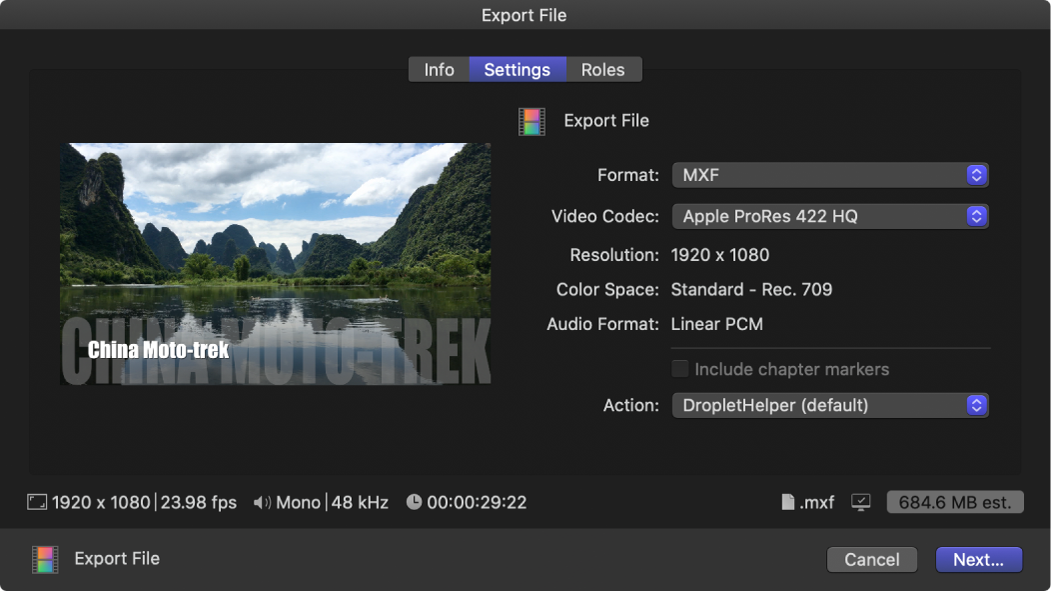
Click Settings at the top of the Share window.
In the Settings pane, click the Format pop-up menu and choose MXF.
Click the “Video codec” pop-up menu and choose a video codec for the MXF file.
The available video codecs are determined by the resolution and frame rate of your project.

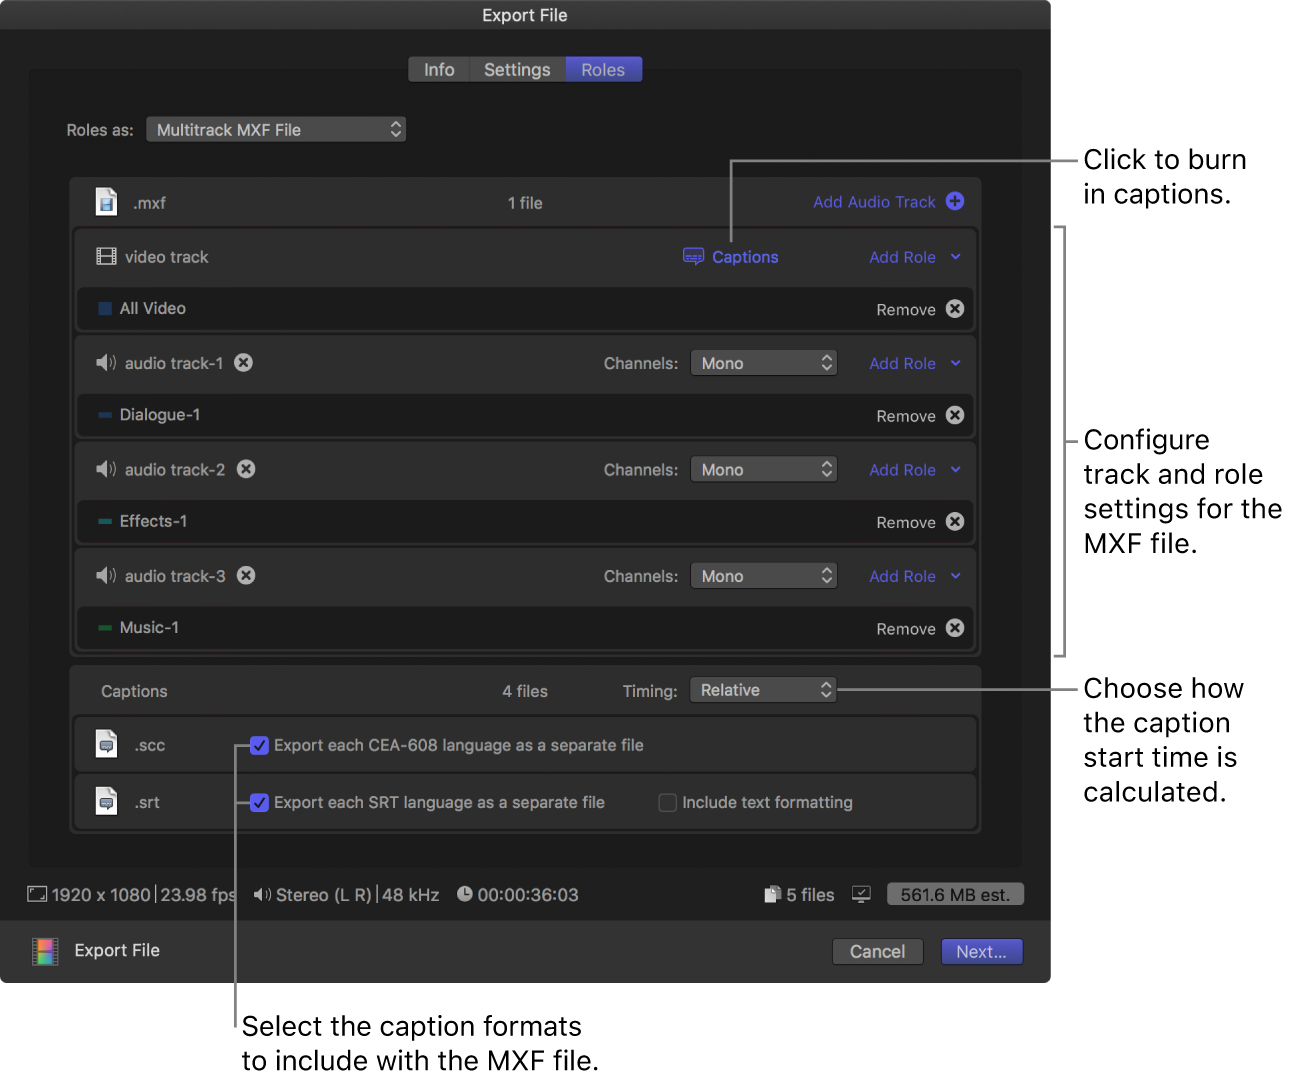
Click Roles at the top of the Share window.
In the Roles pane, click the “Roles as” pop-up menu and choose one of the following:
Multitrack MXF File (the default setting)
A custom preset
For information about creating a custom preset, see Create and modify custom presets.
The default Multitrack MXF File setting presents a list of tracks (including a video track, a track for each audio subrole assignment, and a caption track).
Do any of the following:
Combine roles in a track: For any track in the list, click the Add Role pop-up menu (on the right) to add roles or subroles for the track.
Remove roles from a track: For any role, click the Remove button (on the right).
Choose an audio channel format for a track: For any audio track in the list, click the Channels pop-up menu and choose the channel format (Mono, Stereo, or Surround). See Configure audio channels in Final Cut Pro for Mac.
Add an audio track to the export file: Click the Add Audio Track button, then choose a role or subrole and an audio channel format from the pop-up menus that appear.
Remove a track from the export file: Click the Remove button (with an X) to the right of the track name.
Burn captions in to the output video file: For each video track or file, click the blue Captions button, then click the “Burn in captions” pop-up menu and choose a language version.
Add captions to the export: In the Captions section, select the caption formats you want to export, then click the Timing pop-up menu and choose an option:
Relative: Calculate the caption start time by subtracting the project’s start time.
Absolute: Use each caption’s actual start time, regardless of the project’s start time.
Final Cut Pro will create a separate “sidecar” caption file for each language subrole in the selected caption formats and place the files in the same folder as the exported MXF file.
For information about adding captions to your project, see Intro to captions in Final Cut Pro for Mac and Create captions in Final Cut Pro for Mac.
Save a preset: Click the “Roles as” pop-up menu and choose Save As in the Presets section.

Click Next, choose a location for the exported files, then click Save.
You can monitor the progress of the transcode in the Background Tasks window, and you can continue to work in Final Cut Pro while the file is transcoded.
When transcoding is complete, a notification appears. You can view and locate shared projects in the Share inspector. See View the status of shared items in Final Cut Pro for Mac.
For more information about creating MXF files, see Create a multi-channel MXF file with Final Cut Pro.
Download this guide: PDF