
Fade audio in and out in Final Cut Pro
There are several ways to create fade-ins or fade-outs on the audio portion of a clip or an audio component in Final Cut Pro:
Apply fades using the Modify menu: You can quickly apply fade-ins and fade-outs to selected clips or audio components from the Modify menu. You can change the default fade duration in Final Cut Pro preferences.
Create fades using fade handles: You can use fade handles to create manual fade-ins and fade-outs on the audio portion of a clip or an audio component in the timeline. Fade handles appear in the top-left and top-right corners of the audio waveform when you place the pointer over the clip.
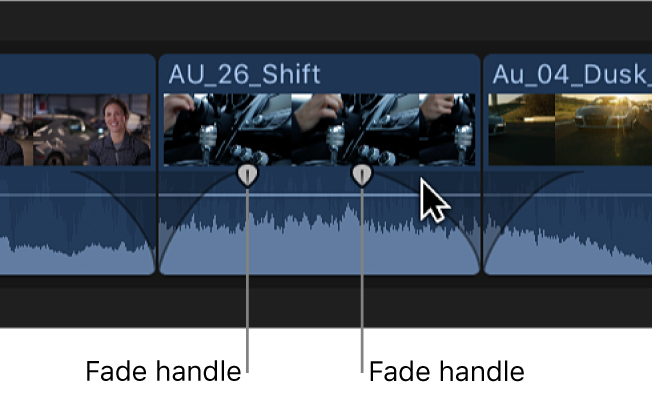
You can also change the fade’s shape by choosing one of several predefined options. Changing the fade shape changes the sound of the fade.
Note: Fades created using fade handles override crossfades created by a transition.
Apply crossfades automatically when transitions are applied: When you add a transition to a video clip with attached audio, Final Cut Pro automatically applies a crossfade transition to the audio. If the audio is detached or expanded from the video, the crossfade is not applied. See Add transitions in Final Cut Pro.
Crossfades: When trimming the audio waveform in clips, you can apply a crossfade to the edit point.
Apply fades using the Modify menu
In the Final Cut Pro timeline, select one or more audio clips or video clips with audio.
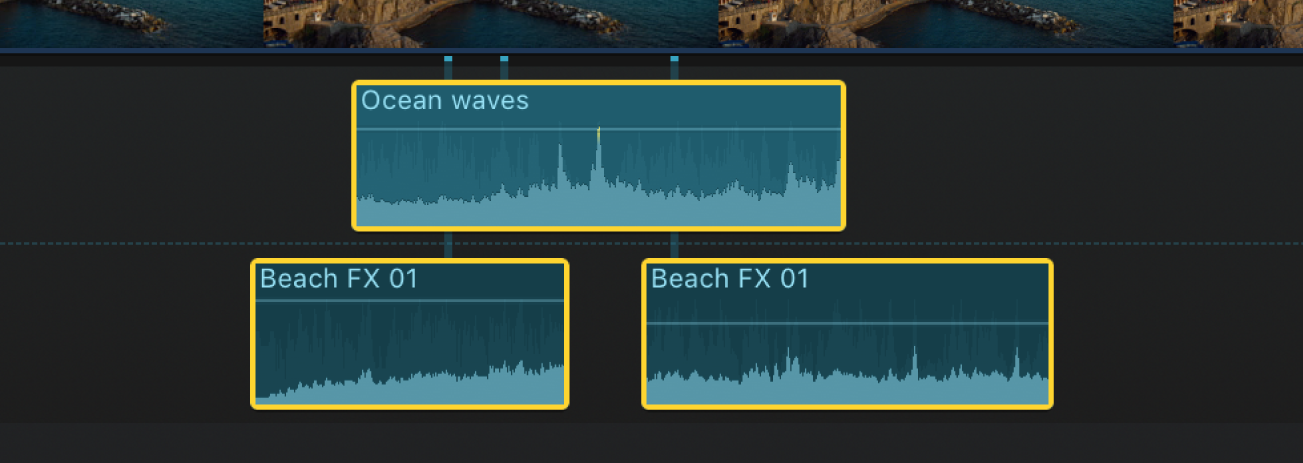
Do one of the following:
Choose Modify > Adjust Volume > Apply Fades.
Fades appear at the beginning and end of the selected clip or clips.
Note: If you select a clip that already has a fade, the Apply Fades command does not override it.
Choose Modify > Adjust Volume > Apply Toggle Fade In.
If there are no preexisting fades at the beginning of the selected clip or clips, fades appear at the beginning of the clips. If there are already fades at the beginning of the selected clip or clips, they are removed.
Choose Modify > Adjust Volume > Apply Toggle Fade Out.
If there are no preexisting fades at the end of the selected clip or clips, fades appear at the end of the clips. If there are already fades at the end of the selected clip or clips, they are removed.
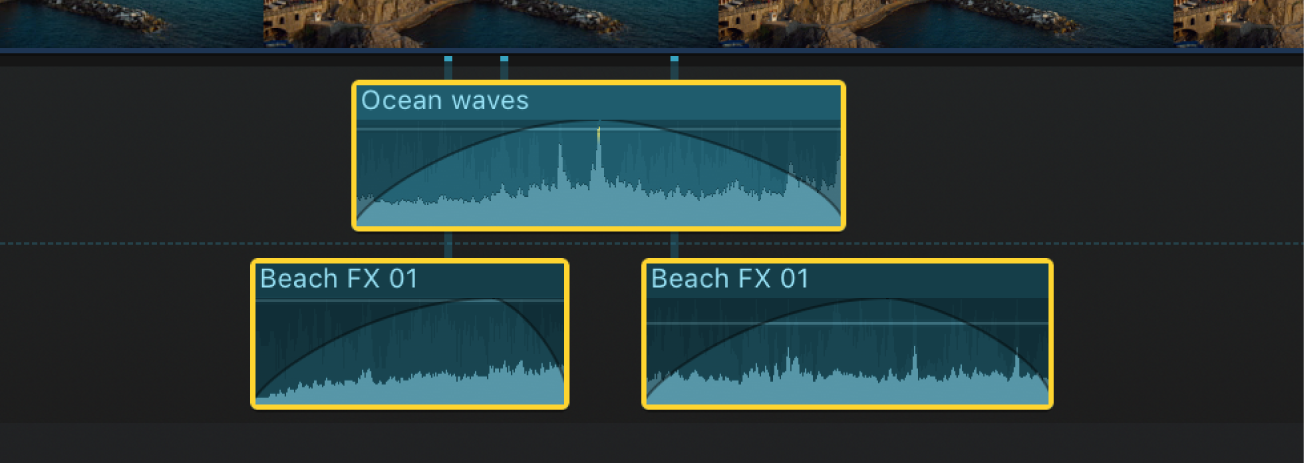
To adjust the duration of a fade, drag the fade handle to the point where you want the fade to begin or end.
The default duration for fades is one half-second. To change the default duration, see Editing preferences in Final Cut Pro.
Tip: You can use the Command Editor to assign a keyboard shortcut to apply (or remove) only a fade-in or a fade-out. See Intro to the Command Editor in Final Cut Pro.
Remove fades
In the Final Cut Pro timeline, select one or more audio clips or video clips with audio.
Do one of the following:
Choose Modify > Adjust Volume > Remove Fades.
Fades are removed from the beginning and end of the selected clip or clips.
Choose Modify > Adjust Volume > Apply Toggle Fade In.
If there are preexisting fades at the beginning of the selected clip or clips, they are removed. If there are no fades at the beginning of the selected clip or clips, fades appear at the beginning of the clips.
Choose Modify > Adjust Volume > Apply Toggle Fade Out.
If there are preexisting fades at the end of the selected clip or clips, they are removed. If there are no fades at the end of the selected clip or clips, fades appear at the end of the clips.
Create a fade manually using fade handles
In the Final Cut Pro timeline, drag the fade handle to the point in the clip where you want the fade to begin or end.
Fade handles from the beginning of a clip create a fade-in, and fade handles at the end of a clip create a fade-out.
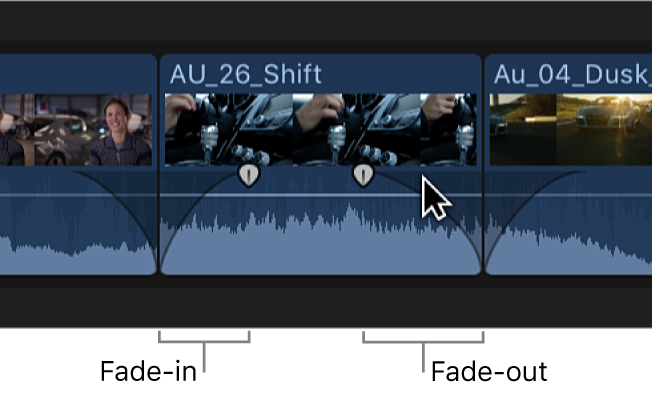
Fades complement any volume adjustments you’ve already made to a clip. For example, if you previously adjusted the volume lower at the beginning of a clip, the fade-in increases the volume from silence (–∞ dB) to the level you’ve already specified.
Create a crossfade manually using fade handles
In Final Cut Pro, select two adjacent clips in the timeline, then choose Clip > Expand Audio (or press Control-S).
The clips appear expanded.

Drag the end point of the first clip and the start point of the second clip so that the audio portions of the clips overlap.
Note: Make sure to adjust the audio overlap to the length you want.
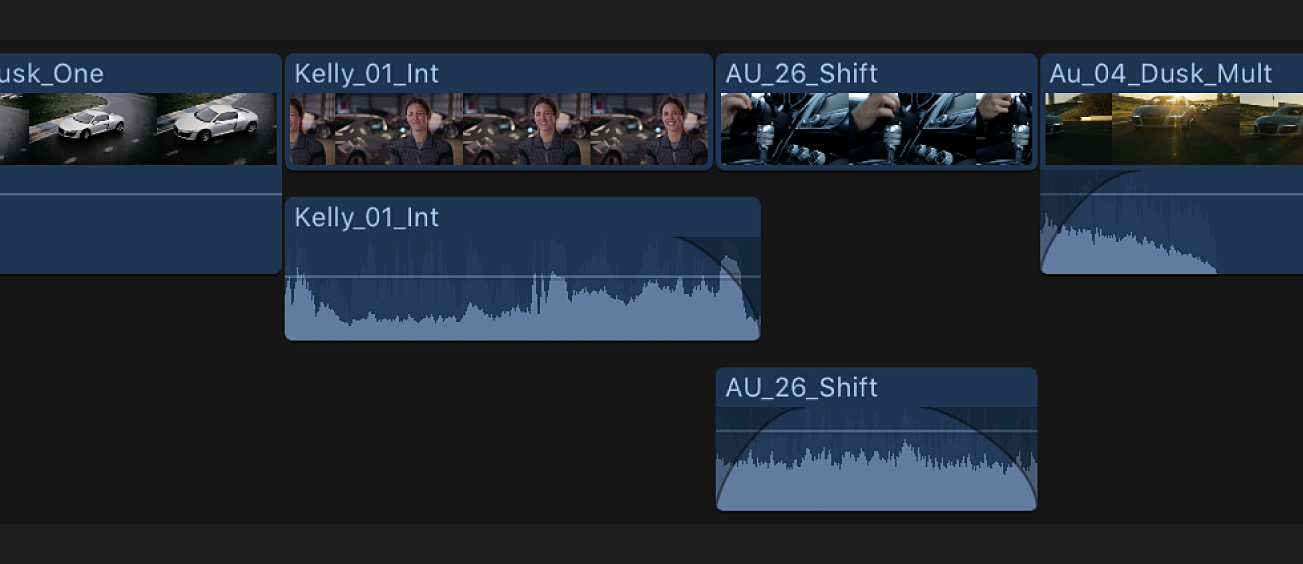
Drag the fade handles of each clip to the points where you want the fade to begin and end.
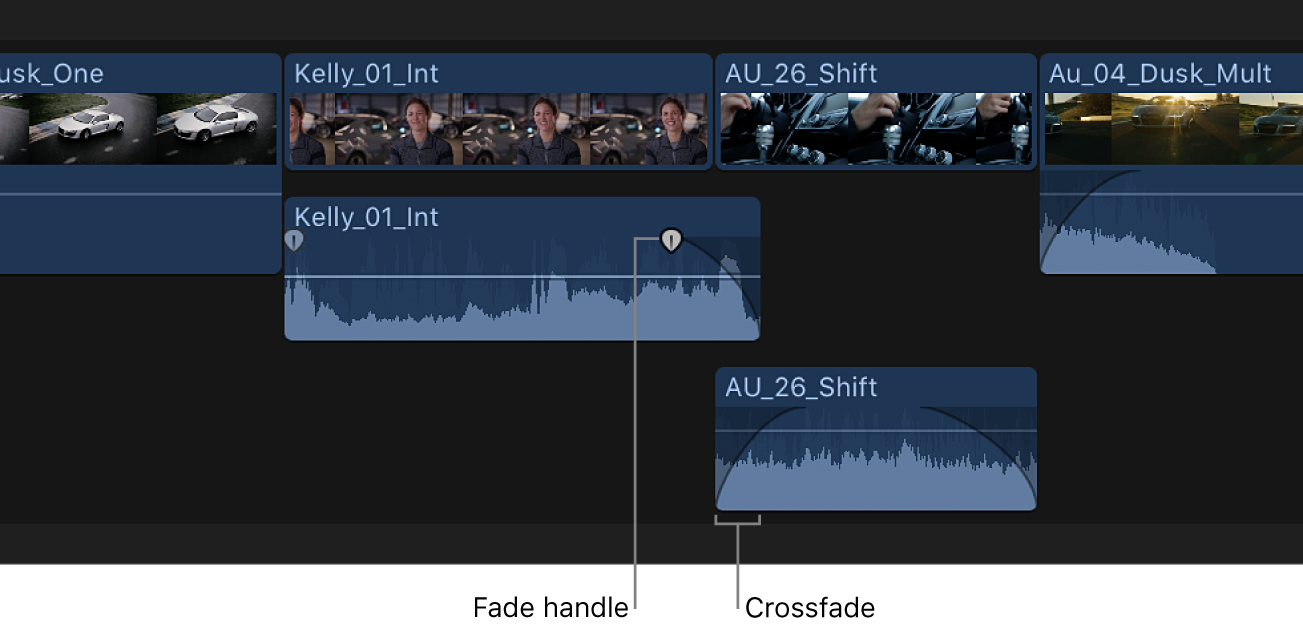
To change the fade shape for each clip, follow the instructions in Change the fade shape when using fade handles, below.
Change the fade shape when using fade handles
In the Final Cut Pro timeline, Control-click a fade handle and choose a fade option:
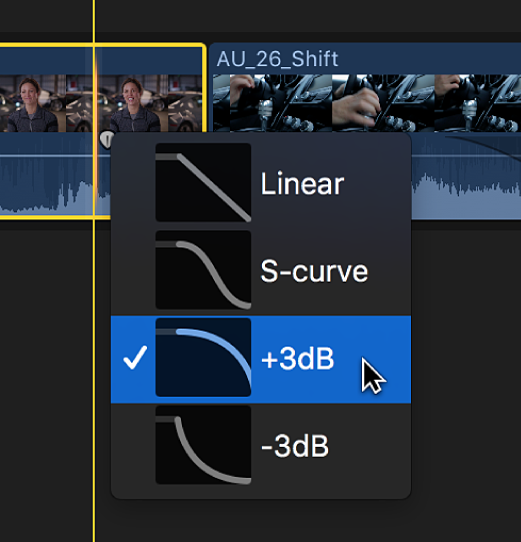
Linear: Maintains a constant rate of change over the length of the fade.
S-curve: Eases in and out of the fade with the midpoint at 0 dB.
+3dB: Starts quickly and then slowly tapers off toward the end. This is the most useful setting for quick fades.
–3dB: Starts slowly and then moves quickly toward the end. This is the default setting and is best for maintaining a natural volume when crossfading between two clips.
Change the fade shape of a transition crossfade
In Final Cut Pro, select a transition in the timeline, then do one of the following:
Choose Window > Show in Workspace > Inspector (or press Command-4).
Click the Inspector button on the right side of the toolbar.

In the Audio Crossfade section of the Transition inspector, click the Fade In Type pop-up menu or the Fade Out Type pop-up menu and choose a fade option:
Linear: Maintains a constant rate of change over the length of the fade.
S-curve: Eases in and out of the fade with the midpoint at 0 dB.
+3dB: Starts quickly and then slowly tapers off toward the end. This is the most useful setting for quick fades.
–3dB: Starts slowly and then moves quickly toward the end. This is the default setting and is best for maintaining a natural volume when crossfading between two clips.