ఈ కంట్రోల్ను మారిస్తే, ఈ పేజీ ఆటోమేటిక్గా అప్డేట్ చేయబడుతుంది
Final Cut Pro User Guide for Mac
- Welcome
- What’s new
-
- Intro to importing media
- If it’s your first import
- Organize files during import
-
- Import from Image Playground
- Import from iMovie for macOS
- Import from iMovie for iOS or iPadOS
- Import from Final Cut Pro for iPad
- Import from Final Cut Camera
- Import from Photos
- Import from Music
- Import from Apple TV
- Import from Motion
- Import from GarageBand and Logic Pro
- Import using workflow extensions
- Record into Final Cut Pro
- Memory cards and cables
- Supported media formats
- Import third-party formats with media extensions
- Adjust ProRes RAW camera settings
- Import REDCODE RAW files
- Import Canon Cinema RAW Light files
-
- Intro to effects
-
- Intro to transitions
- How transitions are created
- Add transitions and fades
- Quickly add a transition with a keyboard shortcut
- Set the default duration for transitions
- Delete transitions
- Adjust transitions in the timeline
- Adjust transitions in the inspector and viewer
- Merge jump cuts with the Flow transition
- Adjust transitions with multiple images
- Modify transitions in Motion
- Add adjustment clips
-
- Add storylines
- Use the precision editor
- Conform frame sizes and rates
- Use XML to transfer projects
- Glossary
- Copyright and trademarks
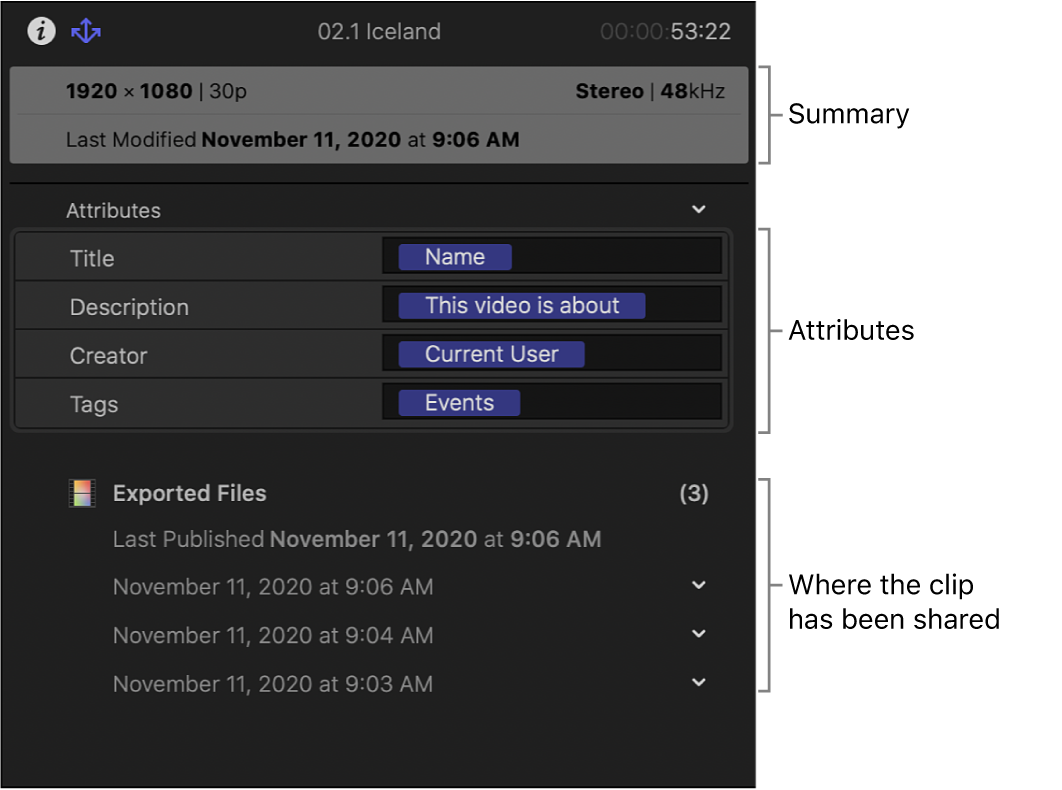
Share inspector
A Final Cut Pro inspector that lets you view and modify information about a shared project or clip. You can customize the metadata (also called attributes) included with shared items.

To open the Share inspector, follow these steps.
In Final Cut Pro, select a project or clip.
If the inspector isn’t already shown, do one of the following:
Choose Window > Show in Workspace > Inspector (or press Command-4).
Click the Inspector button in the toolbar.

Click the Share button at the top of the inspector.

మీ ఫీడ్బ్యాక్ అందించినందుకు ధన్యవాదాలు.