
Lägga till eller ersätta bilder i Numbers för iCloud
Du kan lägga till bilder (foton) i ditt kalkylblad samt byta ut exempelbilder i en mall. Du kan även lägga till en bildbeskrivning som kan läsas av hjälpmedelsteknik (till exempel VoiceOver).
Lägga till en bild
Klicka på knappen Bild
 i verktygsfältet, klicka på Bild, bläddra för att hitta bilden som du vill använda och dubbelklicka sedan på den.
Du kan även dra en bild från din dator till kalkylbladet eller kopiera och klistra in den.
Flytta bilden genom att dra den till en ny plats.
Du kan använda stödlinjer för att placera ett objekt mer exakt.
Om du vill anpassa utseendet på bilden markerar du den, klickar på Stil längst upp i
 sidofältet Format och gör dina val.
Du kan till exempel lägga till en ram eller skugga i bilden. Se Anpassa utseendet på objekt i Numbers för iCloud.
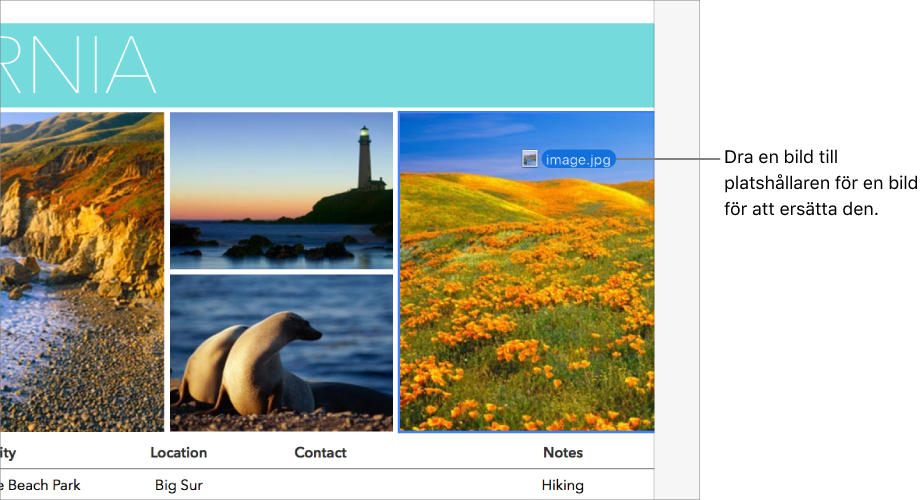
Ersätta en bild
Markera bilden som du vill ersätta.
Klicka på Bild längst upp i
sidofältet Format till höger och klicka sedan på Ersätt.Bläddra för att välja en ny bild och dubbelklicka sedan på den.
Du kan även dra en bild från datorn till en bild som du vill ersätta. När en blå kontur visas runt bilden släpper du musknappen. Om du släpper bilden utanför den blå konturen läggs den nya bilden till i bladet och den befintliga bilden ersätts inte.
Om du vill radera en bild markerar du den och trycker på backsteg.
Lägga till en bildbeskrivning
Du kan lägga till en beskrivning i vilken bild som helst i kalkylbladet. Bildbeskrivningarna läses av hjälpmedelsteknik (som VoiceOver) när någon använder denna teknik tillsammans med ditt kalkylblad. Bildbeskrivningar visas inte på kalkylbladet.
markera objektMarkera en bild i kalkylbladet och klicka sedan på Bild längst upp i
sidofältetFormat. Klicka på textrutan Beskrivning och ange sedan texten du vill ha.
Om du vill radera en bild markerar du den och trycker på backsteg.