
Lägga till videoklipp och bilder i iMovie på iPhone
Lägga till videoklipp
När projektet är öppet rullar du i tidslinjen så att uppspelningshuvudet (den vita vertikala linjen) visas över den plats där du vill lägga till ett videoklipp.
Det nya klippet läggs till antingen före eller efter det befintliga klippet beroende på vad som är närmast uppspelningshuvudet.
Tryck på knappen för att lägga till medier
 och sedan på Video.
Tryck på en videokategori i listan så att den markeras.
Om du vill förhandsvisa ett klipp innan du lägger till det i ett projekt markerar du klippet genom att trycka på det och trycker sedan på uppspelningsknappen
 .
.Du kan också svepa åt höger eller vänster över ett klipp om du vill förhandsvisa det manuellt. På så vis kan du enklare hitta precis den del av klippet som du vill använda.
Om du använder iCloud-bilder kan en del medier lagras på iCloud men inte på din enhet. Om en hämtningsknapp
 visas när du trycker på ett klipp kan du trycka på knappen för att hämta klippet till din enhet.
Gör något av följande:
Lägg till ett helt klipp i filmprojektet: Tryck på klippet och tryck sedan på knappen
 för att lägga till det i projektet.
Beskär klippet innan du lägger till det: Tryck på klippet, dra de gula putsningshandtagen så att bara den önskade delen av klippet markeras och tryck sedan på knappen
för att lägga till det i projektet.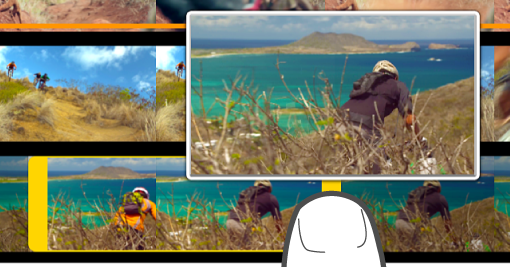
Du kan också putsa ett videoklipp efter det att du har lagt till det i projektet.
Lägg endast till ljudet från klippet: Tryck på klippet, tryck på knappen för fler alternativ
 och sedan på Endast ljud.
Lägg till klippet som ett överlägg: Tryck på klippet, tryck på knappen för mer information
och sedan på ett av följande alternativ:Cutaway: Klippet läggs till så att det görs ett avbrott i huvudklippet i tidslinjen när filmen spelas upp och cutaway-klippet visas istället.
Bild-i-bild: Klippet visas i ett mindre fönster ovanpå huvudklippet i tidslinjen när filmen spelas upp.
Splitscreen: Klippet läggs till så att det visas bredvid huvudklippet i tidslinjen när filmen spelas upp. De två klippen visas sida vid sida och är lika stora.
Grön-/blåskärm: Klippet läggs till så att det visas utan den grön- eller blåskärm som finns i klippet och de återstående delarna visas ovanpå huvudklippet när filmen spelas upp.
Om du vill ha mer information om videoöverlägg läser du Justera effekter i visningsfönstret i iMovie på iPhone.
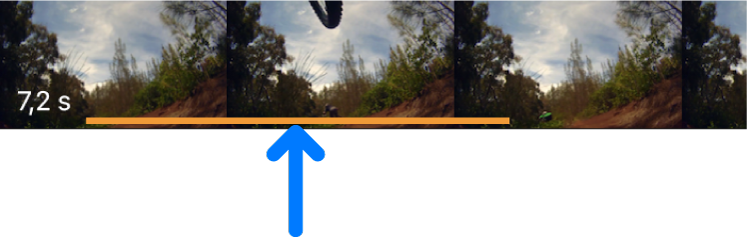
Den del av klippet som du har lagt till visas i mediebläddraren med en orange linje längst ned för att markera att den redan används i projektet. Du kan använda samma del av en video så många gånger du vill i ett projekt.
Lägga till bilder
Bilder från bildbiblioteket och bilder som har synkroniserats till din enhet från datorn kan läggas till i valfritt iMovie-projekt.
Vill du veta hur du tar bilder direkt i iMovie läser du Spela in video och ta bilder i iMovie på iPhone.
När projektet är öppet rullar du i tidslinjen så att uppspelningshuvudet (den vita vertikala linjen) visas över den plats där du vill lägga till bilden.
Du kan flytta bilden senare om du vill.
Om uppspelningshuvudet befinner sig över ett videoklipp läggs bilden till före eller efter klippet beroende på vilken ände som ligger närmast uppspelningshuvudet.
Tryck på knappen
för att lägga till medier och sedan på Bilder eller Album.Tryck på ett album och tryck sedan på den bild du vill lägga till.
Obs! Om du använder iCloud-bilder kan en del medier lagras på iCloud men inte på din enhet. Om en hämtningsknapp
visas när du trycker på en bild kan du trycka på knappen för att hämta bilden till din enhet.Om du vill förhandsvisa en bild innan du lägger till den håller du fingret på bilden tills den öppnas i popupvisningsfönstret.
Bilden visas i tre till sex sekunder beroende på längden på de övergångar som ligger före och efter bilden, men du kan förlänga eller förkorta den här tidslängden med hjälp av putsningshandtagen. En Ken Burns-effekt läggs också på bilden, vilket betyder att kameran ser ut att svepa över bilden och zooma in i den. Om du vill justera den här effekten läser du Justera effekter i visningsfönstret i iMovie på iPhone.
Gör något av följande:
Lägg till bilden i filmprojektet: Tryck på klippet och tryck sedan på knappen
för att lägga till det i projektet.Lägg till bilden som ett överlägg: Tryck på bilden, tryck på knappen för fler alternativ
och sedan på något av följande alternativ:Cutaway: Bilden läggs till så att det görs ett avbrott i huvudklippet i tidslinjen när filmen spelas upp och cutaway-bilden visas istället.
Bild-i-bild: Bilden visas i ett mindre fönster ovanpå huvudklippet i tidslinjen när filmen spelas upp. När du lägger till en bild med en alfakanal används alfan till att avgöra vilka delar av bilden som är genomskinliga, vilket kan vara praktiskt när du lägger till en bild som en logotyp eller vattenstämpel.
Splitscreen: Bilden läggs till så att den visas bredvid huvudklippet i tidslinjen när filmen spelas upp. De två klippen kan visas sida vid sida, eller den ena ovanför den andra, och är lika stora.
Grön-/blåskärm: Bilden läggs till i filmen så att den visas utan den grön- eller blåskärm som finns i den och de återstående delarna visas ovanpå huvudklippet.
Om du vill veta mer om överlägg läser du Justera effekter i visningsfönstret i iMovie på iPhone.
Skrubba video
Skrubbning är ett annat sätt att förhandsvisa ett klipp. När du skrubbar flyttar du manuellt framåt och bakåt genom klippet så att du kan titta på det mer detaljerat.
Håll på det klipp i mediebläddraren som du vill förhandsvisa tills uppspelningshuvudet visas. Svep sedan åt höger eller vänster.
Videon spelas upp i visningsfönstret eller i ett popupvisningsfönster medan du sveper.
Ångra eller göra om en åtgärd
Du kan ångra de åtgärder du har utfört sedan den senaste gången du startade iMovie.
Gör något av följande:
Tryck på ångra-knappen
 .
. Om du vill göra om åtgärden håller du på knappen Ångra projektändring och trycker sedan på Gör om projektändring.
Skaka på enheten och tryck på Ångra projektändring eller Gör om projektändring.