
Select cells, rows, columns, or tables in Numbers for iCloud
To modify cells, rows, columns, or tables, you must first select them.
Select a cell
Go to Numbers for iCloud
 , then sign in to your Apple Account (if necessary).
In your spreadsheet, click a cell in the table.
A blue outline appears around the cell to show it’s selected.
To select a range of table cells, drag across the cells you want to select.
Select rows or columns
Go to Numbers for iCloud
, then sign in to your Apple Account (if necessary).In your spreadsheet, click anywhere in the table.
Letters appear above the columns and numbers appear to the left of the rows.
Do any of the following:
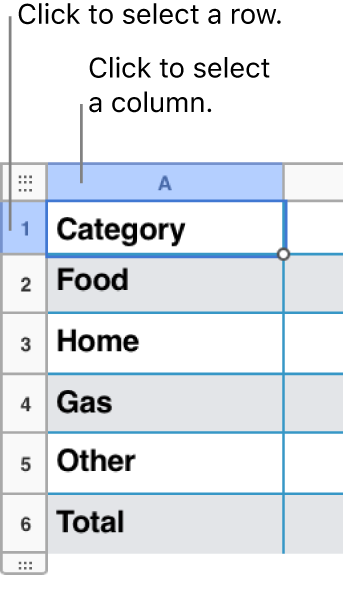
Select a single row or column: Click the row number or column letter (or, if it’s a summary row in a categorized table, click the empty square on the left end of the row). A blue outline appears around the selected row or column.
Select multiple adjacent rows or columns: Click the row number or column letter, then Shift-click another row or column.
Select a table
In many cases, you can just click anywhere in a table (so that the row numbers and column letters appear) to make changes to the table. For some tasks, such as deleting, copying, or cutting a table, you need to select the table itself.
Go to Numbers for iCloud
, then sign in to your Apple Account (if necessary).In your spreadsheet, click anywhere in the table, then click the square in the top-left corner of the table border.
A blue outline appears around the table to show it’s selected.