Final Cut Pro User Guide for Mac
- Welcome
- What’s new
-
- Intro to importing media
- If it’s your first import
- Organize files during import
-
- Import from Image Playground
- Import from iMovie for macOS
- Import from iMovie for iOS or iPadOS
- Import from Final Cut Pro for iPad
- Import from Final Cut Camera
- Import from Photos
- Import from Music
- Import from Apple TV
- Import from Motion
- Import from GarageBand and Logic Pro
- Import using workflow extensions
- Record into Final Cut Pro
- Memory cards and cables
- Supported media formats
-
- Intro to effects
-
- Intro to transitions
- How transitions are created
- Add transitions and fades
- Quickly add a transition with a keyboard shortcut
- Set the default duration for transitions
- Delete transitions
- Adjust transitions in the timeline
- Adjust transitions in the inspector and viewer
- Merge jump cuts with the Flow transition
- Adjust transitions with multiple images
- Modify transitions in Motion
- Add adjustment clips
-
- Add storylines
- Use the precision editor
- Conform frame sizes and rates
- Use XML to transfer projects
-
- Intro to sharing projects
- Share to Apple devices
- Share on the web
- Send a video frame to Pixelmator Pro
- Share in email
- Share stereo or spatial video
- Batch sharing
- Share using Compressor
- Create share destinations
- Change metadata for shared items
- View the status of shared items
- Speed up exports with simultaneous processing
- Glossary
- Copyright and trademarks
Match color between clips in the timeline in Final Cut Pro for Mac
You can use the Match Color effect to match the color of one or more clips in the timeline with the color of a clip you select. The Match Color effect intelligently adjusts your color settings to seamlessly blend different cameras, lighting conditions, and cinematic styles.
For example, if your project uses video from a wide variety of sources, you can use the Match Color effect to ensure that all scenes that take place in the same location have the same look.
Match color between clips in the timeline
In the Final Cut Pro timeline, select the clip that you want to adjust.
Tip: To apply the same Match Color adjustment across multiple clips, make the adjustment on one clip first, then copy the effect to other clips.
Position the playhead on the frame you want to adjust to match a different frame.
Do one of the following:
Choose Modify > Match Color (or press Option-Command-M).
Click the Enhancements pop-up menu below the viewer and choose Match Color.
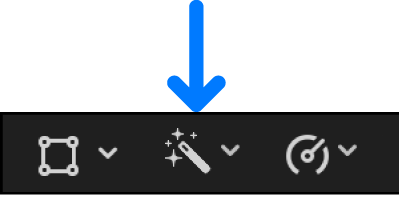
Click the pop-up menu at the top of the Color inspector, then choose Match Color from the Add Correction section at the bottom of the menu.

Drag the Match Color effect from the Effects browser to the clip in the timeline.
The viewer changes to display the frame under the timeline playhead on the right and the frame the pointer is over on the left.
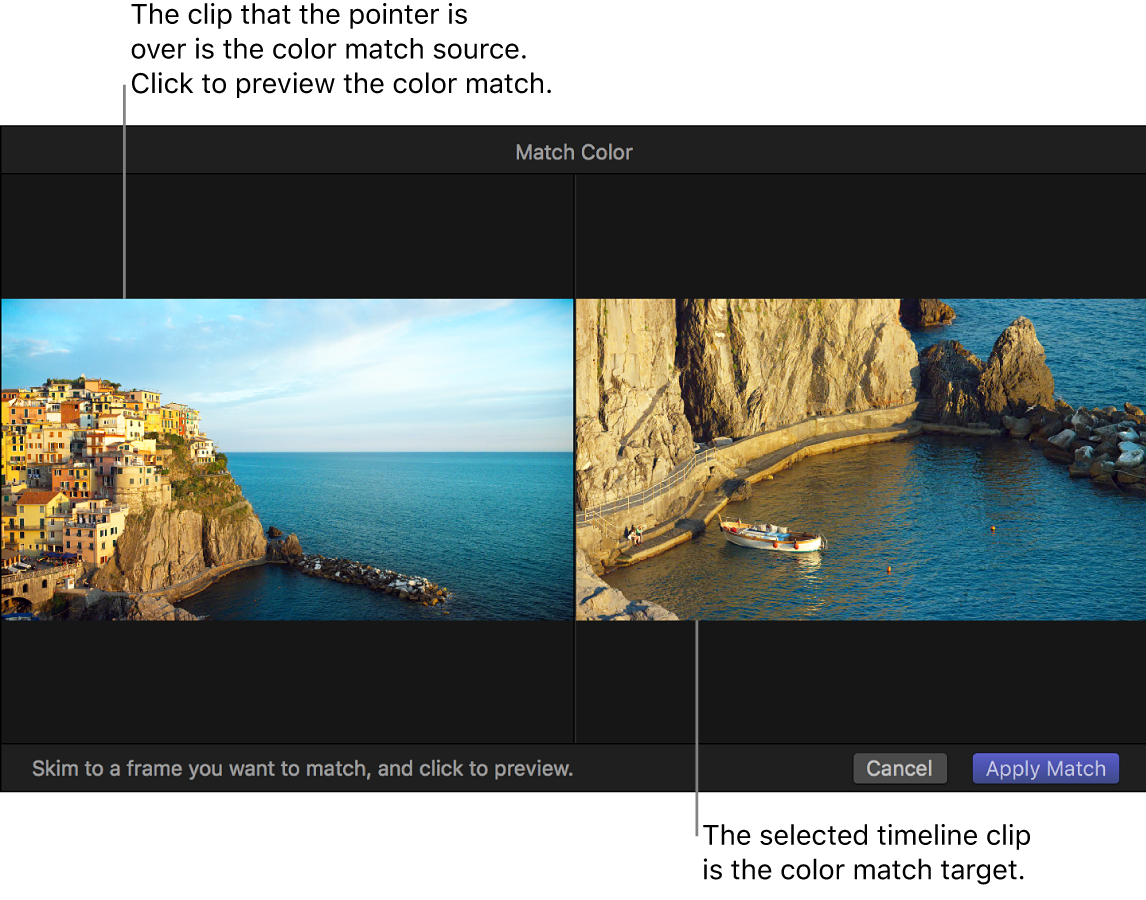
Skim any clip in the timeline or the browser to find a frame with the color look you want to match, then click to preview that look applied to the selected clip.
You can click a variety of clips until you find the look you want.
Tip: You may want to import a still image that has the look you want, even if it’s not related to your project, so that you can match its color.
To apply the current look, click Apply Match.
The viewer returns to the standard display, and the selected timeline clips change to the new look. A Match Color section appears in the Color inspector, showing the adjusted settings.
To change the Match Color source clip, click Choose Source in the Color inspector.


Note: You can create additional Match Color adjustments by dragging the Match Color effect from the Effects browser, or by adding a Match Color effect in the Color inspector. If you choose Match Color from the Modify menu or the Enhancements pop-up menu, any existing Match Color effects are replaced.
Make Match Color adjustments
You can refine Match Color adjustments using the controls in the Color inspector.
In Final Cut Pro, apply Match Color to one or more clips in the timeline.
With the adjusted clip still selected in the timeline, open the Color inspector.
Use the color adjustment sliders, value sliders, and buttons to make any additional adjustments:
Light: Use these controls to adjust light values.
Exposure: Lightens or darkens the image, with a bias toward affecting the highlights more than the other tones.
Contrast: Sets the relative amount of contrast between light and dark areas.
Brightness: Adjusts the overall brightness of the image.
Highlights: Adjusts the detail in the lightest areas of the image, but keeps pure white untouched.
Black Point: Adjusts the point at which black areas become completely black (no detail can be seen). Setting the black point can improve the contrast in a washed-out image.
Shadows: Adjusts the detail that appears in the darkest areas of the image.
Super Highlights: Adjusts colors that are beyond the maximum brightness target of a project to a value that is in the valid range of the project.
Color: Use these controls to adjust color values.
Saturation: Adjusts the color (chroma) intensity of the image.
Highlights Warmth: Adjusts the color temperature of the lightest areas of the image. Drag the slider to the right to add warm (orange) tones to the image, or to the left to add cool (blue) tones.
Highlights Tint: Fine-tunes the white balance in the lightest areas of the image by neutralizing a remaining green or magenta tint. Drag the slider to the right to add a magenta tint to the image, or to the left to add a green tint.
Midtones Warmth: Adjusts the color temperature for the midtone areas of the image. Drag the slider to the right to add warm (orange) tones to the image, or to the left to add cool (blue) tones.
Midtones Tint: Fine-tunes the white-balance adjustment for the midtones only by neutralizing a remaining green or magenta tint. Drag the slider to the right to add a magenta tint to the image, or to the left to add a green tint.
Shadows Warmth: Adjusts the color temperature in the darkest areas of the image. Drag the slider to the right to add warm (orange) tones to the image, or to the left to add cool (blue) tones.
Shadows Tint: Fine-tunes the white-balance adjustment in the darkest areas of the image by neutralizing a remaining green or magenta tint. Drag the slider to the right to add a magenta tint to the image, or to the left to add a green tint.
Mix: Sets the amount of the original image to be blended with the adjusted image.
Turn Match Color corrections on or off
You can turn off the Match Color corrections that have been applied to a clip. This is useful for viewing the difference between the original clip and the corrected clip.
In the Final Cut Pro timeline, select a clip with Match Color corrections applied.
Select or deselect the Match Color checkbox in the Color inspector or in the Effects section of the Video inspector.
Download this guide: PDF