
Adjust volume in Final Cut Pro
You can adjust the volume levels of audio clips from the browser, the timeline, the Audio inspector, or the Modify menu. Volume adjustments you make from the Audio inspector or the Modify menu are applied to the entire selection. To make more precise adjustments, you can create keyframes in the clip, and then make adjustments to points between keyframes. See Keyframe audio effects in Final Cut Pro.
You can use the audio meters to make sure the volume doesn’t exceed peak levels, which may result in audible distortion.
Adjust volume in the timeline
In Final Cut Pro, drag the volume control (the horizontal line across the audio waveform) up or down.
As you drag, the volume level in dB appears, and the waveform changes shape to reflect your adjustments.
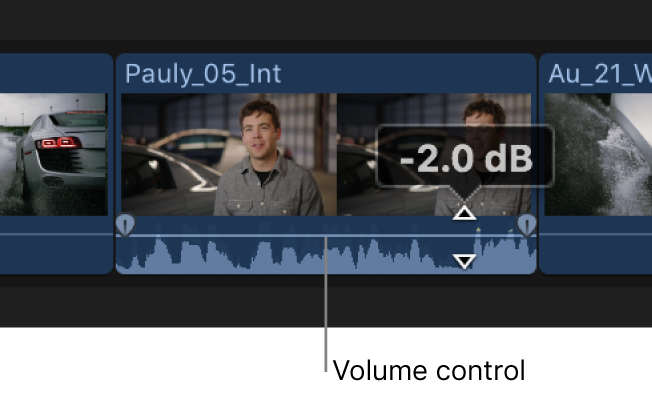
If you adjust the volume between two keyframes, the volume line slopes to show the change in volume between the keyframes.
Adjust volume from the Modify menu or the keyboard
In the Final Cut Pro timeline, select one or more audio clips or video clips with audio.
Do one of the following:
Adjust the volume in +1 or –1 dB increments: Choose Modify > Adjust Volume, then choose Up or Down, or press Control-Plus Sign (+) or Control-Minus Sign (–).
Adjust the volume using an absolute dB value: Choose Modify > Adjust Volume > Absolute (or press Control-Option-L).
The display below the viewer changes to show absolute dB values.
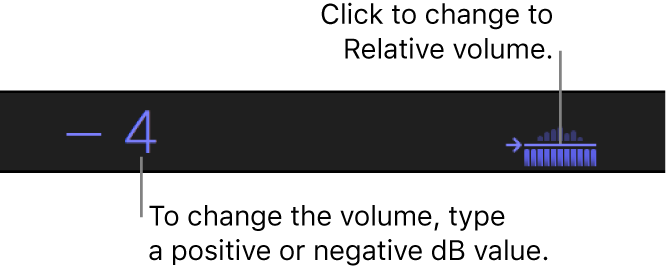
Type a positive or negative value to change the absolute volume. The volume across the entire selection is set to one dB level, and any keyframe adjustments are deleted.
Adjust the volume using a relative dB value: Choose Modify > Adjust Volume > Relative (or press Control-L).
The display below the viewer changes to show relative dB values.
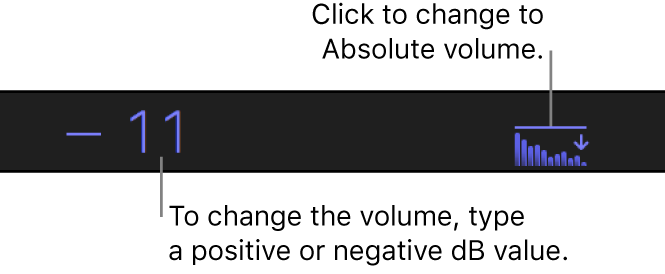
Type a positive or negative value to change the relative volume. The volume is adjusted by the same amount throughout the selection, preserving any fades or other keyframe adjustments.
Silence the selected clip or range to 0 dB: Choose Modify > Adjust Volume > Silence (–∞).
The selection is silenced, and the volume control for the clip or range is set to –∞ dB.
Restore the original audio level for the selected clip or range: Choose Modify > Adjust Volume > Reset (0dB).
The volume of the selection is reset to 0 dB.
If multiple clips are selected, the volume is adjusted for all clips.
Adjust volume in the Audio inspector
In the Final Cut Pro browser or timeline, select one or more audio clips or video clips with audio.
If the inspector isn’t already shown, do one of the following:
Choose Window > Show in Workspace > Inspector (or press Command-4).
Click the Inspector button on the right side of the toolbar.

Click the Audio button at the top of the inspector.

Tip: Double-click the top bar of the Audio inspector to switch between half-height view and full-height view.
In the Audio inspector, do one of the following:
Enter a value in the Volume field.
If multiple clips are selected, the volume for all clips is set to the value you entered.
Drag the Volume slider right to increase the volume, or left to decrease it.
If multiple clips are selected, the volume for all clips is adjusted relative to each clip’s original volume.

Adjust volume automatically across a selected area
To adjust the volume of a clip in the timeline, you can use the Range Selection tool to add keyframes automatically across a selected range.
In Final Cut Pro, select the clip in the timeline.
Click the Tools pop-up menu above the timeline and choose Range Selection (or press R).
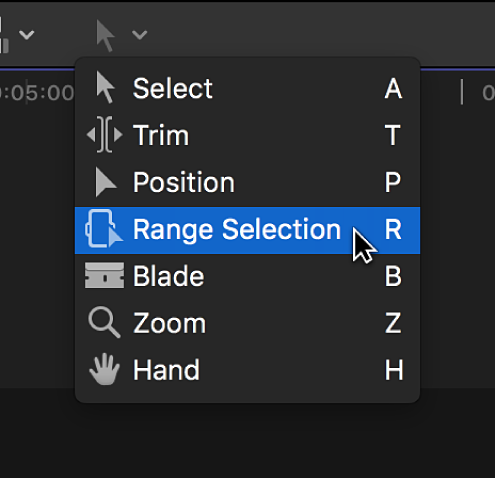
The pointer changes to the Range Selection tool
 .
. Drag across the area where you want to adjust the volume.
To adjust the volume within the range, do one of the following:
Drag the horizontal control in the timeline up or down. (See Adjust volume in the timeline, above.)
Drag the Volume slider in the Audio inspector. (See Adjust volume in the Audio inspector, above.)
Choose Modify > Adjust Volume > Silence (–∞) to silence the range.
Keyframes are automatically created along the adjustment points within the range.
Reset all volume adjustments
Disable a clip’s audio
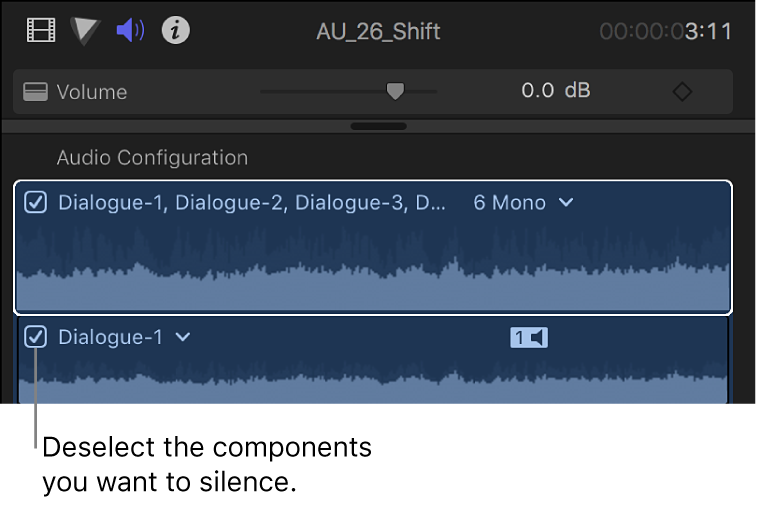
At times, you may import clips with unwanted audio that you will never use. You can disable the audio in these clips. To ensure the best playback performance, deselect the audio components of these clips in the Audio inspector.
In Final Cut Pro, select one or more clips in the timeline or the browser.
In the Audio Configuration section of the Audio inspector, deselect the checkboxes next to the component waveforms you want to silence.
Note: If you add a clip with mono audio to a stereo project, Final Cut Pro plays the single mono audio in both left and right channels, visible in the stereo audio meters for the project.