Final Cut Pro User Guide
- Welcome
-
- What’s new in Final Cut Pro 10.6
- What’s new in Final Cut Pro 10.5.3
- What’s new in Final Cut Pro 10.5
- What’s new in Final Cut Pro 10.4.9
- What’s new in Final Cut Pro 10.4.7
- What’s new in Final Cut Pro 10.4.6
- What’s new in Final Cut Pro 10.4.4
- What’s new in Final Cut Pro 10.4.1
- What’s new in Final Cut Pro 10.4
- What’s new in Final Cut Pro 10.3
- What’s new in Final Cut Pro 10.2
- What’s new in Final Cut Pro 10.1.2
- What’s new in Final Cut Pro 10.1
- What’s new in Final Cut Pro 10.0.6
- What’s new in Final Cut Pro 10.0.3
- What’s new in Final Cut Pro 10.0.1
-
- Intro to effects
-
- Intro to transitions
- How transitions are created
- Add transitions
- Set the default transition
- Delete transitions
- Adjust transitions in the timeline
- Adjust transitions in the inspector and viewer
- Merge jump cuts with the Flow transition
- Adjust transitions with multiple images
- Modify transitions in Motion
-
- Add storylines
- Use the precision editor
- Conform frame sizes and rates
- Use XML to transfer projects
-
- Glossary
- Copyright

Intro to roles in Final Cut Pro
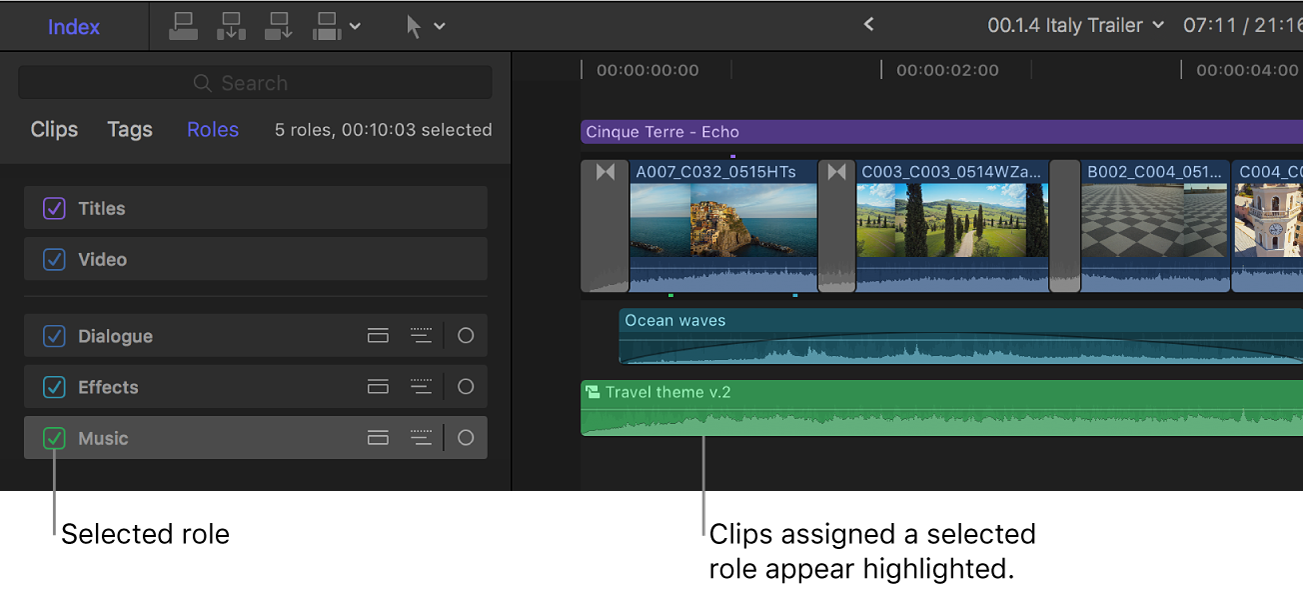
Roles are metadata text and color labels that you assign to clips in the browser or the timeline. When you import clips (video, audio, or still images), Final Cut Pro analyzes existing clip metadata and automatically assigns one of five default color-coded roles (Video, Titles, Dialogue, Music, and Effects) to each clip. For example, if a source media file has a Music “genre” metadata tag, Final Cut Pro assigns a green Music role to the imported clip.
You can use roles to organize clips in your events and projects by function or category, control the arrangement of the timeline, and export separate video or audio files (also known as media stems) for distribution, broadcast, audio mixing, or post-production. Because roles are color-coded, you can instantly recognize clips of the same role in the browser and the timeline. You can also highlight particular roles in the timeline.

You can use roles in the following ways:
Organize clips with roles and subroles: You can create subroles within a role to further organize your clips, and you can create custom roles to add to the default set. To get the maximum benefit from roles (including organizing the timeline or exporting media stems), make sure your clips have the correct role assignments early in the editing process. See View and reassign roles in Final Cut Pro and Create custom roles in Final Cut Pro. With iXML metadata, you can also create custom roles automatically during import.
Organize the timeline with roles: With a few clicks, you can organize the timeline with “lanes,” in which all clips in the same role appear together in a separate layer of the timeline. See Organize the Final Cut Pro timeline with audio lanes. You can also display and edit audio components for entire roles and focus the timeline display on a specific role.
Export media stems: A powerful benefit of roles is the ease with which you can export roles as separate files (media stems). This process is often used when delivering stems to match broadcast specifications or when handing off stems for mixing or post-production. You can export roles as media stems in a combined, multitrack QuickTime file or as separate audio or video files. See Share roles as files with Final Cut Pro.
Create and manage captions: Final Cut Pro features dedicated roles and subroles for adding, editing, and sharing captions (including subtitles and closed captions). See Intro to captions in Final Cut Pro.
For detailed information about advanced uses of audio roles, see Audio Roles in Final Cut Pro.
Download this guide: Apple Books | PDF