Use the Panel Editor for Switch Control or the Accessibility Keyboard on Mac
If you use Switch Control or the Accessibility Keyboard on your Mac, you can use the Panel Editor to add custom panels to the Switch Control or Accessibility Keyboard panel collection, to streamline common tasks and actions for different apps on your Mac. You can also use the panels on another Mac, or share them with other Switch Control or Accessibility Keyboard users.

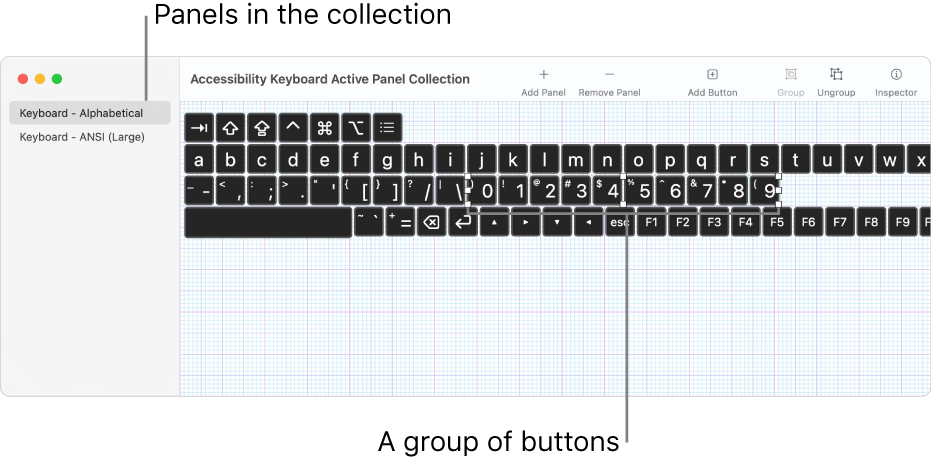
A panel can contain buttons and groups of buttons. You can set options that control the appearance of the items, the actions the items perform, and, in some cases, how you move from one item to another. For example, you can create a panel of buttons to use as a toolbar, or change the font size and color of buttons. The options you can set vary depending on whether the panel is for use with Switch Control or the Accessibility Keyboard. See Set Panel Editor options for Switch Control or the Accessibility Keyboard.
Note: When you edit a panel in the Switch Control or Accessibility Keyboard panel collection, be sure to save your changes so they’re available in Switch Control or the Accessibility Keyboard.
Open the Panel Editor
On your Mac, choose Apple menu

 in the sidebar, then do one of the following on the right (you may need to scroll down):
Click Switch Control.
Click Keyboard.
Click Panel Editor.
The Switch Control or Accessibility Keyboard Active Panel Collection window opens, showing panels that are available on your Mac.
If a collection window isn’t shown, choose File > Open Switch Control Panel Collection or File > Open Accessibility Keyboard Panel Collection.
Add and work with panels
In the Panel Editor on your Mac, in a panel collection window, do any of the following:
Add a panel: Click the Add Panel button
 in the toolbar or choose Edit > Add Panel, then choose a panel type. You can choose and modify an existing template, or choose Empty to create a new panel from scratch.
When you add a keyboard panel, the typing suggestions field and system control buttons aren’t included; they’re automatically shown when you use the panel. You can add a typing suggestions field to a panel; if you do, only your field is shown when you use the panel.
Import panels: Choose File > Import Panels, then select a file.
Copy panels: Select a panel, choose Edit > Copy, then choose Edit > Paste.
Rename panels: Select a panel, click its name, then type a new name.
Delete panels: Select a panel, then click the Remove Panel button
 in the toolbar, or press the Delete key.
Share a panel collection
In the Panel Editor on your Mac, choose File > Duplicate.
A new window appears with a copy of the panel collection. If you don’t want to share all of the panels in the collection, delete panels from the duplicate.
Choose File > Move To, rename the file if you want, select a target location, then click Save.
In the Finder, select the file, click the Share button
 in the Finder toolbar, then choose how to share, such as by email.
You can create a new panel collection to give to other people. Choose File > New Panel Collection, then in the new collection window, choose File > Save, or click Untitled at the top of the window to name and save the file.