Motion User Guide
- Welcome
- What’s new in Motion
-
- Intro to basic compositing
-
- Intro to transforming layers
-
- Intro to transforming layers in the canvas
- Transform layer properties in the canvas
- Transform tools
- Change layer position, scale, or rotation
- Move a layer’s anchor point
- Add a drop shadow to a layer
- Distort or shear a layer
- Crop a layer
- Modify shape or mask points
- Transform text glyphs and other object attributes
- Align layers in the canvas
- Transform layers in the HUD
- Transform 2D layers in 3D space
-
- Intro to behaviors
- Behaviors versus keyframes
-
- Intro to behavior types
-
- Intro to Parameter behaviors
- Audio behavior
- Average behavior
- Clamp behavior
- Custom behavior
- Add a Custom behavior
- Exponential behavior
- Link behavior
- Logarithmic behavior
- MIDI behavior
- Add a MIDI behavior
- Negate behavior
- Oscillate behavior
- Create a decaying oscillation
- Overshoot behavior
- Quantize behavior
- Ramp behavior
- Randomize behavior
- Rate behavior
- Reverse behavior
- Stop behavior
- Track behavior
- Wriggle behavior
-
- Intro to Simulation behaviors
- Align to Motion behavior
- Attracted To behavior
- Attractor behavior
- Drag behavior
- Drift Attracted To behavior
- Drift Attractor behavior
- Edge Collision behavior
- Gravity behavior
- Orbit Around behavior
- Random Motion behavior
- Repel behavior
- Repel From behavior
- Rotational Drag behavior
- Spring behavior
- Vortex behavior
- Wind behavior
- Additional behaviors
-
- Intro to using generators
- Add a generator
-
- Intro to image generators
- Caustics generator
- Cellular generator
- Checkerboard generator
- Clouds generator
- Color Solid generator
- Concentric Polka Dots generator
- Concentric Shapes generator
- Gradient generator
- Grid generator
- Japanese Pattern generator
- Lens Flare generator
- Manga Lines generator
- Membrane generator
- Noise generator
- One Color Ray generator
- Op Art 1 generator
- Op Art 2 generator
- Op Art 3 generator
- Overlapping Circles generator
- Radial Bars generator
- Soft Gradient generator
- Spirals generator
- Spiral Drawing generator
- Use Spiral Drawing onscreen controls
- Star generator
- Stripes generator
- Sunburst generator
- Truchet Tiles generator
- Two Color Ray generator
- Save a modified generator
-
- Intro to filters
- Browse and preview filters
- Apply or remove filters
-
- Intro to filter types
-
- Intro to Color filters
- Brightness filter
- Channel Mixer filter
- Color Adjustments filter
- Color Balance filter
- Example: Color-balance two layers
- Color Curves filter
- Use the Color Curves filter
- Color Reduce filter
- Color Wheels filter
- Use the Color Wheels filter
- Colorize filter
- Contrast filter
- Custom LUT filter
- Use the Custom LUT filter
- Gamma filter
- Gradient Colorize filter
- HDR Tools filter
- Hue/Saturation filter
- Hue/Saturation Curves filter
- Use the Hue/Saturation Curves filter
- Levels filter
- Negative filter
- OpenEXR Tone Map filter
- Sepia filter
- Threshold filter
- Tint filter
-
- Intro to Distortion filters
- Black Hole filter
- Bulge filter
- Bump Map filter
- Disc Warp filter
- Droplet filter
- Earthquake filter
- Fisheye filter
- Flop filter
- Fun House filter
- Glass Block filter
- Glass Distortion
- Insect Eye filter
- Mirror filter
- Page Curl filter
- Poke filter
- Polar filter
- Refraction filter
- Ring Lens filter
- Ripple filter
- Scrape filter
- Sliced Scale filter
- Use the Sliced Scale filter
- Sphere filter
- Starburst filter
- Stripes filter
- Target filter
- Tiny Planet filter
- Twirl filter
- Underwater filter
- Wave filter
-
- Intro to Stylize filters
- Add Noise filter
- Bad Film filter
- Bad TV filter
- Circle Screen filter
- Circles filter
- Color Emboss filter
- Comic filter
- Crystallize filter
- Edges filter
- Extrude filter
- Fill filter
- Halftone filter
- Hatched Screen filter
- Highpass filter
- Indent filter
- Line Art filter
- Line Screen filter
- MinMax filter
- Noise Dissolve filter
- Pixellate filter
- Posterize filter
- Relief filter
- Slit Scan filter
- Slit Tunnel filter
- Texture Screen filter
- Vignette filter
- Wavy Screen filter
- About filters and color processing
- Publish filter controls to Final Cut Pro
- Using filters on alpha channels
- Filter performance
- Save custom filters
-
- Intro to 3D objects
- Add a 3D object
- Move and rotate a 3D object
- Reposition a 3D object’s anchor point
- Exchange a 3D object file
- 3D object intersection and layer order
- Using cameras and lights with 3D objects
- Save custom 3D objects
- Guidelines for working with 3D objects
- Working with imported 3D objects
-
- Intro to 360-degree video
- 360-degree projects
- Create 360-degree projects
- Add 360-degree video to a project
- Create a tiny planet effect
- Reorient 360-degree media
- Creating 360-degree templates for Final Cut Pro
- 360-degree-aware filters and generators
- Export and share 360-degree projects
- Guidelines for better 360-degree projects
-
- Intro to settings and shortcuts
-
- Intro to Keyboard shortcuts
- Use function keys
- General keyboard shortcuts
- Audio list keyboard shortcuts
-
- Tools keyboard shortcuts
- Transform tool keyboard shortcuts
- Select/Transform tool keyboard shortcuts
- Crop tool keyboard shortcuts
- Edit Points tool keyboard shortcuts
- Edit shape tools keyboard shortcuts
- Pan and Zoom tools keyboard shortcuts
- Shape tools keyboard shortcuts
- Bezier tool keyboard shortcuts
- B-Spline tool keyboard shortcuts
- Paint Stroke tool keyboard shortcuts
- Text tool keyboard shortcuts
- Shape mask tools keyboard shortcuts
- Bezier Mask tool keyboard shortcuts
- B-Spline Mask tool keyboard shortcuts
- Transport control keyboard shortcuts
- View option keyboard shortcuts
- HUD keyboard shortcuts
- Inspector keyboard shortcuts
- Keyframe Editor keyboard shortcuts
- Layers keyboard shortcuts
- Library keyboard shortcuts
- Media list keyboard shortcuts
- Timeline keyboard shortcuts
- Keyframing keyboard shortcuts
- Shape and Mask keyboard shortcuts
- 3D keyboard shortcuts
- Miscellaneous keyboard shortcuts
- Touch Bar shortcuts
- Move assets to another computer
- Work with GPUs
- Glossary
- Copyright

Apply the Sequence Replicator behavior in Motion
The Sequence Replicator behavior animates elements of a replicator in sequence over time. This is the only way to animate elements individually—keyframing the cell parameters or applying other behaviors affects all elements in the pattern uniformly.
Using the Sequence Replicator behavior, you can select and apply replicator cell parameters such as Position, Color, Scale, Rotation, or Opacity, then animate those parameters in a cascading sequence that passes through each element in a replicator pattern.

The starting point for the sequence animation is based on the replicator’s origin or build style. For example, if a spiral replicator’s Origin parameter is set to Center, the sequence animation begins at the center of the spiral and moves outward.
You can apply the Sequence Replicator behavior to a replicator or to its cells. Either method results in the same animation.
Note: After you create a Sequence Replicator behavior, you can save it to the Library as a custom behavior.
Apply the Sequence Replicator behavior
In Motion, do one of the following:
In the Layers list or Timeline, select a replicator or replicator cell, click Behaviors in the toolbar, then choose Replicator > Sequence Replicator.
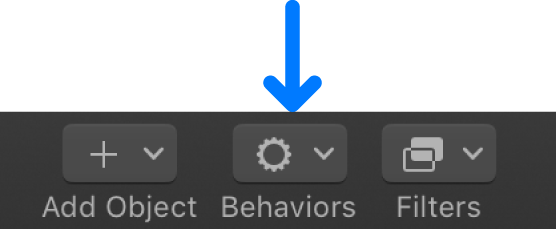
In the Library, select the Behaviors category, select the Replicator subcategory, then drag the Sequence Replicator from the stack to a replicator or replicator cell in the Layers list, Timeline, or canvas.
The Sequence Replicator controls appear in the Behaviors Inspector. For the behavior to have any effect on the replicator, you must add parameters using the Parameter pop-up menu at the top of the Sequence Replicator controls. For details, see the next task.
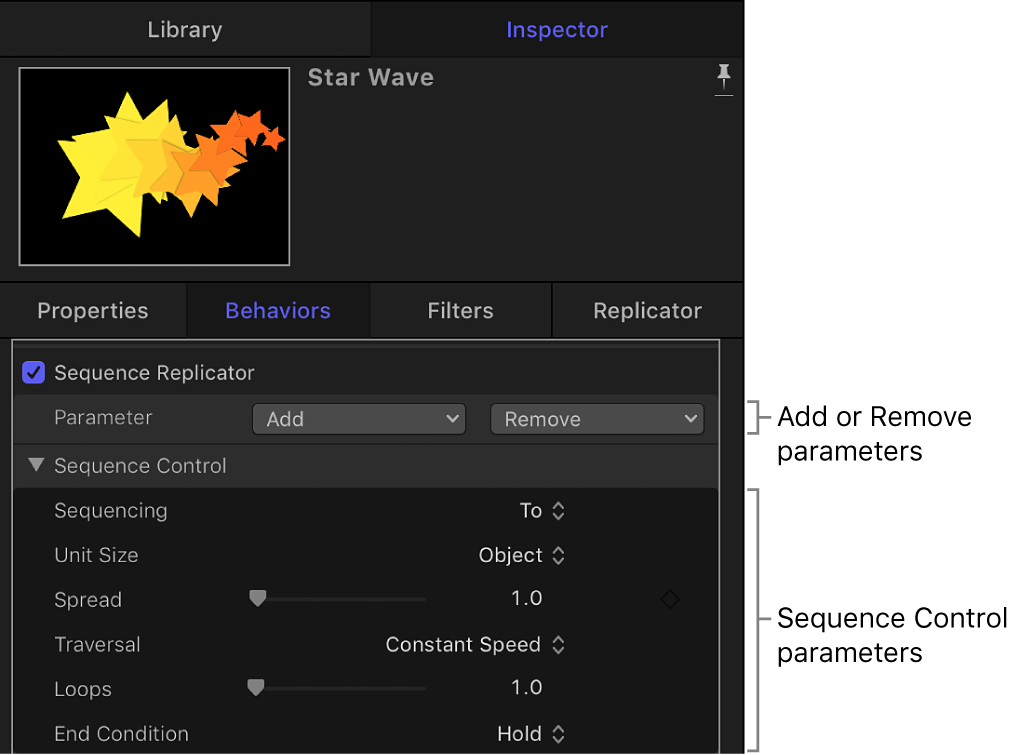
Add and animate parameters in the Behaviors Inspector
After you apply the Sequence Replicator behavior to a replicator, you must assign one or more parameters for the behavior to modify. In the following example, the Rotation, Opacity, and Scale parameters are assigned to the Sequence Replicator behavior in the Behaviors Inspector.
In the Layers list or Timeline in Motion, select the Sequence Replicator behavior.
In the Parameter row of the Behaviors Inspector, do the following:
Click the Add pop-up menu, then choose Rotation.
Click the Add pop-up menu, then choose Opacity.
Click the Add pop-up menu, then choose Scale.
The added parameters appear above the Add and Remove pop-up menus. No animation occurs until you set a value for the parameters.
Ensure that keyframe recording is turned off (make sure the Record button in the timing toolbar is not highlighted solid red).
In the Behaviors Inspector, drag the Rotation dial to set a spin value.
In this example, Rotation is set to 160 degrees, so that each element rotates from 0 degrees to 160 degrees over the pattern for the duration of the Sequence Replicator behavior.
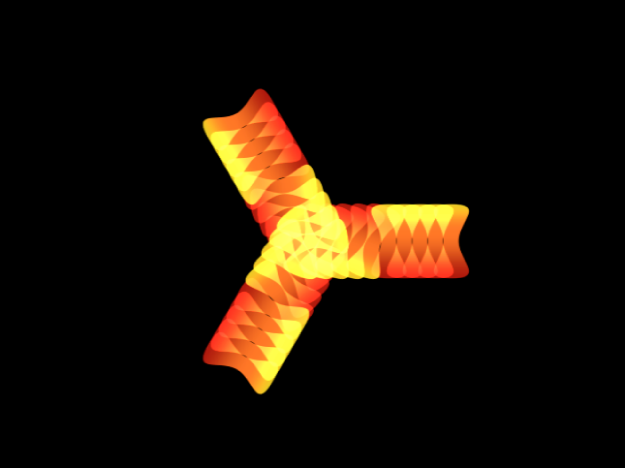
Note: If the elements are already rotated (in the Cell Controls), the elements are rotated 160 degrees from their original rotation value.
Play your project (press the Space bar). Each element rotates 160 degrees in sequence, popping into place before the next element begins rotating.
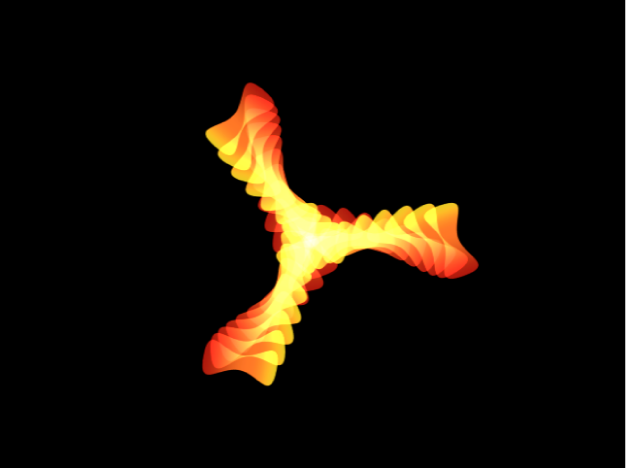
To ease the transition between each element’s animation, drag the Spread value slider to the right.
In this example, Spread is set to 12. In addition to creating a more graceful animation, changing the Spread value can also dramatically change the appearance of the pattern.
Drag the Opacity slider to the lowest value you want the elements to fade to during the animation.
In this example, Opacity is set to 0. Each element fades from 100% opacity to 0% opacity over the duration of the Sequence Replicator behavior.
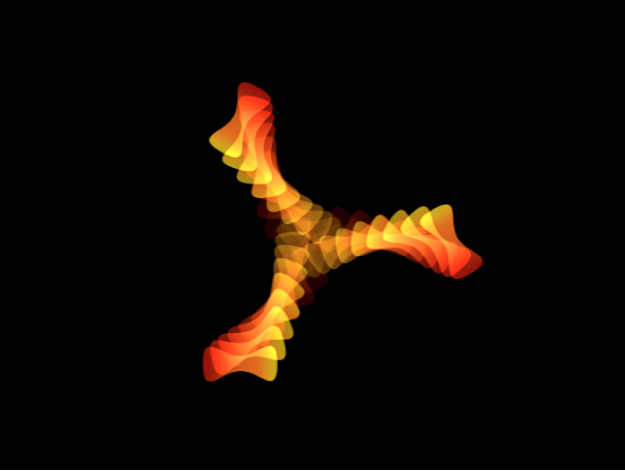
Note: If the elements already contain some transparency, they fade from their original opacity value to 0%.
Drag the Scale slider to the right to increase the size of each element over time.
In this example, Scale is set to 190%.
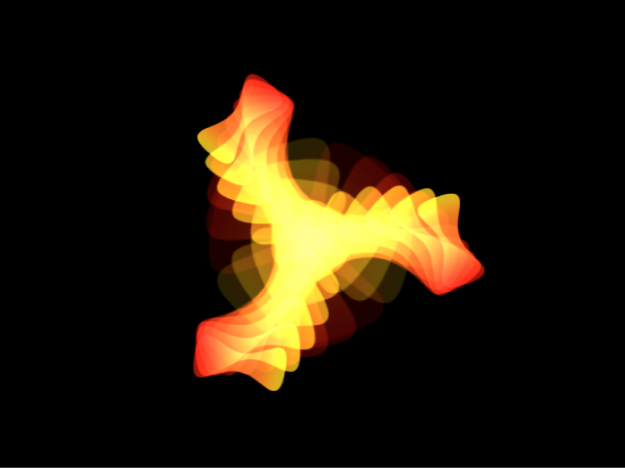
When you play your project, the animation begins at the original value for any added parameter, then transforms to the value you specified in the Sequence Replicator parameters. The animation begins at the origin of the pattern (set in the Origin or Build Style parameter of the Replicator Inspector or HUD) and moves to through the elements to the end of the pattern.
Change the way the sequence moves through the pattern
After you apply parameters to the Sequence Replicator behavior, you can use Sequence Controls parameters to change the way the sequence moves through the replicator pattern. The following task continues with the project used in the previous example.
In Motion, with the Sequence Replicator behavior selected, play the project (press the Space bar) to see the effects of the sequencing.
By default, the Sequencing parameter (in the Behaviors Inspector) is set to “To,” which specifies that the animation begins at the original value of the cells and moves to the value set in the Sequence Replicator behavior for that parameter. The starting point for the sequence animation is based on the build or origin of the pattern (as defined in the Origin or Build Style parameters in the Replicator Inspector). In the current example, the elements begin completely opaque, at 100% scale, and with 0 degrees of rotation at the origin of the pattern. As the sequence moves toward the end of the pattern, the elements become completely transparent, are scaled to 190%, and are rotated 160 degrees.

In the Behaviors Inspector, click the Sequencing pop-up menu, then choose From.
Play your project. The animation now moves from the value set in the Sequence Replicator behavior to the original value of the cells. This is the opposite of the To Sequencing option.

Click the Sequencing pop-up menu, then choose Through.
Play your project. The sequence goes through a full animation cycle starting at the original value of the cells, moving to the value set in the Sequence Replicator, then returning to the original value of the cells. This is similar to combining the To and From Sequencing options.

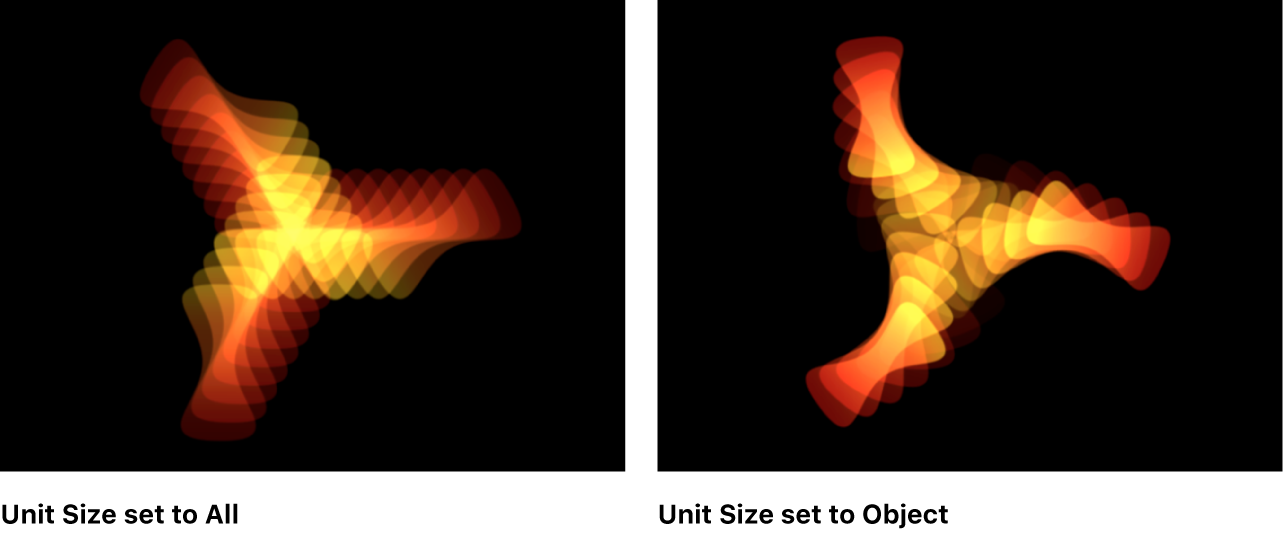
Click the Unit Size pop-up menu, then choose All.
When you play your project, the sequence animation affects all replicator elements simultaneously. The default Unit Size setting is Object, which applies the sequence animation to the elements of the replicator based on the origin of the pattern.
Drag the Loops slider to the right to set a value of 3.
When you play your project, the sequence loops three times.
In the Behaviors Inspector, click the End Condition pop-up menu, then choose Ping Pong.
By default, the End Condition parameter is set to Hold, which completes a sequence animation cycle, then starts the cycle again from the beginning. When End Condition is set to Ping Pong, the animation cycles forward one time, then cycles backward, then forward, and so on.
Note: The End Condition parameter has no effect for Loop values less than or equal to 1.
Download this guide: PDF