Numbers User Guide for Mac
- Welcome
-
- Intro to Numbers
- Intro to images, charts and other objects
- Create a spreadsheet
- Open or close spreadsheets
- Personalise templates
- Use sheets
- Undo or redo changes
- Save your spreadsheet
- Find a spreadsheet
- Delete a spreadsheet
- Print a spreadsheet
- Change the sheet background
- Touch Bar for Numbers
- Use VoiceOver to create a spreadsheet
-
- Use iCloud with Numbers
- Import an Excel or text file
- Export to Excel or another file format
- Reduce the spreadsheet file size
- Save a large spreadsheet as a package file
- Restore an earlier version of a spreadsheet
- Move a spreadsheet
- Lock a spreadsheet
- Password-protect a spreadsheet
- Create and manage custom templates
- Copyright

Use sheets in Numbers on Mac
You can add multiple sheets (or tabs) to a spreadsheet to help you better organise your tables, charts, and other information. For example, you could separate your party planning into sheets for the budget, seating chart, vendor information and task list.

Organise sheets
Do any of the following:
Rename a sheet: Double-click its name, then type a new one.
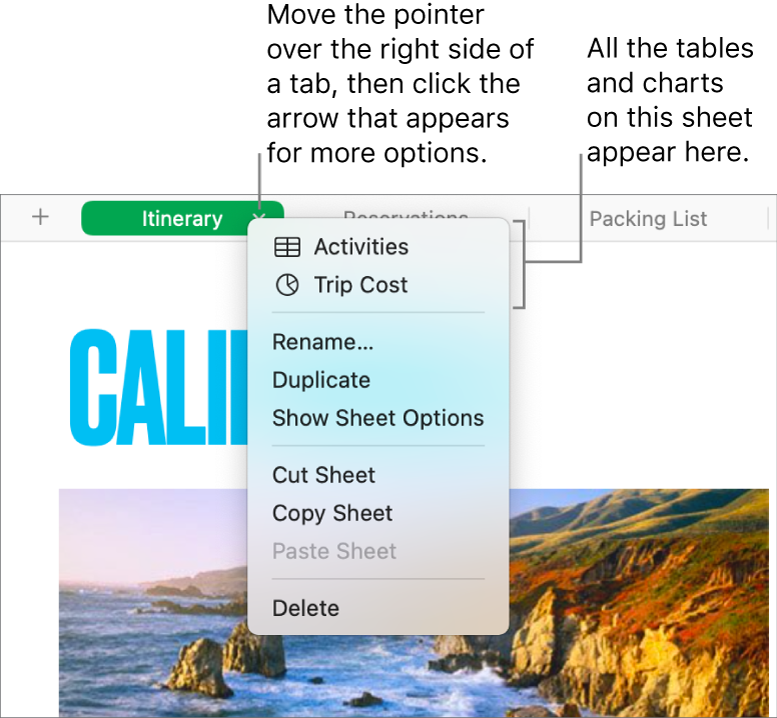
Duplicate a sheet: Move the pointer over the right side of a tab, click the arrow that appears, then choose Duplicate.
Delete a sheet: Move the pointer over the right side of a tab, click the arrow that appears, then choose Delete.

Tip: You can also use tabs to jump to a specific table or chart on a sheet, which is particularly useful for very large sheets. Move the pointer over the right side of a tab, click the arrow that appears, then choose a table or chart.
If your spreadsheet includes bidirectional text (text written in both left-to-right and right-to-left languages), you can also reverse the direction of your sheets. See Use bidirectional text in tables in Numbers on Mac.