Enter data using forms in Numbers on iPad
A quick way to enter data into a table is to use a form. Forms are particularly useful when all the rows in your table contain the same kind of information, such as when you’re collecting contact information, entering inventory or recording class attendance. You can also collaborate with others to create and edit forms in shared spreadsheets.
Each form you create is linked to a specific table in your spreadsheet. In the form, each row of your table is shown as a record and each column corresponds with a field. Any changes you make in the form are made in the table and vice versa.
You can create a form for almost any table in your spreadsheet or you can start with a blank form and Numbers automatically creates a table for you.
Note: Forms are hidden in spreadsheets that are opened in Numbers on Mac or on iCloud.com.

Create a form for an existing table
You can create a form for an existing table if the table doesn’t include any merged cells.

Tap
 near the top-left corner of the spreadsheet, then tap New Form.
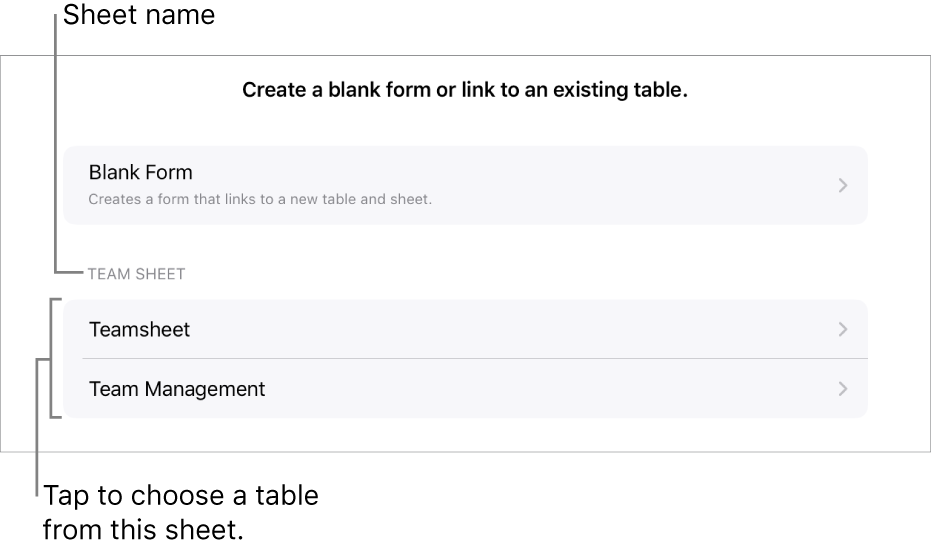
Tap the name of the table you want to create a form for.
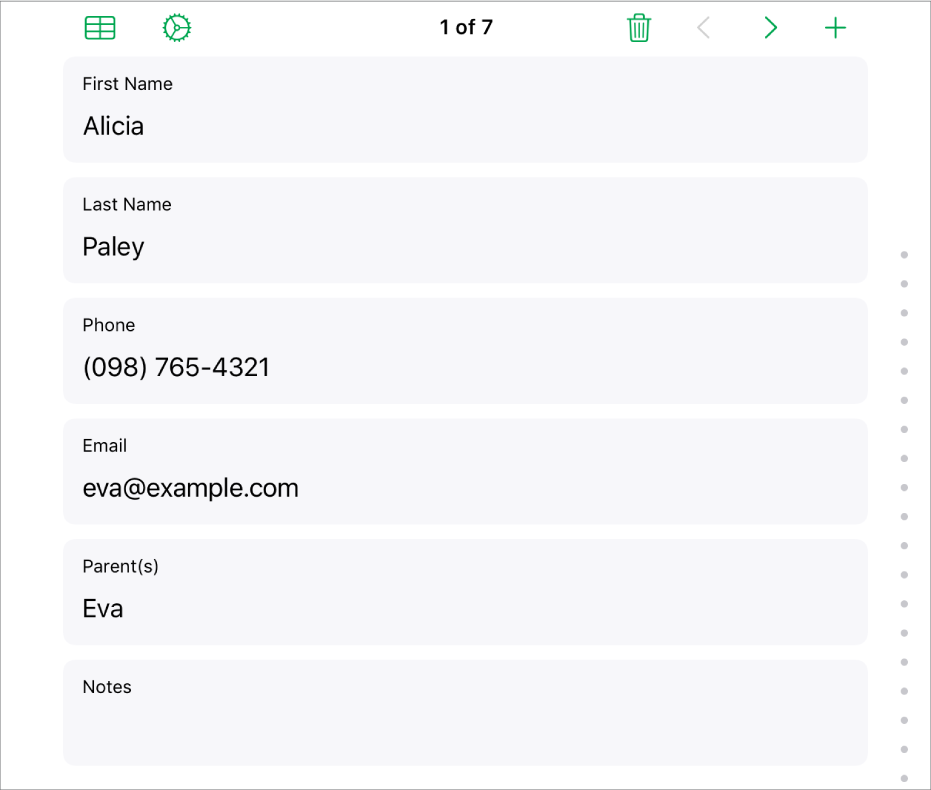
The form is created using existing data and the first record is shown. If the table doesn’t have headers, Form Setup is shown. See Customise fields in a form.
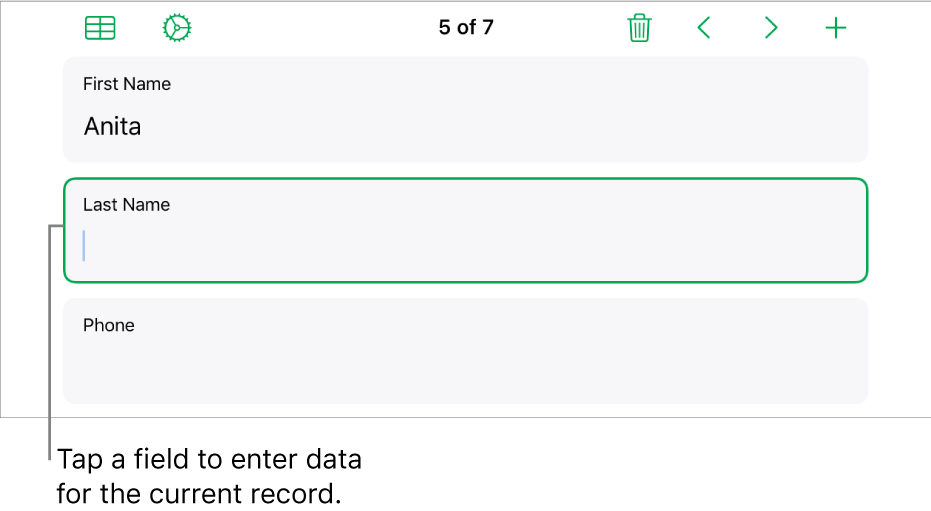
Tap a field to enter or edit data for the record or choose a different record.
If the table used to create the form contains a formula, results of the formula are shown in the form but the formula can only be edited in the table.
To exit the form, tap the tab for another sheet or form.
Create a blank form
If you don’t have an existing table to use for a new form, you can start with a blank form instead. When you create a blank form, Numbers automatically creates a new sheet containing the linked table.
Tap
 near the top-left corner of the spreadsheet, then tap New Form.
Tap Blank Form.
A form and a new sheet, called Form Data, containing the linked table are created.
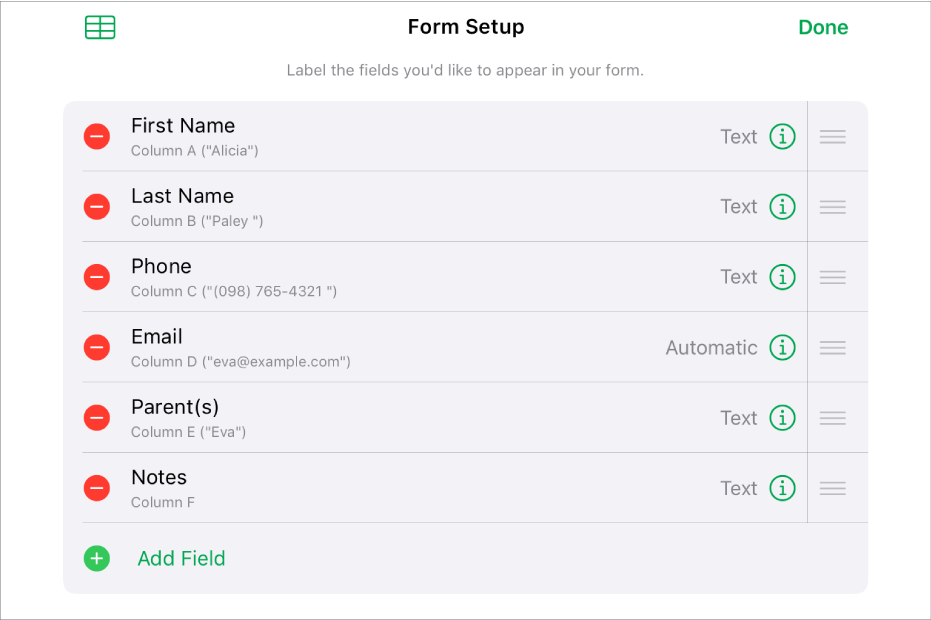
In Form Setup, tap a field label to edit it.
You can also add fields to your form, as well as change the format of a field (such as Number, Currency and Percentage). See Customise fields in a form.
When you’ve finished making changes in Form Setup, tap Done to view the first record.
To exit the form, tap another sheet or form.
Customise fields in a form
Fields correspond with the information or data you’re collecting in a form. For example, if you create a form to collect names and parental contact information for members of a youth sports team, you might add fields for “Name,” “Phone number” and “Email address.”
You can add, edit, delete, re-order and change the format of fields (such as Percentage, Tick Box or Duration) without leaving the form. Changes you make to fields in a form are also made in the table.

Tap the tab for the form you want to edit.
To customise the fields in your form, including changing the label or format, tap
 to view Form Setup, then do any of the following:
Add a field: Tap Add Field.
You may also need to tap Add Blank Field or Add [field type] Field.
A new column is also added to the linked table.
Edit a field label: Tap the label, then type a new label.
If a label is blank, that field is not shown in each record until a label is added.
Delete a field: Tap
 next to the field you want to delete, then tap Delete.
The corresponding column for this field and any data in the column, is also deleted from the linked table.
Reorder fields: Touch and hold
 next to a field, then drag up or down to reorder it.
Reordering a field also moves the column for that field in your table.
Change the format of a field: Tap
 , then choose a format, such as Number, Percentage or Duration.
Tap
 next to a format in the menu to view additional settings.
When you finish making changes in Form Setup, tap Done.
To exit the form, tap another sheet or form.
Enter data in a form
When you enter data for each record in a form, Numbers automatically adds the data to the linked table.

Tap the tab for the form you want to edit.
Tap a field then enter the data for that record.
You can add, delete and jump between records so you can collect all your data. See Add, remove and move between records.
To view all of the data in the table, tap
 .
.Tables that are linked to a form can be edited like any other table in your spreadsheet.
Add, remove and move between records
Each record in a form corresponds with a single row in your table. For example, if you’re collecting names and parental contact information for members of a youth sports team, you can add a record for every member of the team.

Tap the tab for the form you want to edit.
To add, delete or move between records, do any of the following:
Add a record: Tap
 .
.A new row is also added to the linked table.
Delete the current record: Tap
 .
.The row corresponding to this record and any data in the row is also deleted from the linked table.
Go to the previous or next record: Tap
 or
or  .
.Scroll through records: Drag up and down along the dots on the right side of the screen.
Re-order a record: Tap
 to view the linked table, then move the row for the record you want to re-order.
The order of the records in the form changes to reflect the order of the rows in the table.
Note: If you don’t see the controls above, you may need to tap Done in the Form Setup pane to return to the list of records.
To exit the form, tap another sheet or form.
When you have a form tab selected, a flag appears on the tab containing the table the form is linked to. When you select a table that is linked to a form, a flag appears on the form tab.
Tip: You can use your finger or Apple Pencil to write in form fields. See Turn handwriting into text.