Final Cut Pro User Guide for Mac
- Welcome
- What’s new
-
- Intro to effects
-
- Intro to transitions
- How transitions are created
- Add transitions and fades
- Quickly add a transition with a keyboard shortcut
- Set the default duration for transitions
- Delete transitions
- Adjust transitions in the timeline
- Adjust transitions in the inspector and viewer
- Merge jump cuts with the Flow transition
- Adjust transitions with multiple images
- Modify transitions in Motion
-
- Add storylines
- Use the precision editor
- Conform frame sizes and rates
- Use XML to transfer projects
- Glossary
- Copyright

Adjust stereo video properties in Final Cut Pro for Mac
You can edit your entire project without thinking about stereo video properties. But at some point, you need to balance the parallax from shot to shot.
Convergence is the perception of distance to elements in a scene. You can adjust the convergence to move the whole scene closer to the audience or farther away from the audience.
About parallax and convergence
Parallax is the apparent shift in the position of an object in a scene when viewed from two different positions (such as a left and right eye, or, in the case of stereo video, left and right cameras). The difference in the position of an object between the two views is what creates the perception of depth.
Parallax can be positive or negative, depending on the perceived depth of an object relative to the screen:
Negative parallax: Objects that appear in front of the screen have negative parallax. The perceptual effect becomes more pronounced as the parallax increases. Large amounts of parallax should be avoided to prevent eye strain.
Positive parallax: Objects that appear behind the screen have positive parallax.
Zero parallax: Objects that appear exactly aligned with the screen plane have zero parallax; this is also known as the scene’s convergence point.
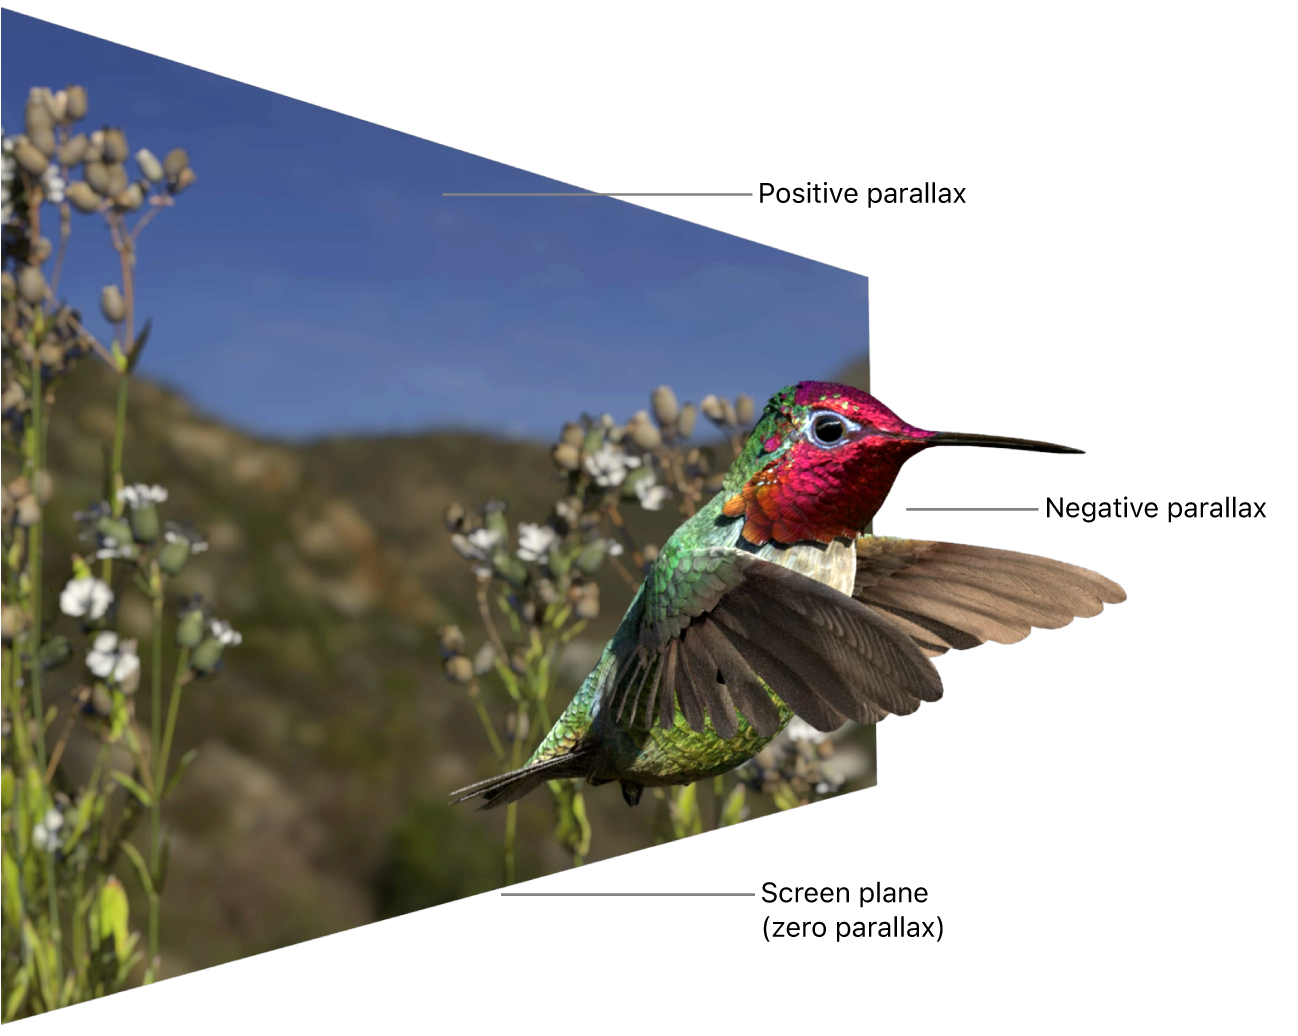
You can use the Convergence control in Final Cut Pro to adjust the parallax points in a stereoscopic scene closer to the viewer (negative values) or farther away from the viewer (positive values). You can also set the parallax of titles and generators to adjust their depth relative to the rest of the scene.
Adjust the parallax using the Convergence control
A fundamental step in creating a stereo video is correcting convergence, or balancing the parallax for each clip in your timeline. Most stereoscopic cameras use parallel lenses, so the convergence point is at infinity. This causes the whole scene to appear in negative parallax. You can use the Convergence control to balance the negative and positive parallax in the scene, and even fine-tune it to place specific objects in the scene at zero parallax.
In the example below, the parallax is adjusted so that the child’s face appears even with the screen plane and the arm holding the flower appears in front of the screen. A 3D title is added and adjusted to appear in front of the child and flower.
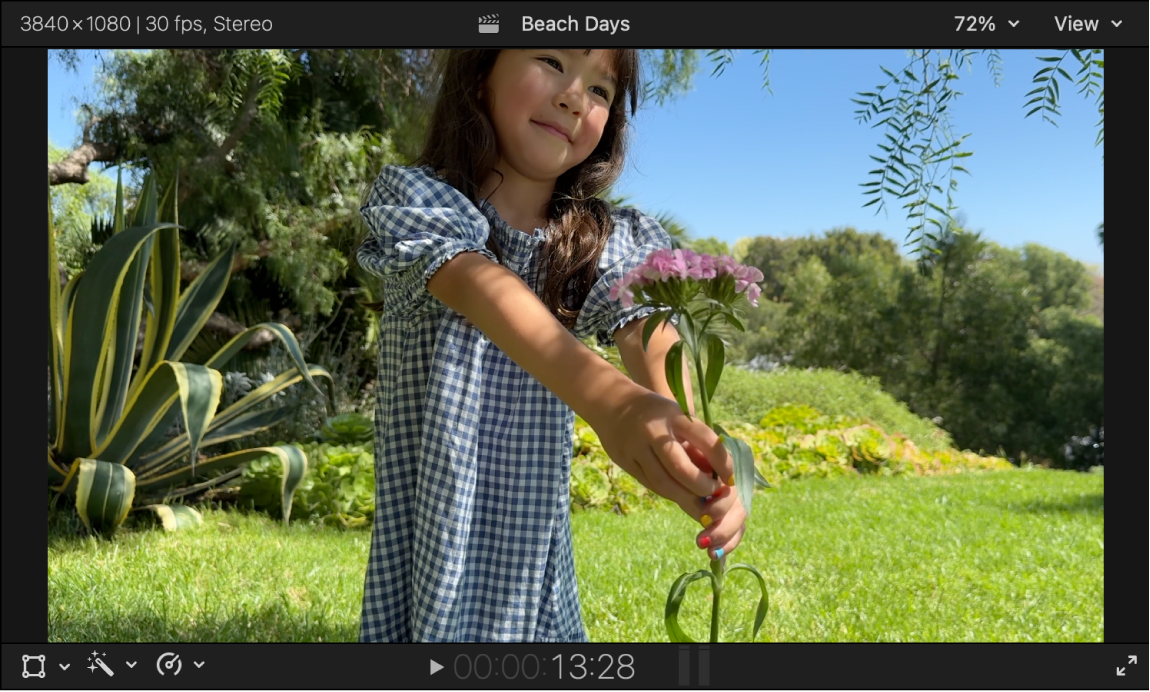
In a stereo video project in Final Cut Pro, select a stereo video clip in the timeline, then position the playhead so that the clip appears in the viewer.
To assess the parallax, click the View pop-up menu in the upper-right corner of the viewer, choose Show Stereoscopic As (in the Display section), then choose a preview option.
See Preview stereo and spatial video in Final Cut Pro for Mac.
This example uses the Anaglyph Monochrome view. In most cases, you can use any of the preview options to check parallax with or without standard red/cyan anaglyph glasses.
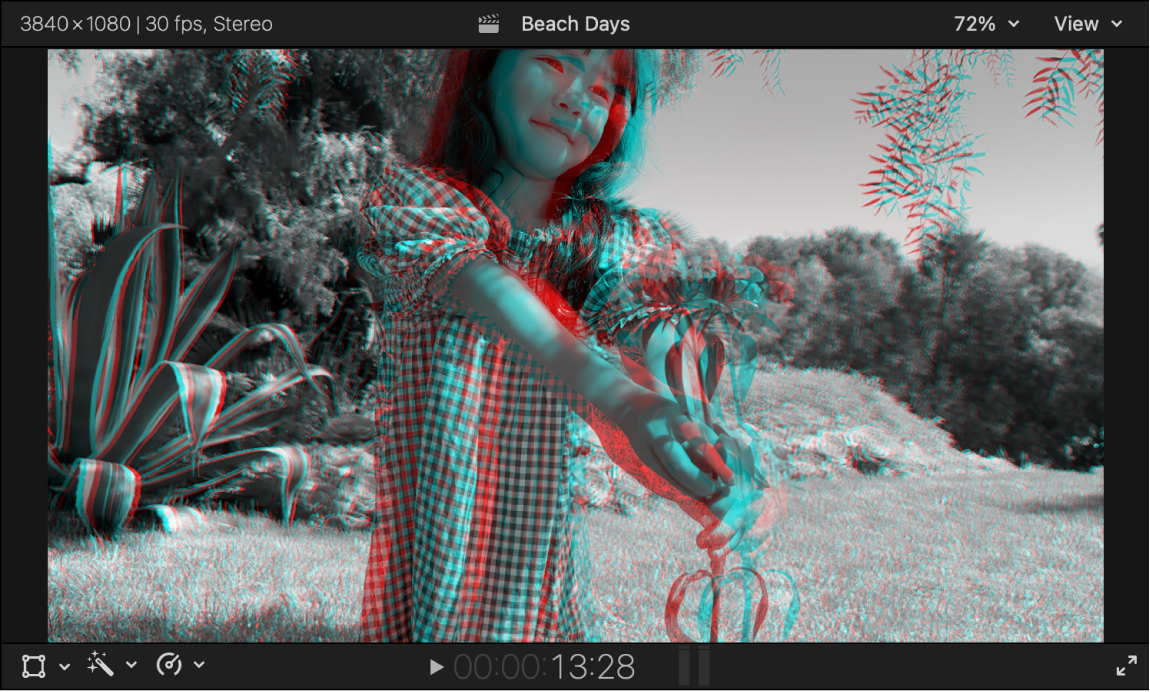
If you’re wearing anaglyph glasses, the child appears to be in front of the screen. This is an example of negative parallax. If you aren’t wearing anaglyph glasses, the negative parallax is indicated by the red edge on the child’s arm and face in Anaglyph Monochrome view. Edges with red on the right side indicate negative parallax (closer than the screen plane), and edges with red on the left side indicate positive parallax (behind the screen plane).
In the Stereoscopic section, the Convergence slider is set to its default value of 0.
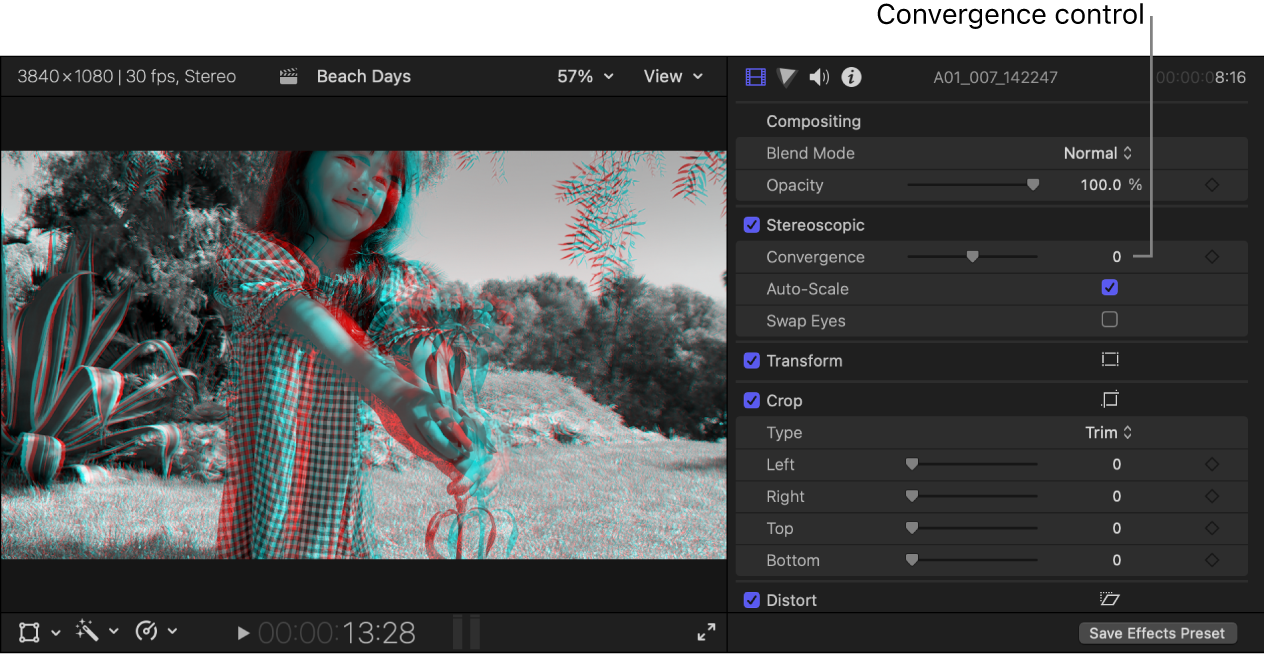
Adjust the Convergence value to a positive number so that the red edge disappears from the right side of the child’s face.
When viewed with anaglyph glasses, the face appears even with the screen plane. The arm and flower continue to appear in front of the screen.
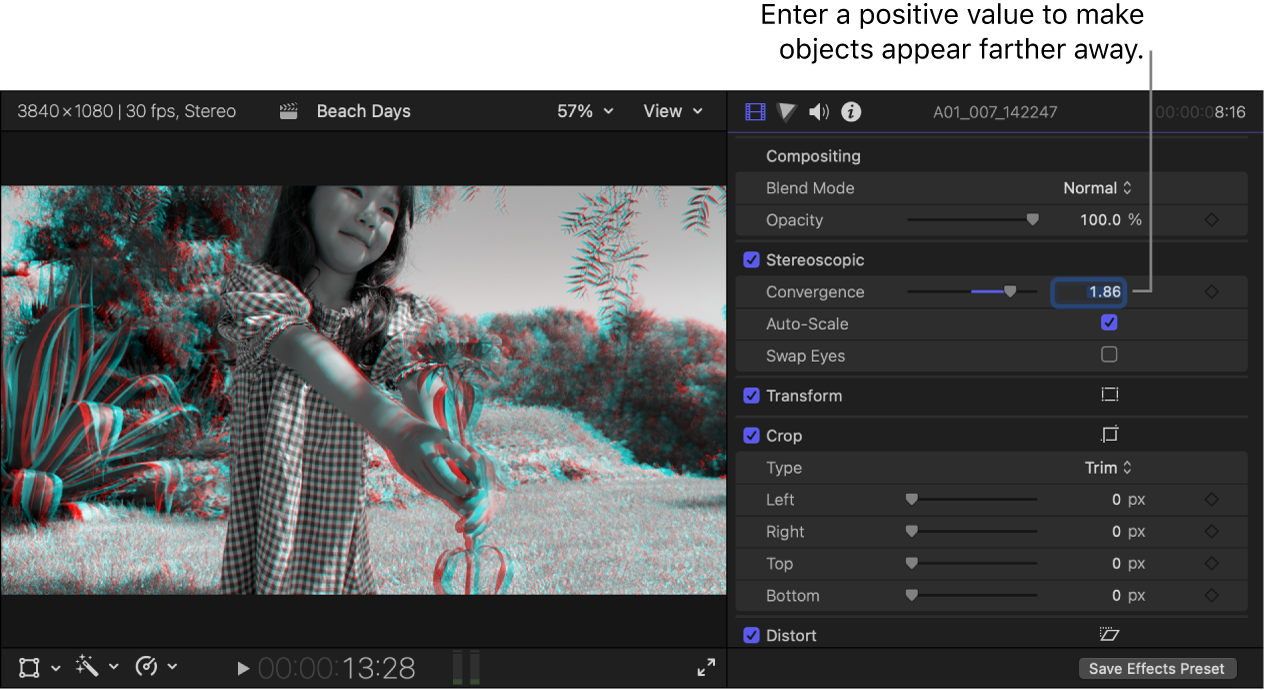
Add the Basic 3D title to the clip.
By default, titles appear exactly at the screen plane, but in this scene, the title conflicts with the flower. To resolve this issue, you can adjust the parallax of the title to move it in front of the entire scene.
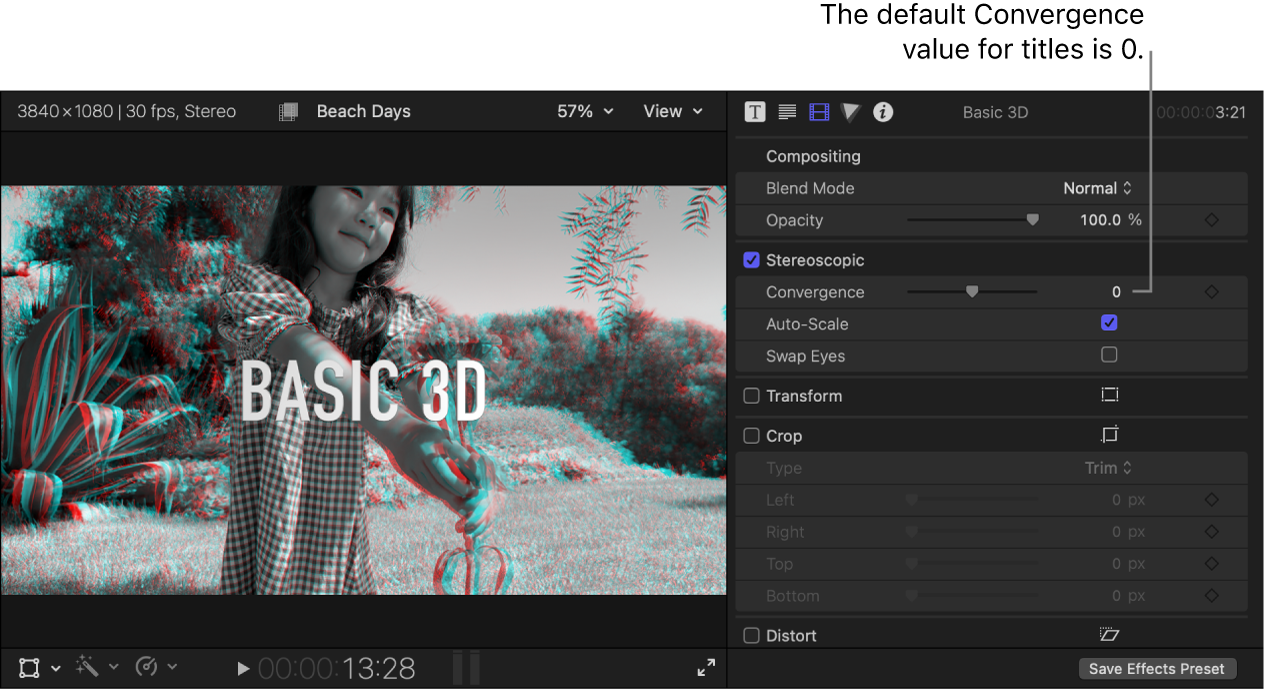
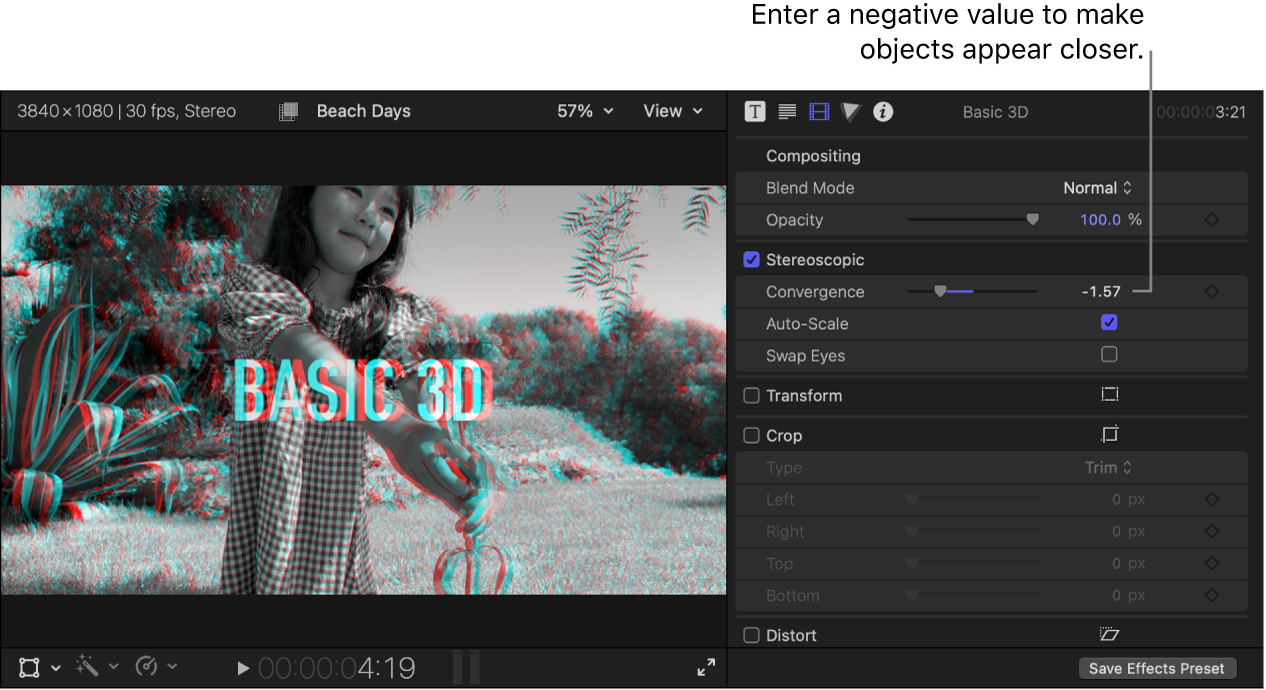
Select the title in the timeline, then adjust its Convergence value in the inspector to a negative number.
When the image is viewed with anaglyph glasses, the title appears in front of the scene. When the image is viewed without anaglyph glasses, edges with red on the right side indicate the negative parallax.
Important: Very large positive parallax values (exceeding 2% of the screen width) may cause eye divergence and eye strain.
Download this guide: PDF