Use Delay Designer in surround in Final Cut Pro for Mac
Delay Designer’s design is optimized for use in surround configurations. With 26 taps that can be freely positioned in the surround field, you can create some truly amazing rhythmic and spatial effects.
Delay Designer always processes each input channel independently.
In a mono/stereo input and surround output configuration: Delay Designer processes the two stereo channels independently, and the surround panner lets you place each delay around the surround field.
In a surround input and surround output configuration: Delay Designer processes each surround channel independently, and the surround panner lets you adjust the surround balance of each tap in the surround field.
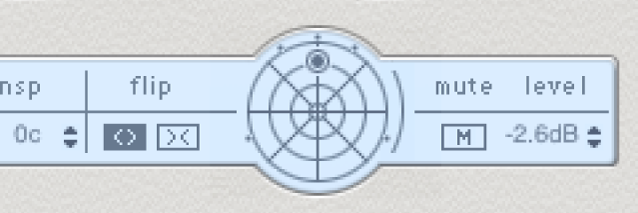
When you use Delay Designer in any surround configuration, the Pan parameter on the Tap parameter bar is replaced with a surround panner, which lets you determine the surround position of each tap.
Note: In the Tap display’s Pan view, you can only adjust the angle of taps. You must use the surround panner on the Tap parameter bar to adjust diversity.

In the Final Cut Pro timeline, select a clip with the Delay Designer effect applied, then open the effect’s settings in the Audio inspector.
To add the effect and show its controls, see Add Logic effects to clips in Final Cut Pro for Mac.
To move the surround position, do any of the following:
Adjust diversity: Command-drag.
Adjust the angle: Option-Command-drag.
Reset the angle and diversity: Option-click the blue dot.
Note: Delay Designer generates separate automation data for stereo pan and surround pan operations. This means that when you use it in surround channels, it will not react to existing stereo pan automation data, and vice versa.
Download this guide: PDF