Logic Pro User Guide for iPad
- What’s new in Logic Pro 1.1
-
- What is Logic Pro?
- Working areas
- Work with function buttons
- Work with numeric values
-
- Intro to tracks
- Create tracks
- Create tracks using drag and drop
- Choose the default region type for a software instrument track
- Select tracks
- Duplicate tracks
- Reorder tracks
- Rename tracks
- Change track icons
- Change track colors
- Use the tuner on an audio track
- Show the output track in the Tracks area
- Delete tracks
- Edit track parameters
- Start a Logic Pro subscription
- How to get help
-
- Intro to recording
-
- Before recording software instruments
- Record software instruments
- Record additional software instrument takes
- Record to multiple software instrument tracks
- Record multiple MIDI devices to multiple tracks
- Record software instruments and audio simultaneously
- Merge software instrument recordings
- Spot erase software instrument recordings
- Replace software instrument recordings
- Capture your most recent MIDI performance
- Use the metronome
- Use the count-in
-
- Intro to arranging
-
- Intro to regions
- Select regions
- Cut, copy, and paste regions
- Move regions
- Remove gaps between regions
- Delay region playback
- Trim regions
- Loop regions
- Repeat regions
- Mute regions
- Split and join regions
- Stretch regions
- Separate a MIDI region by note pitch
- Bounce regions in place
- Change the gain of audio regions
- Create regions in the Tracks area
- Convert a MIDI region to a Drummer region or a pattern region
- Rename regions
- Change the color of regions
- Delete regions
- Create fades on audio regions
- Access mixing functions using the Fader
-
- Intro to Step Sequencer
- Use Step Sequencer with Drum Machine Designer
- Record Step Sequencer patterns live
- Step record Step Sequencer patterns
- Load and save patterns
- Modify pattern playback
- Edit steps
- Edit rows
- Edit Step Sequencer pattern, row, and step settings in the inspector
- Customize Step Sequencer
-
- Effect plug-ins overview
-
- Instrument plug-ins overview
-
- ES2 overview
- Interface overview
-
- Modulation overview
-
- Vector Envelope overview
- Use Vector Envelope points
- Use Vector Envelope solo and sustain points
- Set Vector Envelope segment times
- Vector Envelope XY pad controls
- Vector Envelope Actions menu
- Vector Envelope loop controls
- Vector Envelope release phase behavior
- Vector Envelope point transition shapes
- Use Vector Envelope time scaling
- Use the Mod Pad
- Modulation source reference
- Via modulation source reference
-
- Sample Alchemy overview
- Interface overview
- Add source material
- Save a preset
- Edit mode
- Play modes
- Source overview
- Synthesis modes
- Granular controls
- Additive effects
- Additive effect controls
- Spectral effect
- Spectral effect controls
- Filter module
- Low and highpass filter
- Comb PM filter
- Downsampler filter
- FM filter
- Envelope generators
- Mod Matrix
- Modulation routing
- Motion mode
- Trim mode
- More menu
- Sampler
- Copyright
Intro to tracks in Logic Pro for iPad
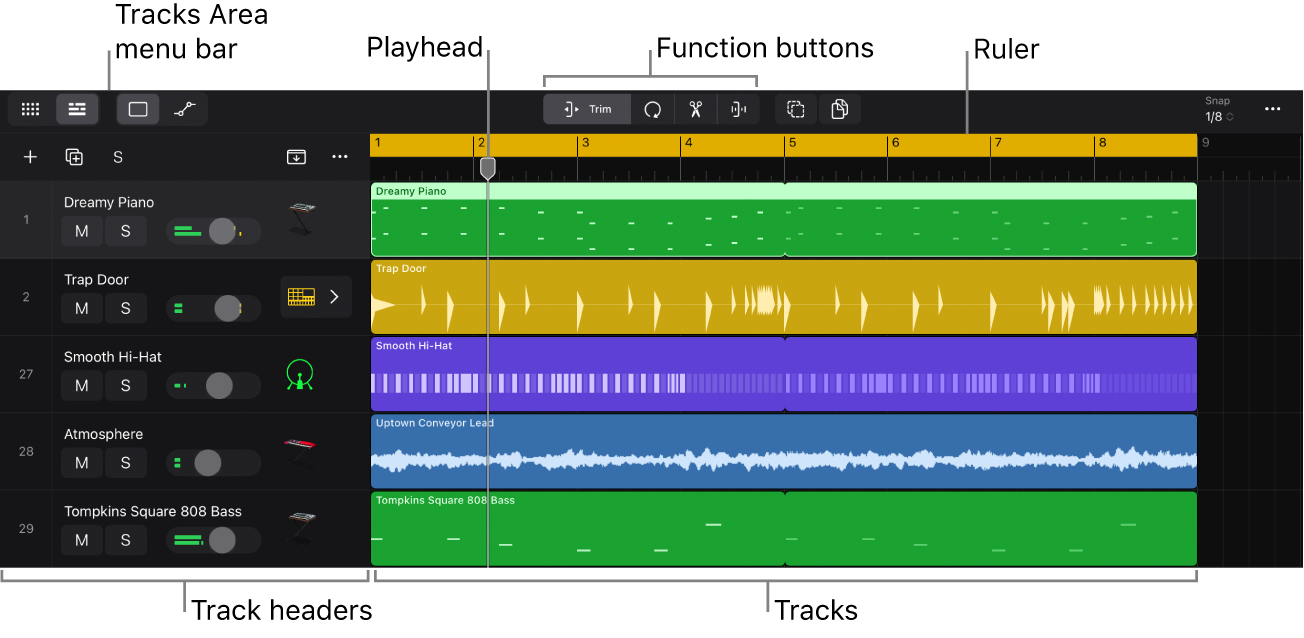
Tracks help you organize and control the sound of the recordings and other material in a Logic Pro for iPad project. You record and arrange regions on tracks in the Tracks area and use the same tracks for the cells in the Live Loops grid. Each track is assigned to a channel strip in the Mixer.
When you create a track, you choose the track type and the default region type. You can also set new track options, including opening the Browser to browse for patches.

Logic Pro projects can include the following track types:
Audio tracks: Contain audio regions from audio recordings, audio Apple Loops, and imported audio files.
Software instrument tracks: Contain MIDI regions from software instrument recordings, software instrument Apple Loops, Drummer regions, and Step Sequencer pattern regions.
Each track has a track header located to the left of the track, which shows the track number and track icon. Track headers also contain controls that you can use to mute, solo, and adjust the volume level of the track, and control other track functions.
You can use track stacks to organize projects with high track counts and simplify the creation of audio subgroups for related tracks. There are two types of track stacks: folder stacks and summing stacks, which are useful in different situations.
You can view and edit track parameters for the selected track in the inspector.
A special set of tracks called global tracks appear below the ruler in the Tracks area. Global tracks provide a way to view and edit different aspects of the overall project, such as tempo and transposition, which affect all tracks in the project.
Download this guide: PDF