Final Cut Pro User Guide for Mac
- Welcome
- What’s new
-
- Intro to effects
-
- Intro to transitions
- How transitions are created
- Add transitions and fades
- Quickly add a transition with a keyboard shortcut
- Set the default duration for transitions
- Delete transitions
- Adjust transitions in the timeline
- Adjust transitions in the inspector and viewer
- Merge jump cuts with the Flow transition
- Adjust transitions with multiple images
- Modify transitions in Motion
-
- Add storylines
- Use the precision editor
- Conform frame sizes and rates
- Use XML to transfer projects
- Glossary
- Copyright

Reorient 360° video in Final Cut Pro for Mac
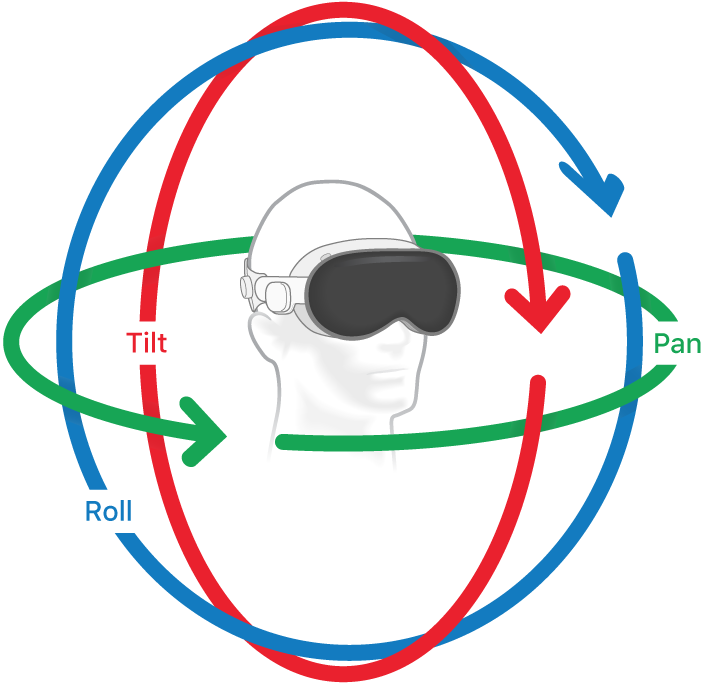
Every 360° video clip has a native orientation (the default direction the viewer looks). You can change the orientation of a 360° video clip by adjusting its Tilt, Pan, and Roll parameters.
Panning is a camera movement in which the field of view moves horizontally. Tilting moves the field of view up and down. Rolling rotates the view around an axis that goes through the length of the camera lens, causing the angle of the horizon to change.

Note: The settings described in this topic affect the orientation of output media files you export from a project. For information about temporary playback and navigation in the 360° viewer, see View and navigate 360° video in Final Cut Pro for Mac.
Change the 360° orientation using the Video inspector
In Final Cut Pro, create a 360° project.
Add a 360° clip to the timeline, then select the clip.
Position the playhead over the clip in the timeline so that the clip’s video is displayed in the viewer.
If the Video inspector isn’t already shown, do one of the following:
Choose Window > Show in Workspace > Inspector (or press Command-4).
Click the Inspector button on the right side of the toolbar.

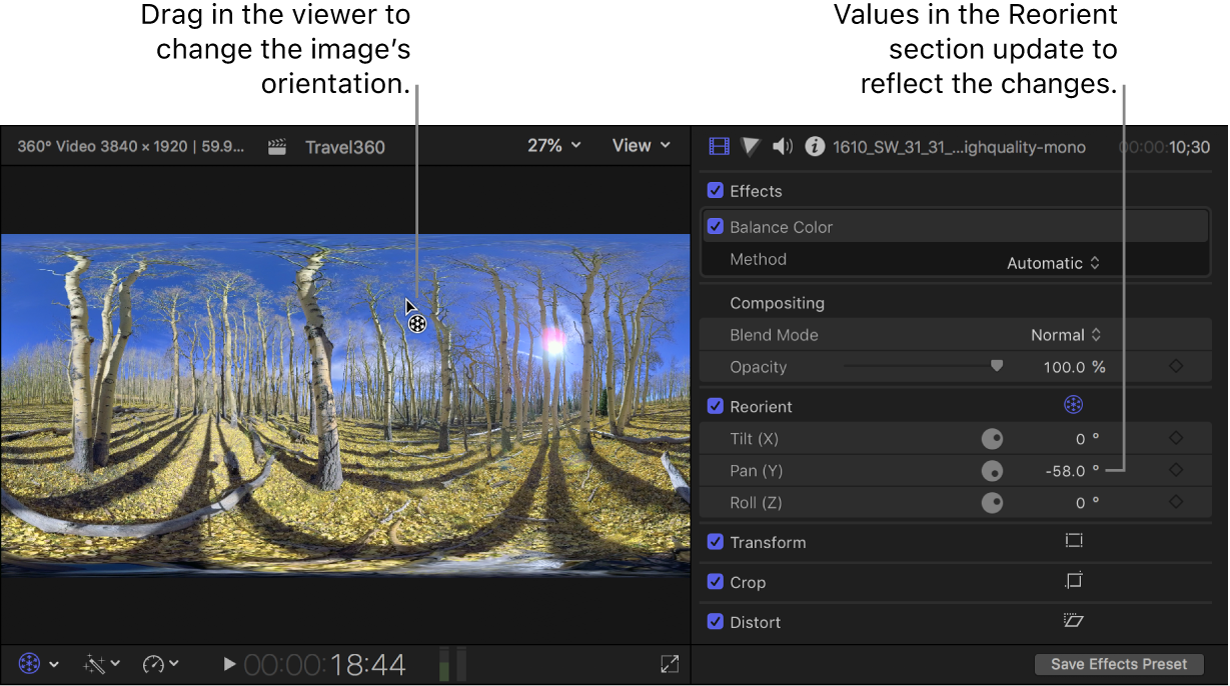
Adjust the parameters in the Reorient section of the inspector:
Tilt (X): Rotate the view up or down (around the x-axis).
Pan (Y): Rotate the view left or right (around the y-axis).
Roll (Z): Rotate the view clockwise or counterclockwise (around the z-axis).
Convergence: Adjust the apparent convergence point of elements in stereo (stereoscopic) media space, allowing them to be perceived as closer or farther away. (The Convergence parameter appears for stereoscopic clips.)
As you change the values in the Reorient section of the inspector, the viewer updates to reflect the changes.
Change the 360° orientation using the onscreen control
In Final Cut Pro, create a 360° project.
Add a 360° clip to the timeline, then select the clip.
Position the playhead over the clip in the timeline so that the clip’s video is displayed in the viewer.
To show the Reorient onscreen control, do one of the following:
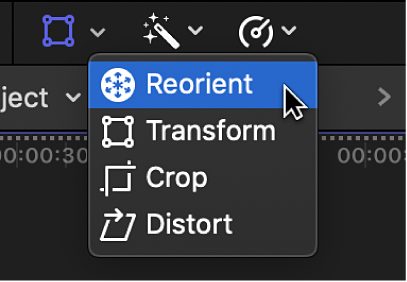
Click the pop-up menu in the lower-left corner of the viewer and choose Reorient.

Control-click in the viewer (not the 360° viewer) and choose Reorient.
Click the Reorient button
 in the Reorient section of the Video inspector.
When you move the pointer over the viewer, the pointer changes to the Reorient control. The Reorient button in the inspector and in the lower-left corner of the viewer turns blue to indicate that the Reorient control is active.
Drag in the viewer (not the 360° viewer) to adjust the orientation of the selected clip.
Tip: To constrain the movement to one axis, hold down the Shift key as you drag.
As you drag in the viewer, the values in the Reorient section of the inspector update to reflect the changes.

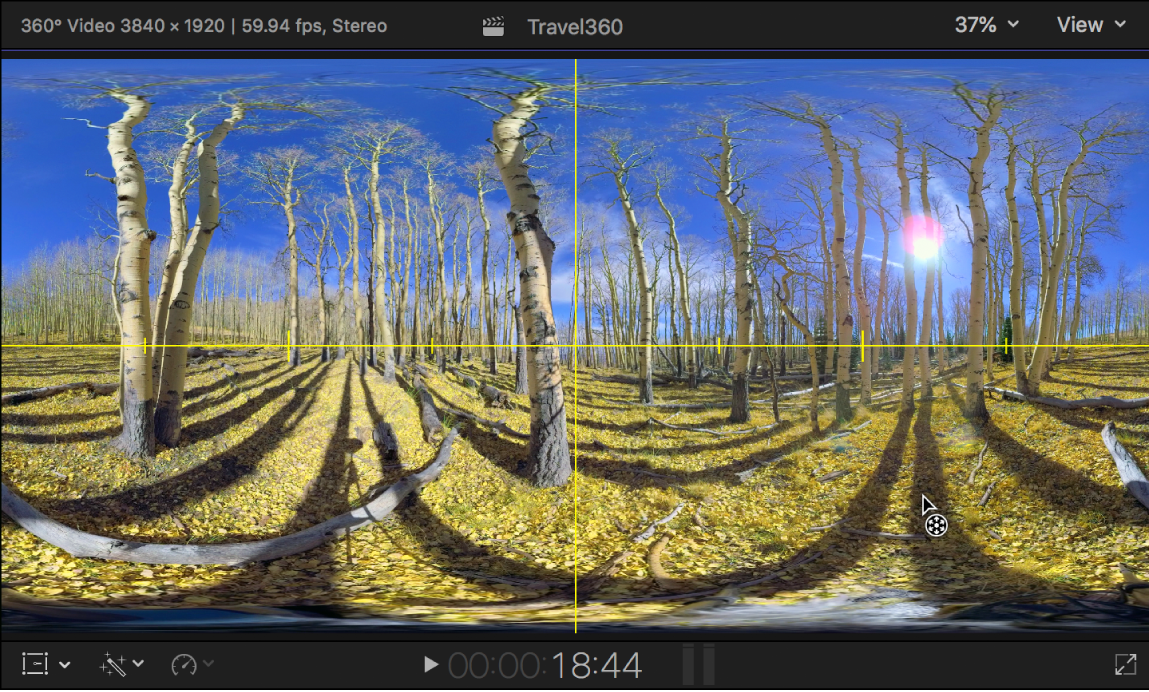
Use the Horizon guidelines to realign the image
When you make orientation changes in a 360° video clip (particularly when adjusting the Tilt and Roll parameters), you might lose track of the horizon line. You can show Horizon guidelines in the viewer to help you realign, recenter, or level the image—for example, to align the horizon on the x-axis.
In Final Cut Pro, click the View pop-up menu in the upper-right corner of the viewer, then choose Show Horizon in the Overlays section.

Note: It’s possible to create cinematic camera moves in your 360° projects by using keyframes to animate changes to the orientation parameters over time (see Add video effect keyframes in Final Cut Pro for Mac). However, this may not be appropriate given that 360° video is fully interactive and navigable by the viewing audience at all times. A more appropriate use of this technique might be animating a 360° clip in a rectilinear project. See Add 360° clips to standard projects in Final Cut Pro for Mac.
Download this guide: PDF