Final Cut Pro X User Guide
- Welcome
-
- What’s new in Final Cut Pro 10.4.7
- What’s new in Final Cut Pro 10.4.6
- What’s new in Final Cut Pro 10.4.4
- What’s new in Final Cut Pro 10.4.1
- What’s new in Final Cut Pro 10.4
- What’s new in Final Cut Pro 10.3
- What’s new in Final Cut Pro 10.2
- What’s new in Final Cut Pro 10.1.2
- What’s new in Final Cut Pro 10.1
- What’s new in Final Cut Pro 10.0.6
- What’s new in Final Cut Pro 10.0.3
- What’s new in Final Cut Pro 10.0.1
-
- Intro to effects
-
- Intro to transitions
- How transitions are created
- Set the default transition
- Add transitions
- Delete transitions
- Adjust transitions in the timeline
- Adjust transitions in the inspector and viewer
- Merge jump cuts with the Flow transition
- Adjust transitions with multiple images
- Modify transitions in Motion
-
- Add storylines
- Use the precision editor
- Conform frame sizes and rates
- Use XML to transfer projects
-
- Glossary
- Copyright

Final Cut Pro onscreen control examples
Following are a few examples of the onscreen controls you might use while working with clip effects and transitions. Many other clip effects and transitions use the same or similar controls—these examples are intended to provide general information about using the onscreen controls.
Keep the following in mind while going through these examples:
The examples assume that you’re familiar with applying clip effects to clips in the timeline.
You can apply multiple clip effects to the same clip, but for the purpose of these examples, it’s best to either apply each clip effect to a different timeline clip or remove the clip effect before applying a different one.
These examples also assume that you’re familiar with adding transitions to edit points in the timeline.
Most of the effects and transitions have additional adjustments in the Video inspector or Transition inspector.
Example: Apply a Censor effect
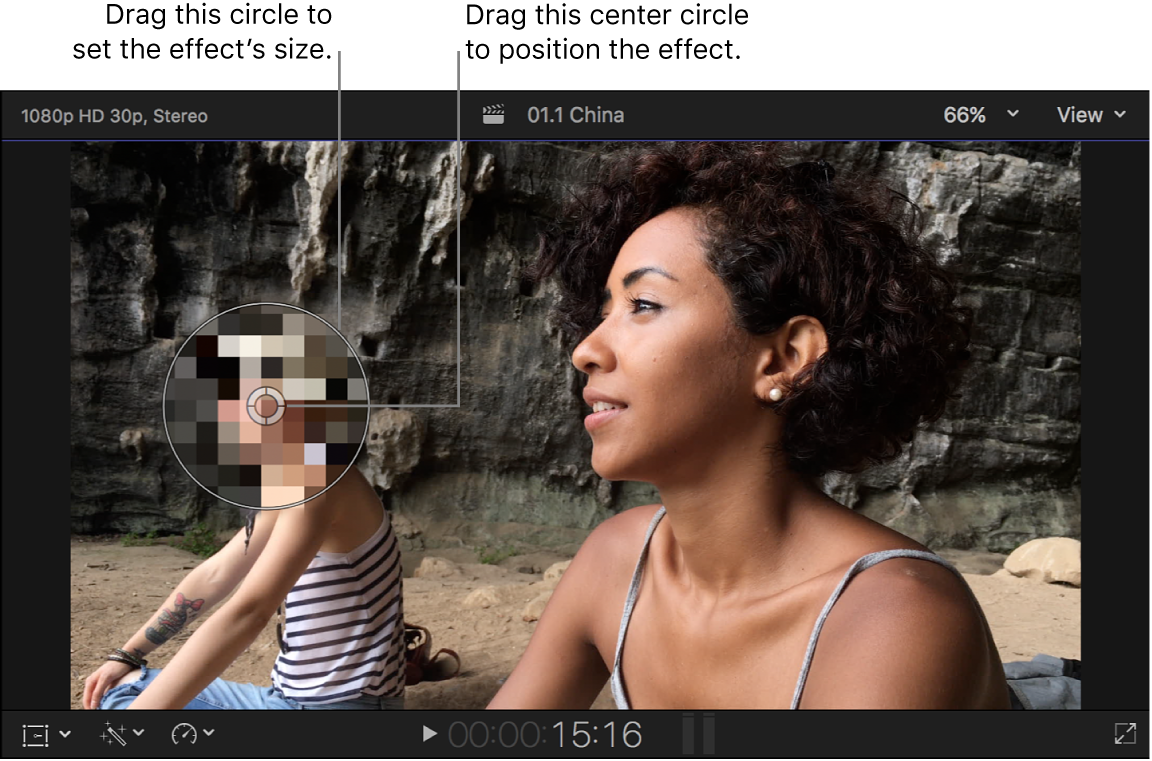
In Final Cut Pro, open the Effects browser and drag the Censor effect to a clip in the timeline.
Position the playhead over the clip in the timeline so that the clip’s video is displayed in the viewer.
To adjust the effect’s onscreen controls, do any of the following:
Position the effect: Drag the center circle.
Set the effect’s size: Drag the outer circle.
Example: Apply a Droplet effect
In Final Cut Pro, open the Effects browser and drag the Droplet effect to a clip in the timeline.
Position the playhead over the clip in the timeline so that the clip’s video is displayed in the viewer.
To adjust the effect’s onscreen controls, do any of the following:
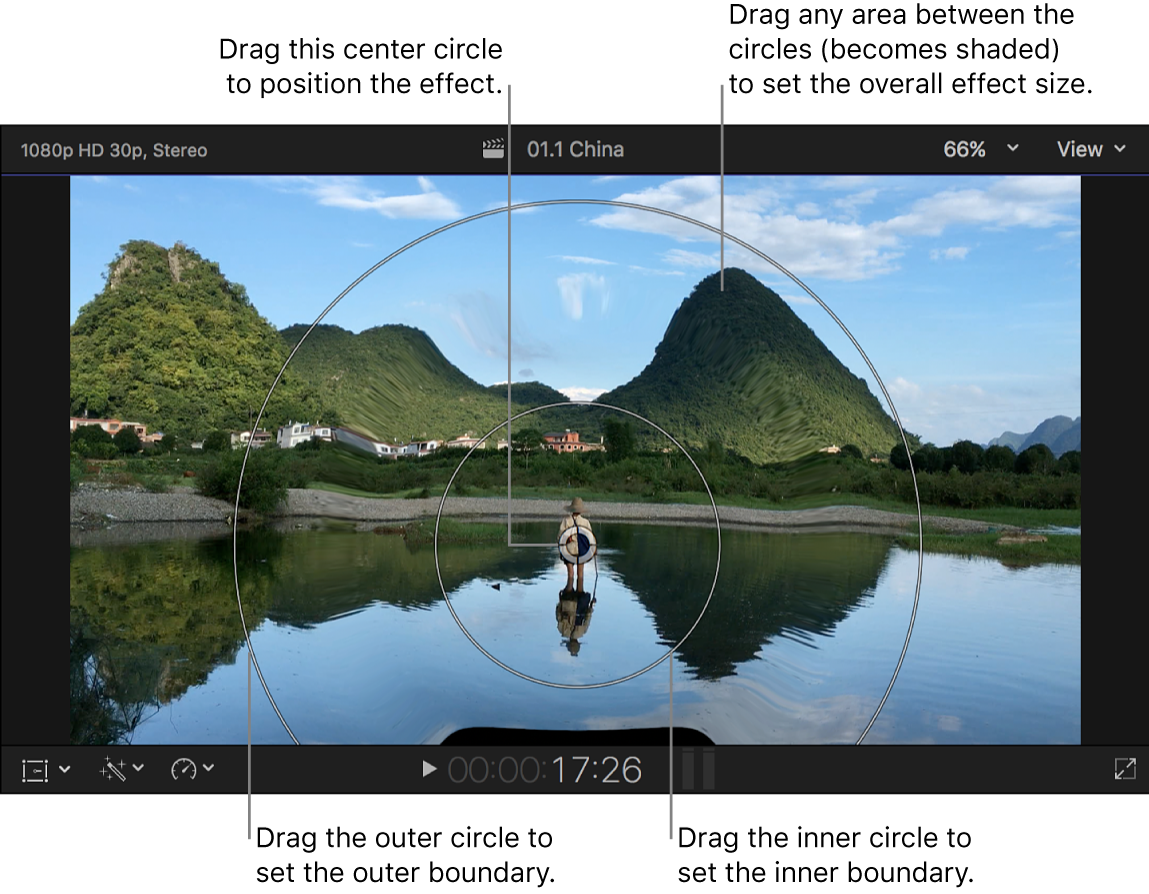
Position the effect: Drag the center circle.
Set the effect’s outer limit: Drag the outer circle.
Set the effect’s inner limit: Drag the inner circle.
Set the effect’s overall size: Drag any area in between the inner and outer circles. A shaded area appears when the pointer is in this area.
Example: Apply a Prism effect
In Final Cut Pro, open the Effects browser and drag the Prism effect to a clip in the timeline.
Position the playhead over the clip in the timeline so that the clip’s video is displayed in the viewer.
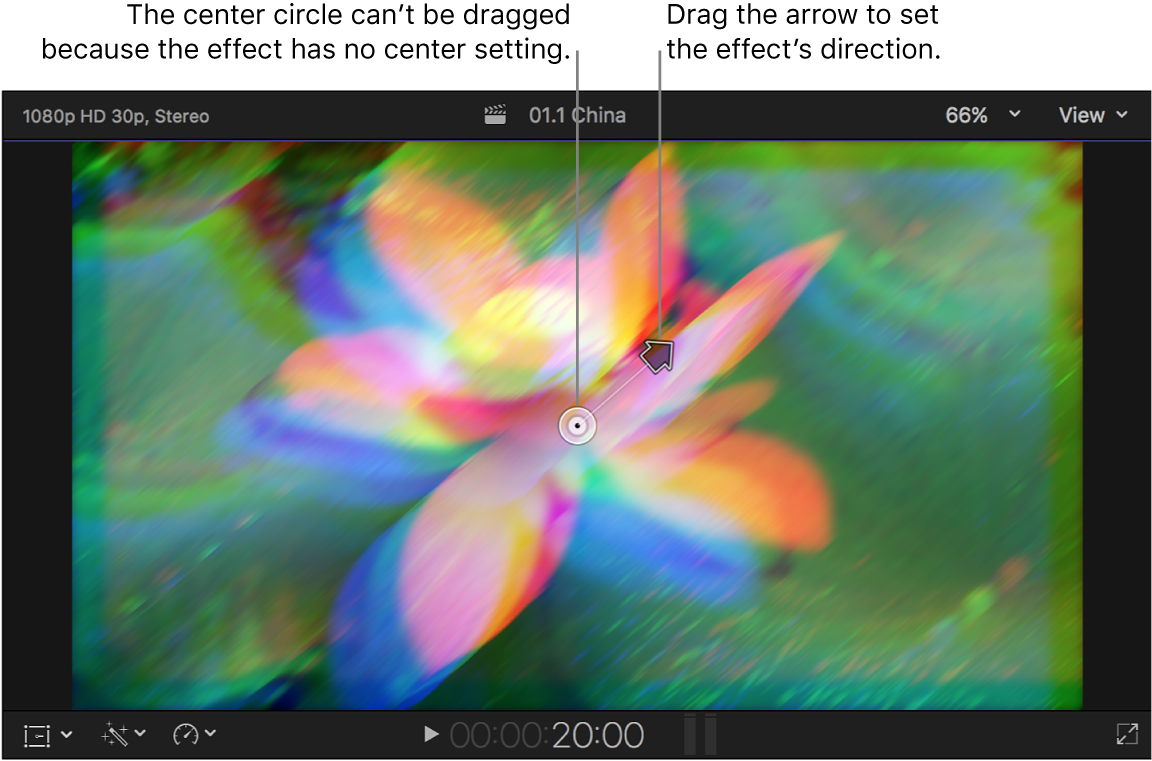
To adjust the direction of the effect, drag the arrow.
Because the effect has no center setting, the circle in the center can’t be dragged.
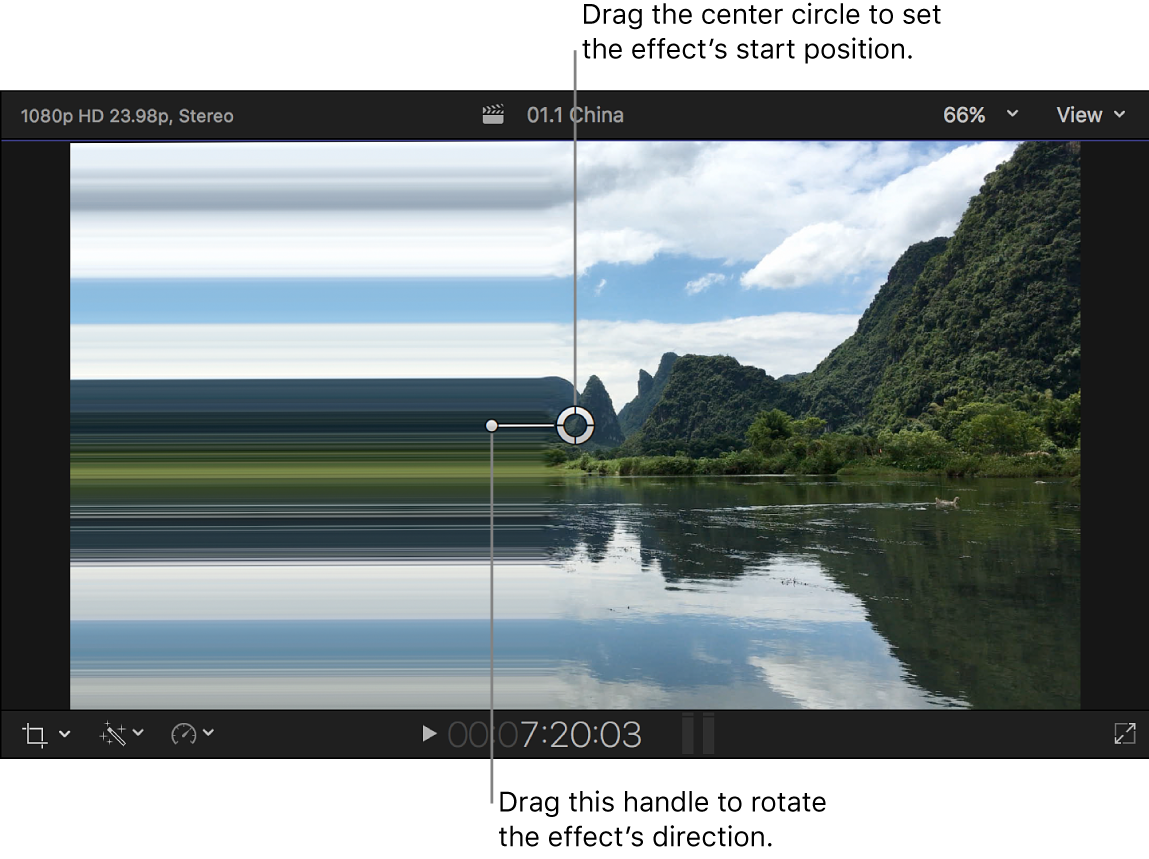
Example: Apply a Scrape effect
In Final Cut Pro, open the Effects browser and drag the Scrape effect to a clip in the timeline.
Position the playhead over the clip in the timeline so that the clip’s video is displayed in the viewer.
To adjust the effect’s onscreen controls, do any of the following:
Position the effect: Drag the center circle.
Set the effect’s direction: Drag the rotation handle.
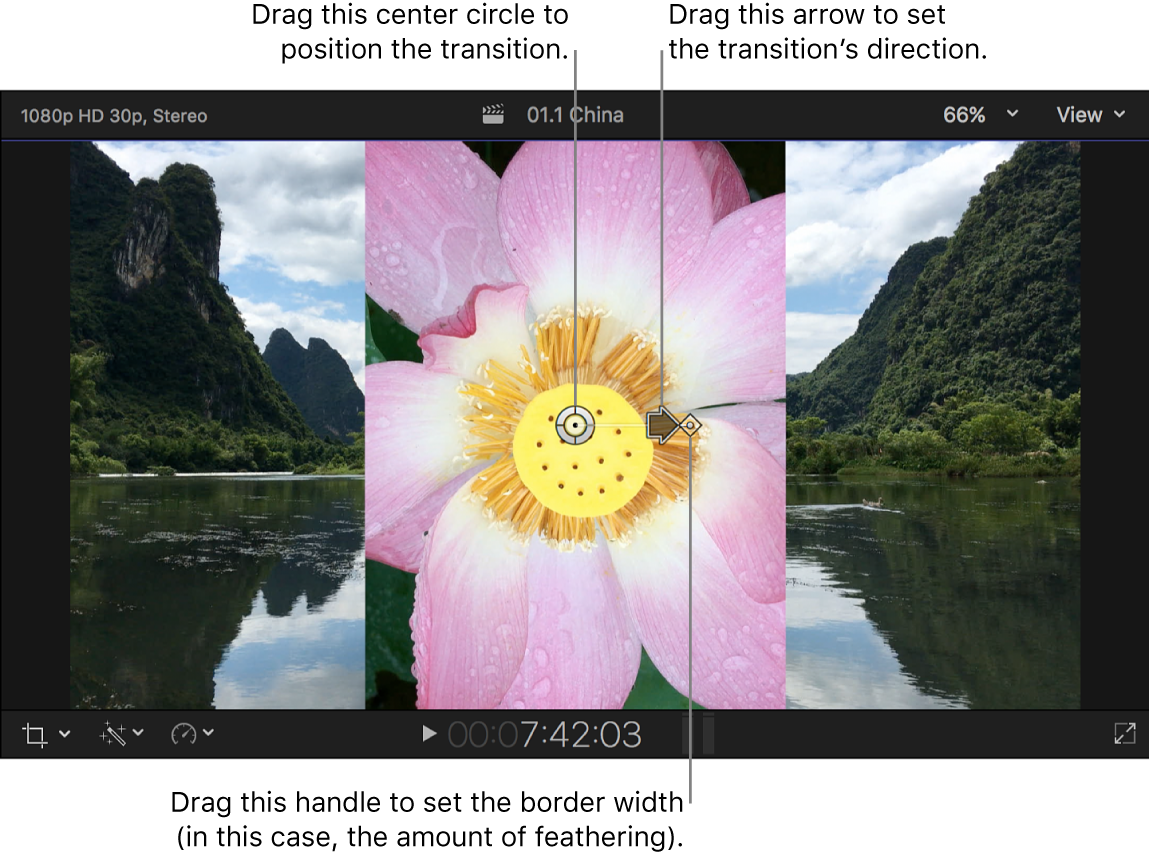
Example: Apply a Center transition
In Final Cut Pro, open the Transitions browser and drag the Center transition to an edit point in the timeline.
Position the playhead over the clip in the timeline so that the clip’s video is displayed in the viewer.
To adjust the transition’s onscreen controls, do any of the following:
Position the transition: Drag the center circle.
Set the transition’s direction: Drag the arrow.
Set the transition’s border width: Drag the outer handle toward or away from the center circle.
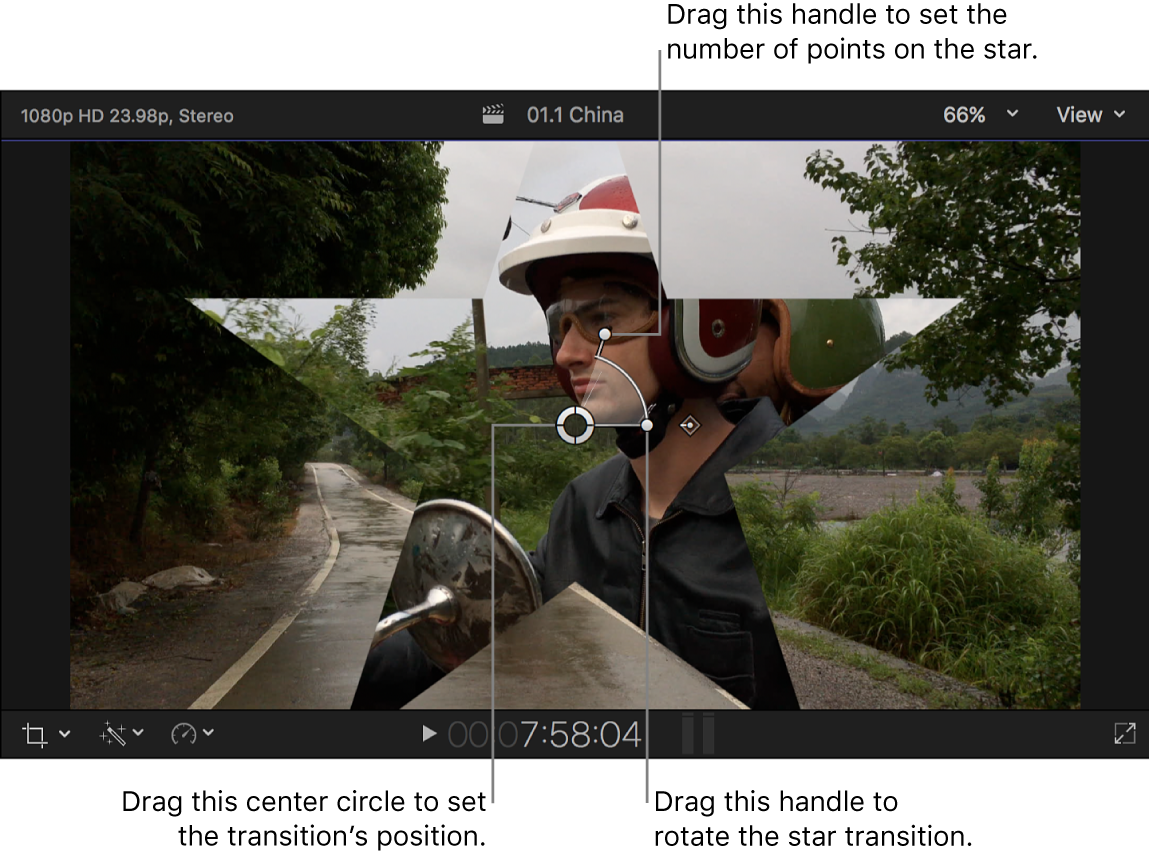
Example: Apply a Star transition
In Final Cut Pro, open the Transitions browser and drag the Star transition to an edit point in the timeline.
Position the playhead over the clip in the timeline so that the clip’s video is displayed in the viewer.
To adjust the transition’s onscreen controls, do any of the following:
Position the transition: Drag the center circle.
Set the number of points on the star: Drag the longer handle.
Rotate the star: Drag the shorter handle.
Example: Apply a Zoom & Pan transition
In Final Cut Pro, open the Transitions browser and drag the Zoom & Pan transition to an edit point in the timeline.
Position the playhead over the clip in the timeline so that the clip’s video is displayed in the viewer.
To adjust the transition’s onscreen controls, do any of the following:
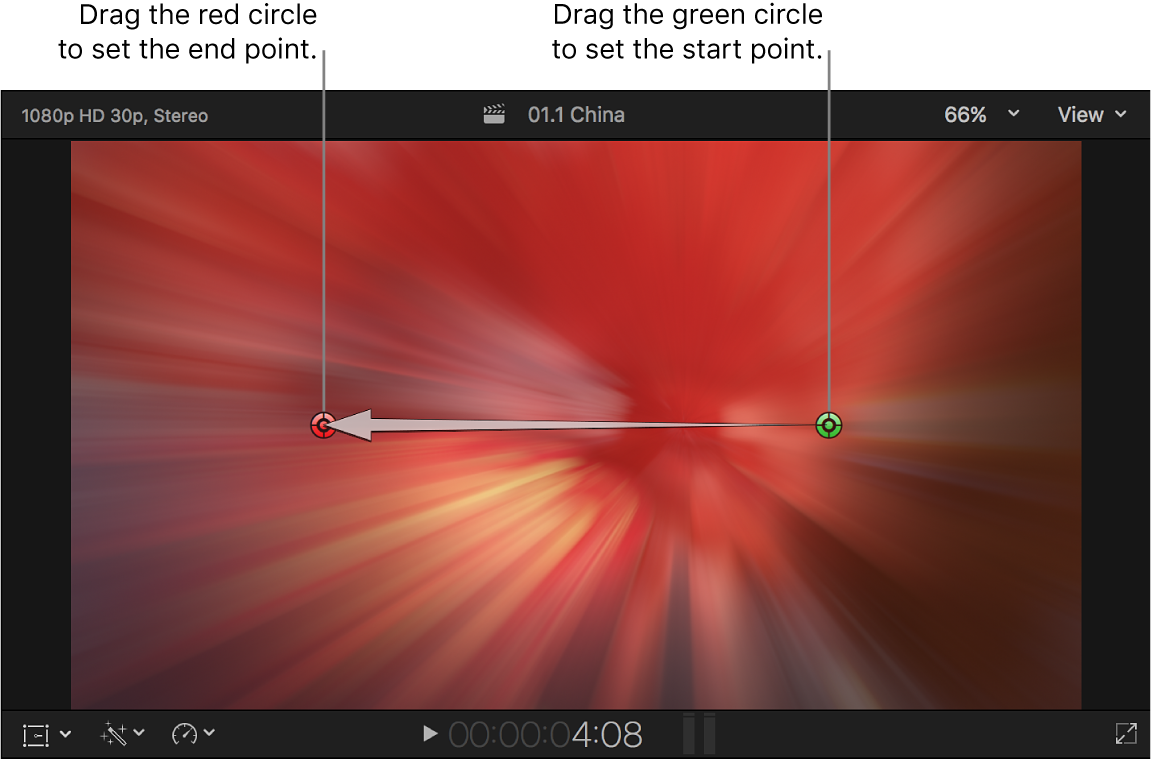
Set the transition’s start point: Drag the green circle.
Set the transition’s end point: Drag the red circle.
