Final Cut Pro User Guide for Mac
- Welcome
- What’s new
-
- Intro to effects
-
- Intro to transitions
- How transitions are created
- Add transitions and fades
- Quickly add a transition with a keyboard shortcut
- Set the default duration for transitions
- Delete transitions
- Adjust transitions in the timeline
- Adjust transitions in the inspector and viewer
- Merge jump cuts with the Flow transition
- Adjust transitions with multiple images
- Modify transitions in Motion
-
- Add storylines
- Use the precision editor
- Conform frame sizes and rates
- Use XML to transfer projects
- Glossary
- Copyright

Modify groups of keyframes in Final Cut Pro for Mac
There are many ways you can modify keyframes to create simple or complex animations. In addition to modifying individual keyframes, you can also modify keyframe groups, effect curves (the line segments between keyframes), or the entire set of keyframes for a given parameter. You can make all of these changes with great precision.
Select and modify multiple keyframes
You can select and modify multiple keyframes in the Video Animation or Audio Animation editor, or directly in the body of a clip (for audio level keyframes).
In Final Cut Pro, do one of the following:
Shift-click more than one keyframe.
All intermediate keyframes are selected. You can’t select nonadjacent keyframes.
Drag a selection rectangle around the keyframes you want to select.
Tip: In the Video Animation or Audio Animation editor, you can select a range by dragging with the Select tool or the Range Selection tool. To select a range of keyframes displayed in the clip body (such as audio keyframes) you must use the Range Selection tool.
To modify the selected keyframes, do any of the following:
Move the group to a different place in time: Drag any individual keyframe horizontally.
Change the value of all the keyframes: Drag any individual keyframe vertically.
Keyframe values remain relative to one another while you drag; however, if you “flatten” the curve by dragging all the way to the top or bottom of the graph, the keyframe values remain in that flattened state, with all keyframes sharing the same value.
Increase the relative values by 1: Press Option-Up Arrow.
Decrease the relative values by 1: Press Option-Down Arrow.
Move the keyframes earlier in time by 1 frame: Press Comma (,).
Move the keyframes later in time by 1 frame: Press Period (.).
Tip: You can also modify any two keyframes simultaneously by selecting the line segment between them and then performing any of the steps above.
Adjust all keyframes on a curve
You can adjust all keyframes on a curve at once in the Video Animation or Audio Animation editor, or directly in the body of a clip (for audio level keyframes).
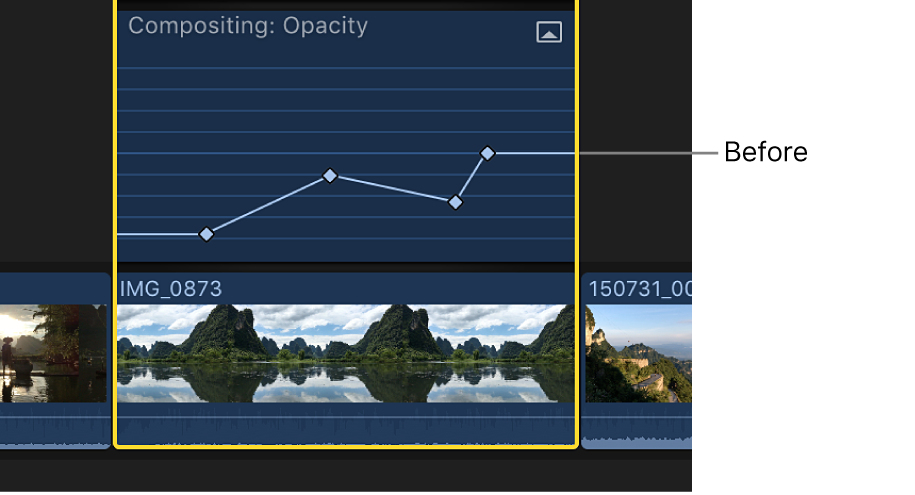
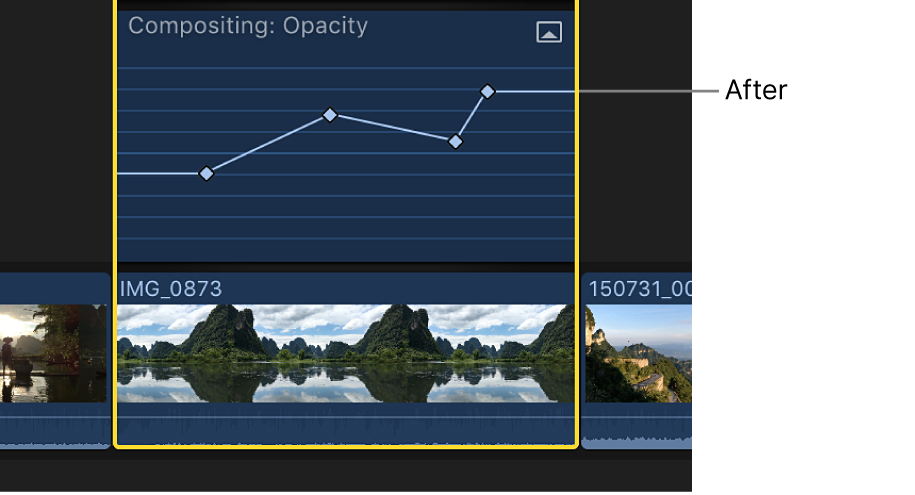
In Final Cut Pro, hold down the Command and Option keys, then drag either a keyframe or a curve up or down.
All keyframes are adjusted by the same amount, preserving the original shape of the curve. However, if you “flatten” the curve by dragging all the way to the top or bottom of the graph, the keyframe values remain in that flattened state, with all keyframes sharing the same value.


You can also copy specific keyframes between different attributes or between different clips. See Copy and paste keyframes in Final Cut Pro for Mac.
Download this guide: Apple Books | PDF