Logic Pro User Guide for iPad
-
- What is Logic Pro?
- Working areas
- Work with function buttons
- Work with numeric values
-
- Intro to tracks
- Create tracks
- Create tracks using drag and drop
- Choose the default region type for a software instrument track
- Select tracks
- Duplicate tracks
- Reorder tracks
- Rename tracks
- Change track icons
- Change track colors
- Use the tuner on an audio track
- Show the output track in the Tracks area
- Delete tracks
- Edit track parameters
- Start a Logic Pro subscription
- How to get help
-
- Intro to recording
-
- Before recording software instruments
- Record software instruments
- Record additional software instrument takes
- Record to multiple software instrument tracks
- Record multiple MIDI devices to multiple tracks
- Record software instruments and audio simultaneously
- Merge software instrument recordings
- Spot erase software instrument recordings
- Replace software instrument recordings
- Capture your most recent MIDI performance
- Route MIDI internally to software instrument tracks
- Record with Low Latency Monitoring mode
- Use the metronome
- Use the count-in
-
- Intro to arranging
-
- Intro to regions
- Select regions
- Cut, copy, and paste regions
- Move regions
- Remove gaps between regions
- Delay region playback
- Trim regions
- Loop regions
- Repeat regions
- Mute regions
- Split and join regions
- Stretch regions
- Separate a MIDI region by note pitch
- Bounce regions in place
- Change the gain of audio regions
- Create regions in the Tracks area
- Convert a MIDI region to a Session Player region or a pattern region
- Rename regions
- Change the color of regions
- Delete regions
-
- Intro to chords
- Add and delete chords
- Select chords
- Cut, copy, and paste chords
- Move and resize chords
- Loop chords on the Chord track
- Edit chords
- Work with chord groups
- Use chord progressions
- Change the chord rhythm
- Choose which chords a Session Player region follows
- Analyze the key signature of a range of chords
- Create fades on audio regions
- Extract vocal and instrumental stems with Stem Splitter
- Access mixing functions using the Fader
-
- Intro to Step Sequencer
- Use Step Sequencer with Drum Machine Designer
- Record Step Sequencer patterns live
- Step record Step Sequencer patterns
- Load and save patterns
- Modify pattern playback
- Edit steps
- Edit rows
- Edit Step Sequencer pattern, row, and step settings in the inspector
- Customize Step Sequencer
-
- Effect plug-ins overview
-
- Instrument plug-ins overview
-
- ES2 overview
- Interface overview
-
- Modulation overview
- Use the Mod Pad
-
- Vector Envelope overview
- Use Vector Envelope points
- Use Vector Envelope solo and sustain points
- Set Vector Envelope segment times
- Vector Envelope XY pad controls
- Vector Envelope Actions menu
- Vector Envelope loop controls
- Vector Envelope point transition shapes
- Vector Envelope release phase behavior
- Use Vector Envelope time scaling
- Modulation source reference
- Via modulation source reference
-
- Sample Alchemy overview
- Interface overview
- Add source material
- Save a preset
- Edit mode
- Play modes
- Source overview
- Synthesis modes
- Granular controls
- Additive effects
- Additive effect controls
- Spectral effect
- Spectral effect controls
- Filter module
- Low, bandpass, and highpass filters
- Comb PM filter
- Downsampler filter
- FM filter
- Envelope generators
- Mod Matrix
- Modulation routing
- Motion mode
- Trim mode
- More menu
- Sampler
- Studio Piano
- Copyright
Phat FX processors in Logic Pro for iPad
The parameters of all Phat FX processors are described in the respective sections below.
Bass Enhancer parameters
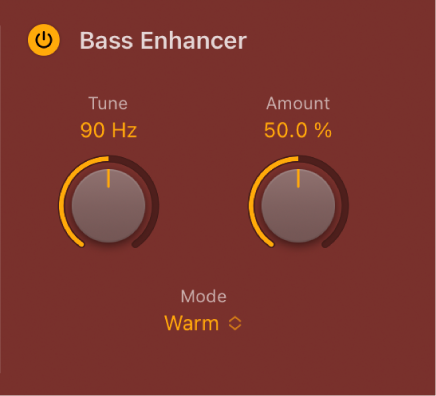
Bass Enhancer boosts the signal around a defined frequency.
Bass Enhancer On/Off button: Enable/disable the bass enhancer effect. You can also tap the button in the Effects order strip to enable/disable the processor.
Tune knob and field: Set the center frequency for bass enhancement. Signals surrounding this frequency are boosted.
Amount knob and field: Set the level of the effect signal.
Mode pop-up menu: Choose a bass enhancement characteristic. Each option provides a different tonal color and response.
Compressor parameters
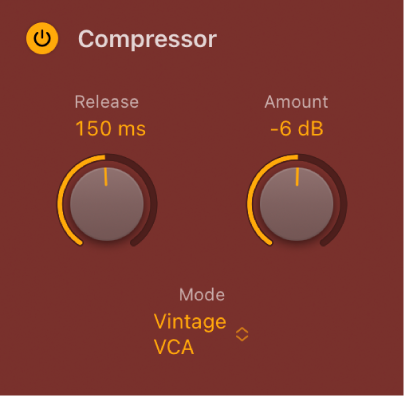
The compression unit tightens up your audio by smoothing out dynamics and increasing the overall volume.
Compressor On/Off button: Enable/disable the compressor effect. You can also tap the button in the Effects order strip to enable/disable the processor.
Release knob and field: Set the time it takes for the compression circuit to stop reducing the signal.
Amount knob and field: Set the level of compression.
Mode pop-up menu: Choose an emulated compressor circuit. The choices are Classic, Clip, Platinum, Studio VCA and FET, Classic VCA, or Vintage VCA, FET, and Opto.
FET models: Field Effect Transistor compressors are known for their fast transient response. They can deliver a clean or warm tone (notably midrange), and can be pushed toward a “crunchy” tone on transients. FET compressors are ideal for drums, vocals, and guitars. FET compressors can only attenuate the signal.
VCA models: Voltage Controlled Amplifier compressors can respond slowly or quickly to incoming transients. They tend toward a clean tone and are suited for bass guitars and low-frequency signals. VCA compressors can attenuate or amplify the signal.
Opto model: Optical compressors are known for their fast transient response and nonlinear release handling. They are very clean and are ideal for vocals and guitars.
Distortion parameters
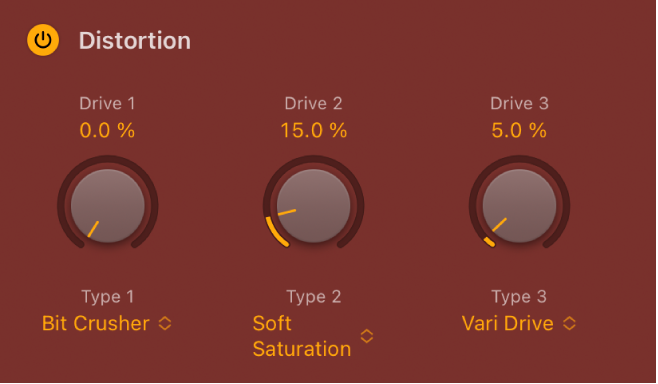
The three distortion units can be used independently or combined to create a huge variety of tones.
Distortion On/Off button: Enable/disable the distortion effect module. You can also tap the button in the Effects order strip to enable/disable the processor.
Drive knobs and fields: Set the level for each of the three distortion units.
Type pop-up menus: Choose a distortion characteristic for effect unit 1, 2, or 3. Each option provides a different tonal color and response.
Bitcrusher is a harsher-sounding digital effect.
Diode gently clips and saturates the tone.
Dirt and Grit are distortions that can saturate heavily when you use higher Amount values.
Downsampler is a lo-fi digital effect (similar to Bitcrusher but frequency dependent).
Exciter hypes and emphasizes high-frequency content.
Scream is a classic tube distortion effect that emphasizes high-frequency content.
Soft Saturation is a tube-like distortion effect that can warm and thicken the tone.
Squared can be used to hard clip the tone.
Tube is a classic tube distortion effect.
Vari Drive emulates a tube-based distortion effect that is great for clean boost.
Mod FX parameters
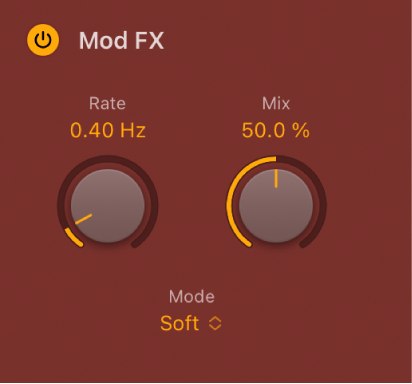
The modulation unit provides four types of chorus-like effects, ranging from soft through to doubling or ensemble type processing.
Mod FX On/Off button: Enable/disable the Mod FX unit. You can also tap the button in the Effects order strip to enable/disable the processor.
Rate knob and field: Set the speed of the modulation effect.
Mix knob and field: Set the level of the original versus modulated signal. This is a modulation amount control.
Mode pop-up menu: Choose a modulation characteristic. Each option provides a different tonal color and effect depth.
Filter parameters
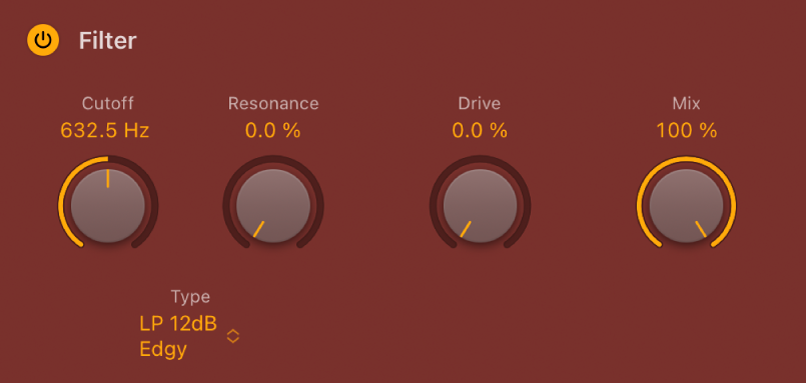
The filter unit provides dozens of filter types. See Phat FX filter types.
Filter On/Off button: Enable/disable the filter effect. You can also tap the button in the Effects order strip to enable/disable the processor.
Cutoff knob and field: Set the cutoff frequency for the filter. Higher frequencies are attenuated and lower frequencies are allowed to pass in a lowpass (LP) filter. The reverse is true in a highpass (HP) filter. When in a bandpass (BP) mode, cutoff determines the center frequency of the band that is allowed to pass. The comb and other filter types change the names and behaviors of the filter controls.
Resonance knob and field: Boost or cut signals in the frequency band that surrounds the cutoff frequency.
Type pop-up menu: Choose a filter characteristic. Each option provides a different tonal color and response to Cutoff, Drive, and Resonance control values.
Note: The chosen filter type can alter the names and functions of the default Cutoff, Resonance, and Drive knobs.
Drive knob and field: Overdrive the filter. This can lead to intense distortions, depending on filter type.
Mix knob and field: Set the level of the original versus filtered signal.
Bandpass parameters
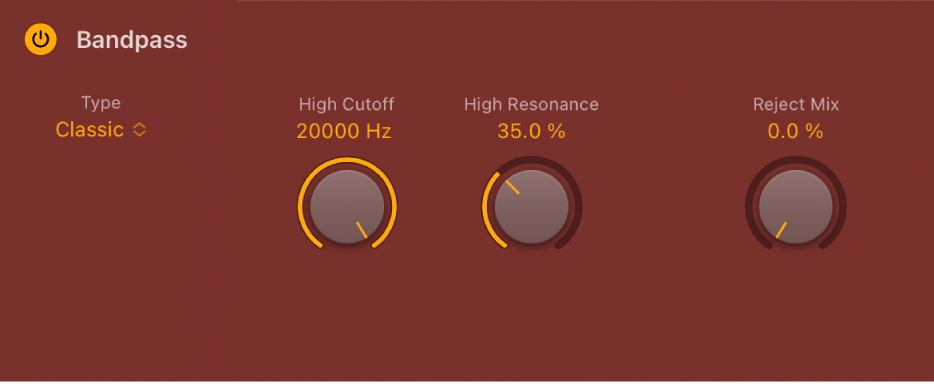
The Bandpass unit passes the portion of a signal occupying a band surrounding the cutoff frequency and rolls off the portions above and below that band. The Reject Mix knob lets you restore (mix in) the signal that was not band passed at the Bandpass unit position within the overall signal chain. This allows you to apply one or more effects to a specific frequency range only, leaving other frequencies unchanged.
Bandpass On/Off button: Enable/disable the bandpass filter. You can also tap the button in the Effects order strip to enable/disable the processor.
Type pop-up menu: Choose a filter characteristic. Each option provides a different tonal color and response to High and Low Resonance control values.
Low/High Cutoff knobs and fields: Set the lowest and highest frequencies allowed to pass by the filter. Frequencies outside these values are cut.
Low/High Resonance knobs and fields: Determine the basic sonic character of filtering around the low and high frequencies set with the Low/High knobs. Higher Resonance settings emphasize the frequency, resulting in a sharper, brighter character. Lower Resonance settings result in a softer character.
Reject Mix knob: Mix in (restore) the signal that was not band passed at the Bandpass unit position within the signal chain.
Download this guide: PDF