
Create split edits in Final Cut Pro for Mac
You can set separate video and audio start and end points in an individual clip, creating a split edit. You can use a split edit to introduce the sound of a new shot or scene before cutting to the video of that shot or scene, or to extend the audio of a shot over a subsequent shot. For example, you could cut from a clip of a person talking to video of a person listening, while the audio from the first clip continues.
You can use split edits in many different situations—in dialogue scenes, when cutting to illustrative B-roll footage during an interview, or when transitioning from one scene to another. Split edits help you create seamless edits from one shot to the next.
The split edit technique results in L-shaped and J-shaped clips with audio extending to the left or the right. These are known as L-cuts and J-cuts.
Create a split edit by dragging
To create the split edit, you extend the audio of one clip over a neighboring clip. In this example, the audio from the close-up shot is extended over the previous shot to create a J-cut.
In Final Cut Pro, add clips to the timeline in the order in which you want them to appear in your movie.

To show separate audio for the clip you want to edit, do one of the following:
Select the clip in the timeline, then choose Clip > Expand Audio (or press Control-S).
Double-click the clip’s audio waveform.
Show audio lanes in the timeline for the clips you want to edit.
The audio and video portions of the clip appear as discrete elements that you can change individually. The audio and video are still attached and will remain in sync.

Drag the start point (left edge) of the video portion of the clip to the right, effectively trimming it with a roll edit.
The example below shows the video start point of the close-up shot being dragged to the right.
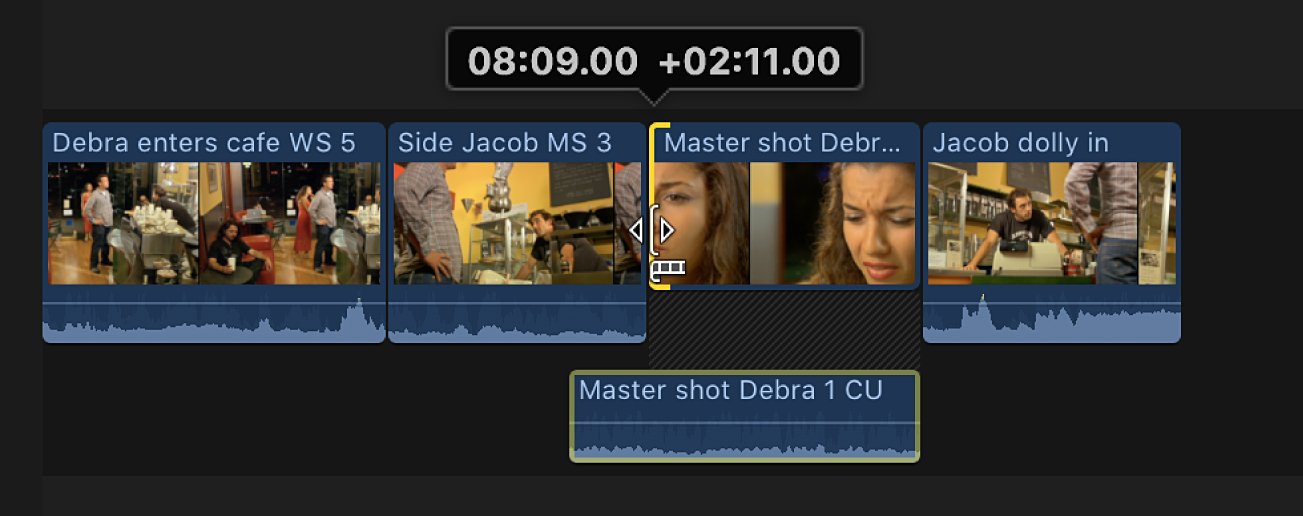
This creates a J-shaped split edit, with the start point of the audio overlapping the preceding clip.
To complete the split edit, show separate audio for the preceding clip, then do one of the following:
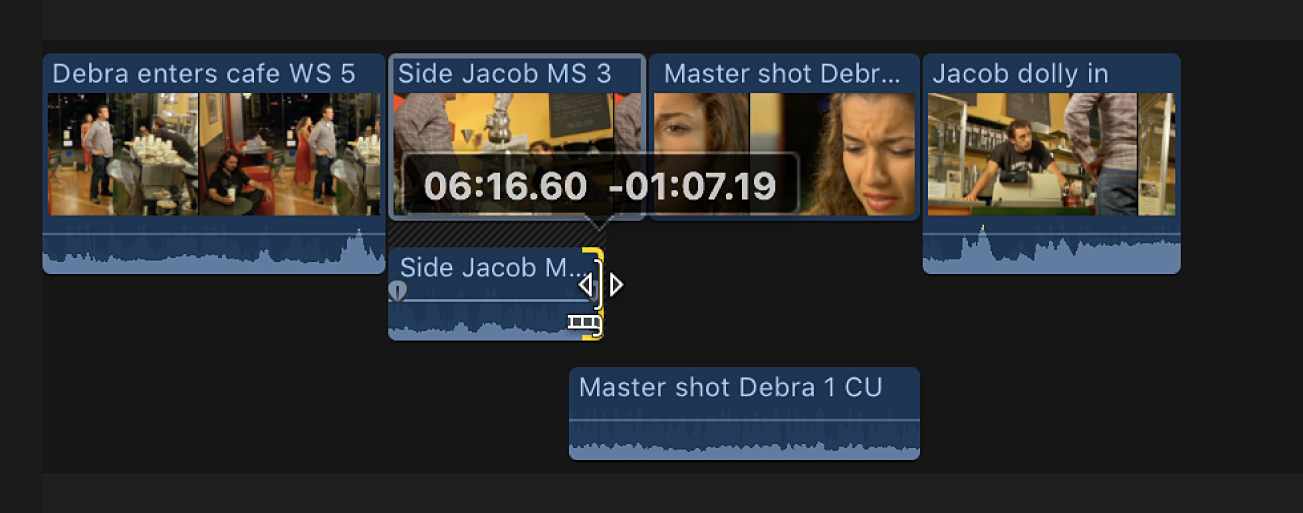
Drag the preceding clip’s end point to the left so that the two audio clips no longer overlap.
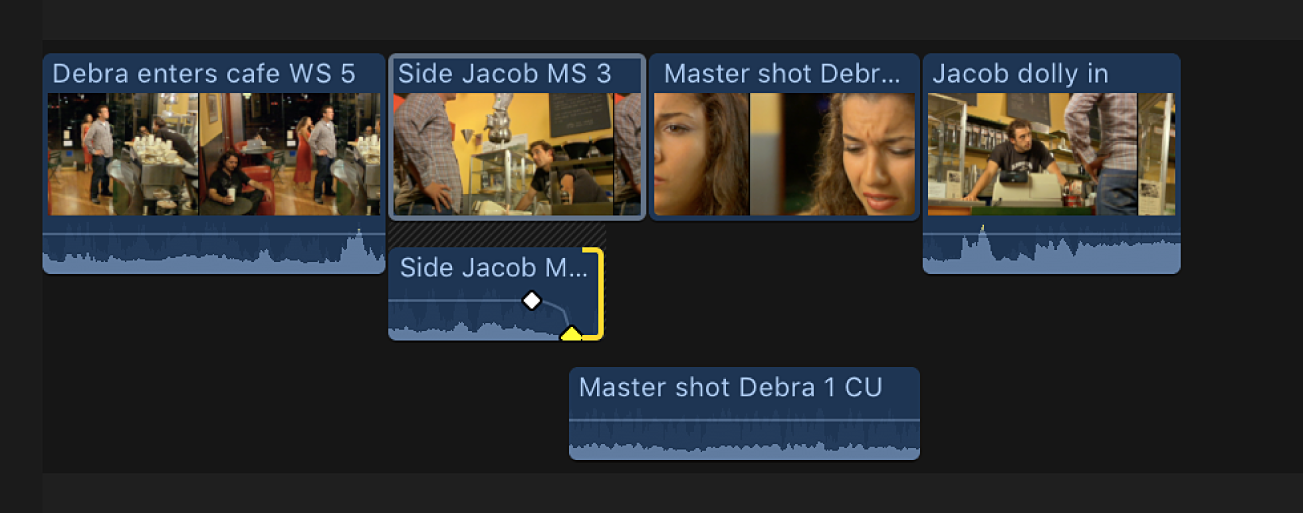
Adjust the audio level of either clip (using keyframes or audio fade handles) so that the audio overlap sounds natural.
If you want to turn off the separate audio view to “clean up” the affected clips, do one of the following:
Select the clip in the timeline, then choose Clip > Collapse Audio (or press Control-S).
Double-click the clip’s audio waveform.
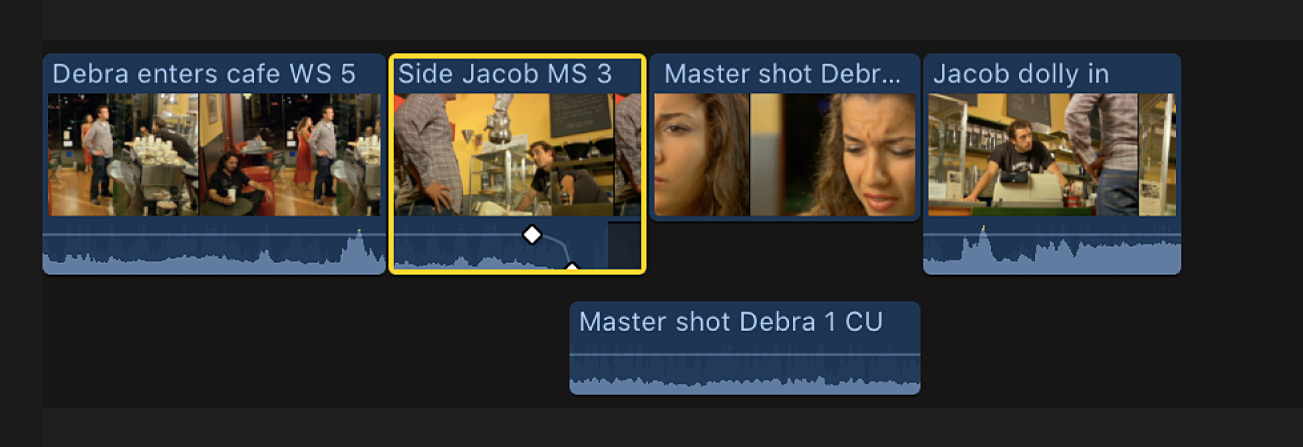
When you play back this section of the timeline, the person in the close-up shot begins to speak before the video cuts to the close-up.
Create a split edit using keyboard shortcuts
You can create split edits quickly using keyboard shortcuts. In this example, the audio from the close-up is extended over the medium shot to create a J-cut.
In Final Cut Pro, confirm that the two adjacent clips have sufficient media handles. If not, trim the clips (shorter) to create the media handles.
To show separate audio for the two adjacent clips, do one of the following:
In the timeline, select the clips whose audio you want to expand, then choose Clip > Expand Audio (or press Control-S).
Double-click the clip’s audio waveform.

Move the playhead to the edit point between the two clips.
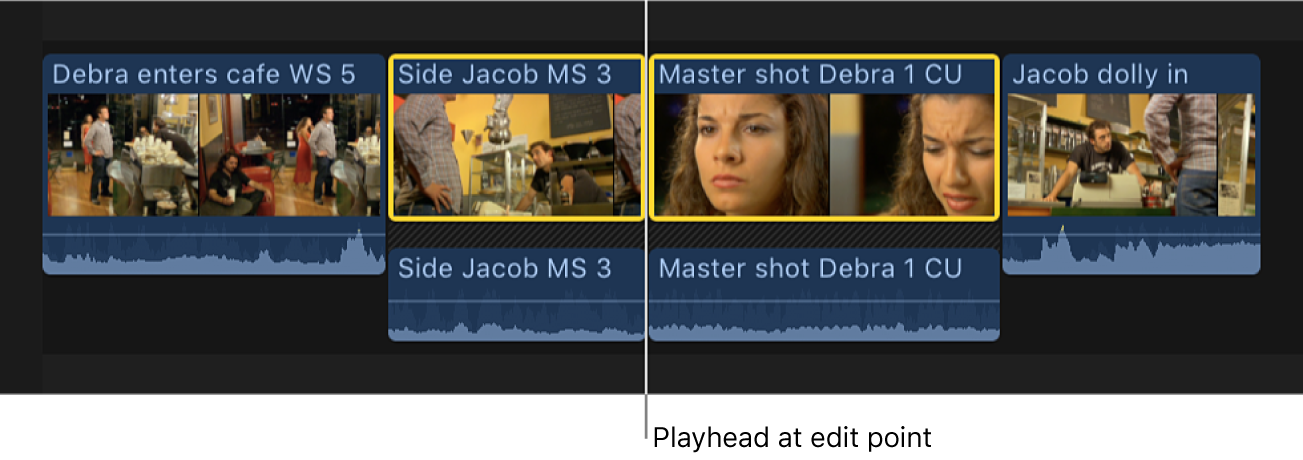
To ensure accurate playhead placement, use keyboard shortcuts:
Move the playhead to the previous edit point: Press Semicolon (;) or the Up Arrow key.
Move the playhead to the next edit point: Press Apostrophe (’) or the Down Arrow key.
Do one of the following:
Select both sides of the audio edit point: Press Shift-Backslash (\).
Select both sides of the video edit point: Press Backslash (\).
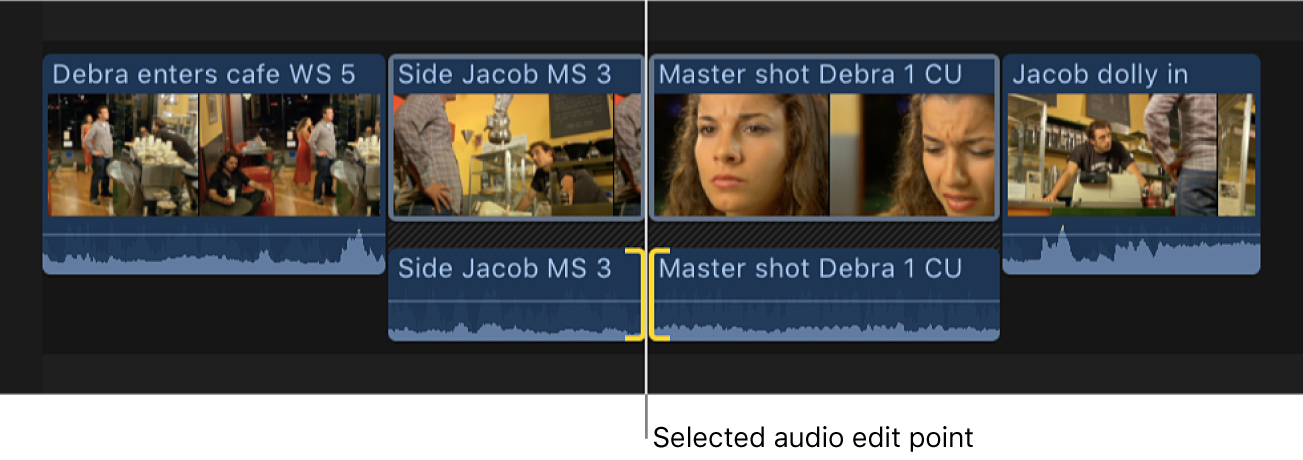
To roll the audio edit point or the video edit point, do any of the following:
Nudge the edit point left or right: Press Comma (,) or Period (.), respectively.
Nudge the edit point 10 frames left or right: Press Shift-Comma (,) or Shift-Period (.), respectively.
Add or subtract from the current edit using timecode: Press the Plus Sign (+) or Minus Sign (–) key followed by the timecode duration, then press Return.
The timecode entry field (with blue numbers) appears below the viewer as you type. For more information about entering timecode values, see Navigate using timecode in Final Cut Pro for Mac.
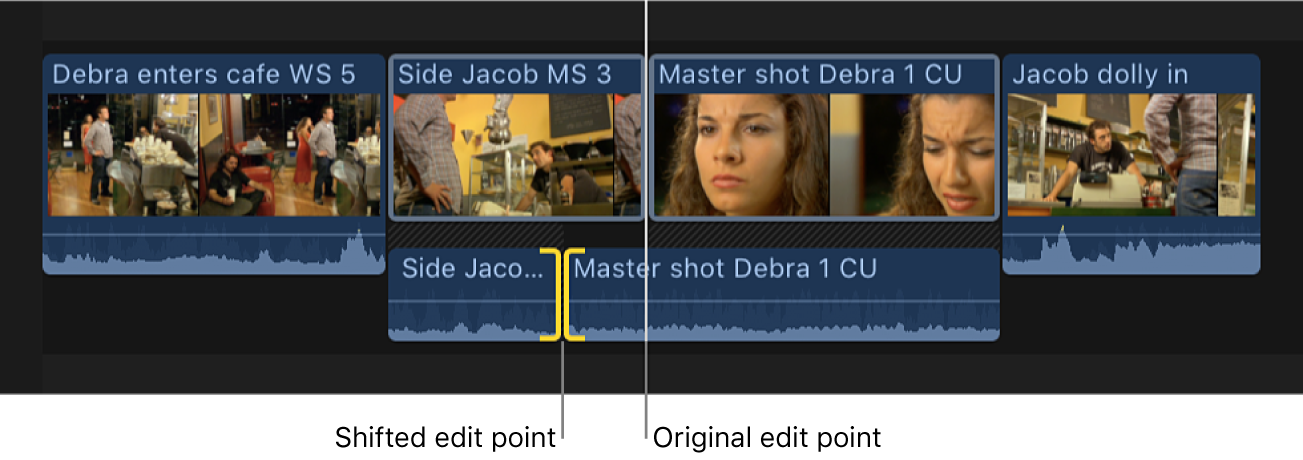
When you play back this section of the timeline, the person in the close-up shot begins to speak before the video cuts to the close-up.
Align audio to video
If you perform a split edit that extends the audio portion of a clip beyond the video portion, you can quickly put the audio and video back into alignment so that the video and audio start and end points match.
In the Final Cut Pro timeline, select the clips or components you want to align.
Choose Trim > Align Audio to Video.
If you select a component, the audio is aligned on both edges of that component. If you select the edge of a component, only that edge is aligned.
Note: If you’re working on numerous split edits throughout your project, you might find it convenient to show expanded audio by displaying audio roles in separate lanes. See Organize the timeline with audio lanes in Final Cut Pro for Mac.
Download this guide: Apple Books | PDF