Final Cut Pro User Guide
- Welcome
-
- What’s new in Final Cut Pro 10.6.2
- What’s new in Final Cut Pro 10.6
- What’s new in Final Cut Pro 10.5.3
- What’s new in Final Cut Pro 10.5
- What’s new in Final Cut Pro 10.4.9
- What’s new in Final Cut Pro 10.4.7
- What’s new in Final Cut Pro 10.4.6
- What’s new in Final Cut Pro 10.4.4
- What’s new in Final Cut Pro 10.4.1
- What’s new in Final Cut Pro 10.4
- What’s new in Final Cut Pro 10.3
- What’s new in Final Cut Pro 10.2
- What’s new in Final Cut Pro 10.1.2
- What’s new in Final Cut Pro 10.1
- What’s new in Final Cut Pro 10.0.6
- What’s new in Final Cut Pro 10.0.3
- What’s new in Final Cut Pro 10.0.1
-
- Intro to effects
-
- Intro to transitions
- How transitions are created
- Add transitions
- Set the default transition
- Delete transitions
- Adjust transitions in the timeline
- Adjust transitions in the inspector and viewer
- Merge jump cuts with the Flow transition
- Adjust transitions with multiple images
- Modify transitions in Motion
-
- Add storylines
- Use the precision editor
- Conform frame sizes and rates
- Use XML to transfer projects
-
- Glossary
- Copyright

Drag clips to the timeline in Final Cut Pro
You can add clips to the timeline by dragging them from the browser or from the Finder.
Drag clips from the browser
You can show media in the browser by selecting items in the sidebar.
In Final Cut Pro, open a project in the timeline.
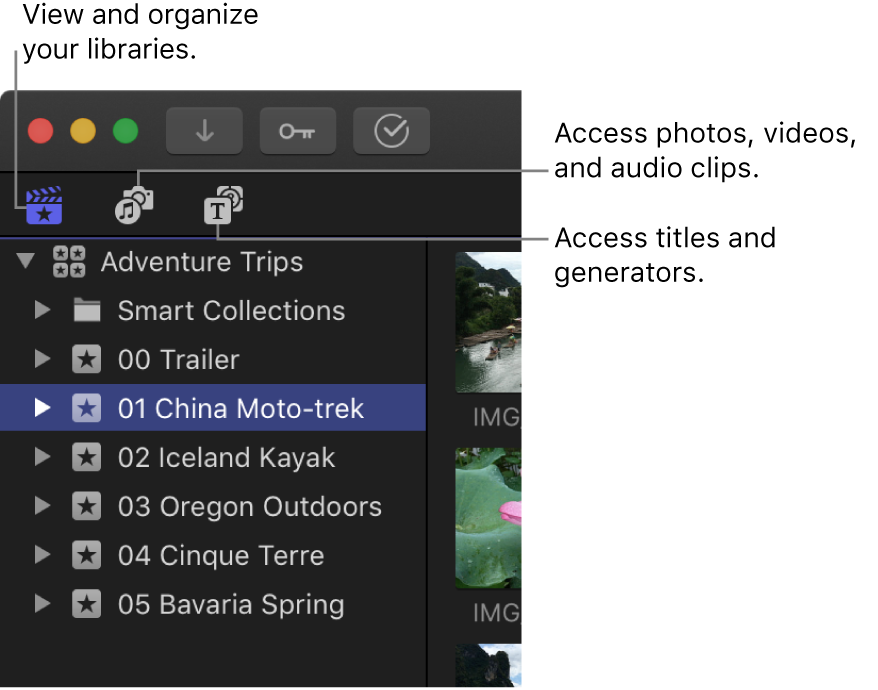
To open the sidebar for the type of media you want to add, do one of the following:
Click one of the buttons in the top-left corner of the Final Cut Pro window.

Choose Window > Go To > Libraries (or press Command-1).
Choose Window > Go To > Photos, Videos, and Audio (or press Shift-Command-1).
Choose Window > Go To > Titles and Generators (or press Option-Command-1).
In the sidebar you opened, select the item containing the media you want to add to your project.
The contents of the selected item appear in the browser.
Drag one or more clips from the browser to the timeline.
Tip: You can add one clip to your project at a time, but it may be easier to add a number of clips to the project at once and then rearrange them in the timeline.
Drag files from the Finder
In Final Cut Pro, make sure to open the correct project in the timeline.
Arrange the windows onscreen so that you can see both the Final Cut Pro main window and the files in the Finder.
Drag the files from the Finder to the timeline.
Tip: You can also copy one or more video files in the Finder and paste them into the timeline.
Depending on where you drag the clips in the timeline, your actions may result in an append edit, an insert edit, a connect edit, or a replace edit. Final Cut Pro automatically adjusts surrounding clips to fit in place around any clips you’ve dragged.
Note: If you add clips to the timeline from the Finder, the Libraries sidebar, or the Photos, Videos, and Audio sidebar, you’re effectively importing the media into the event that contains the current project. In this case, Final Cut Pro applies the default optimization and analysis settings to the new clips. You can change these settings in the Import pane of Final Cut Pro preferences.
When you add still images to the timeline, they have a default duration of 4 seconds. You can change this duration in the Editing pane of Final Cut Pro preferences.
Download this guide: Apple Books | PDF