Change clip speed in Final Cut Pro for Mac
In Final Cut Pro, you can make both constant and variable speed changes to your clips while preserving the audio’s pitch.
Note: Speed settings are applied to the specific instance of the selected clip only. They are not applied to that clip’s source media file on your Mac or storage device. To create a media file with the applied speed effects, export the clip as a QuickTime movie. See Export final mastering files in Final Cut Pro for Mac.
Apply a constant speed change
Applying a constant speed change to a range selection or a whole clip alters the selection’s playback speed by a uniform percentage. For example, applying a speed setting of 25 percent to the selection makes the entire selection play in slow motion.
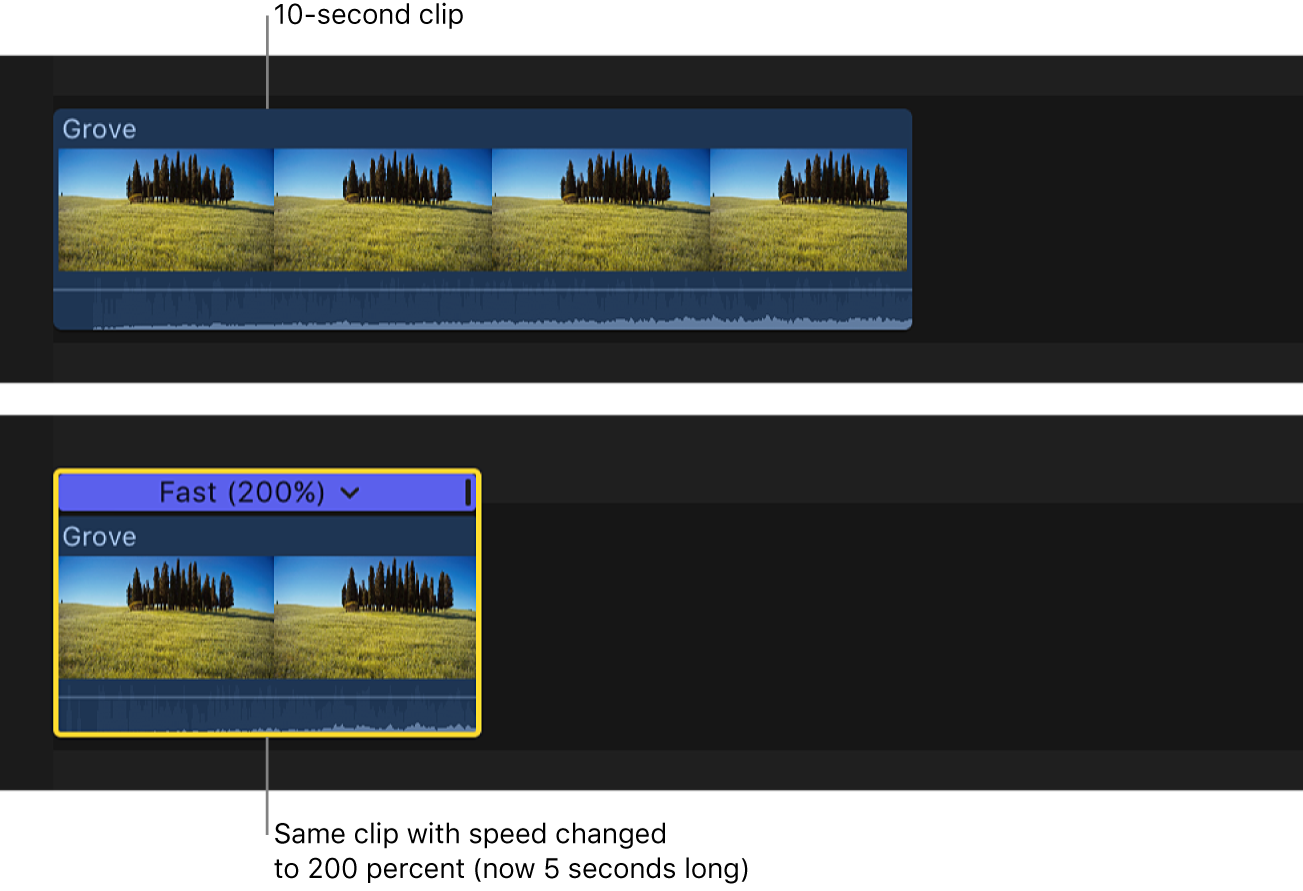
Constant speed changes usually alter the duration of a clip. By default, if a constant speed change causes the duration of a clip to become longer or shorter, all clips coming after it ripple forward or backward. If you change the speed to 50 percent, your clip becomes twice as long, and subsequent clips are moved to the right; if you change the speed to 200 percent, the clip becomes half as long, and subsequent clips ripple left. For example, if you set a 5-second clip to play back at 50 percent speed, Final Cut Pro adds frames to the clip so that the clip becomes 10 seconds long and plays back more slowly. If you increase the clip’s speed to 200 percent, Final Cut Pro removes frames and the clip plays back in only 2.5 seconds.

In the Final Cut Pro timeline, select a range, a whole clip, or a group of clips whose speed you want to change.
Do one of the following:
Apply a preset speed setting: Click the Retime pop-up menu below the viewer and choose Slow or Fast, then choose a speed from the submenu.

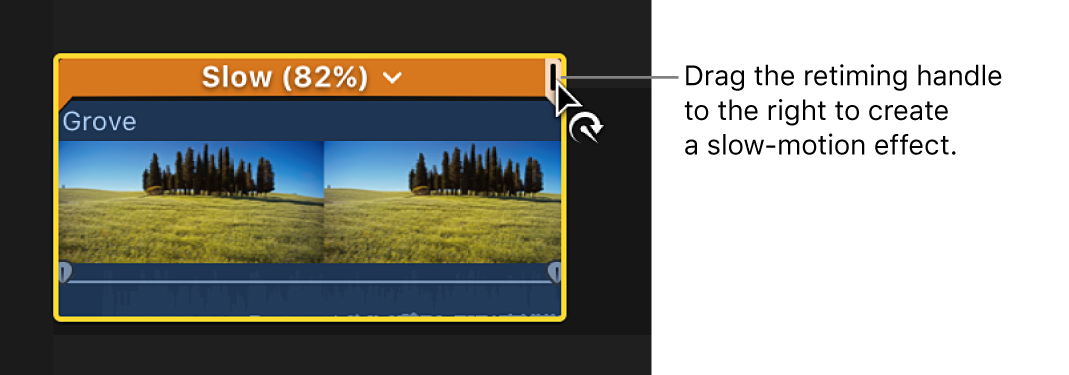
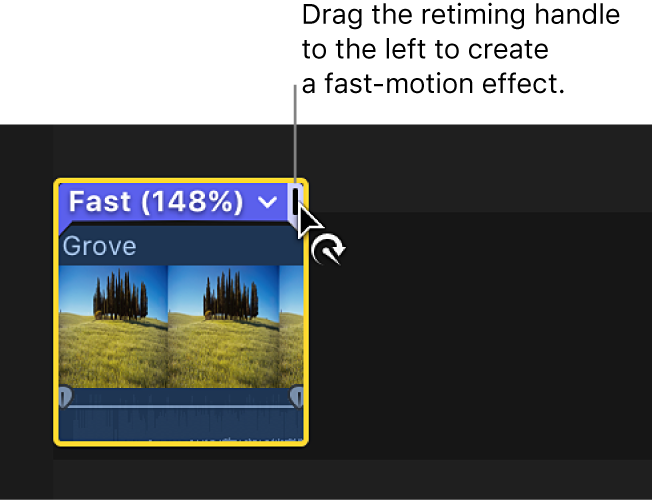
Apply a manual speed setting: Click the Retime pop-up menu and choose Show Retime Editor (or press Command-R) to display the retime editor above the selection in the timeline, then drag the retiming handle.
If you drag the retiming handle to the right, the speed of the selection decreases, the duration of the selection increases, and the bar above the timeline selection turns orange.

If you drag the retiming handle to the left, the speed of the selection increases, the duration of the selection decreases, and the bar above the timeline selection turns blue.

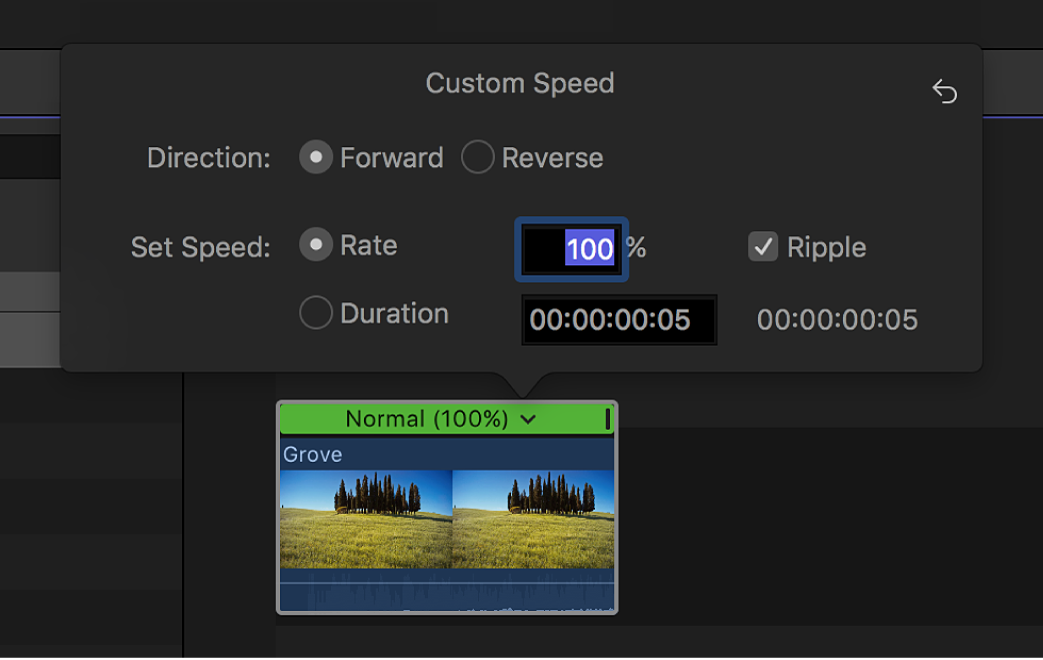
Apply a custom speed setting: Click the Retime pop-up menu and choose Custom. In the Custom Speed window that appears, select a direction (forward or reverse), then select either Rate or Duration and enter a speed percentage or duration. If you want to allow subsequent clips in the timeline to move earlier or later as a result of the speed change, leave the Ripple checkbox selected. To prevent subsequent clips from moving, deselect the checkbox.
Apply a constant speed change without rippling the sequence
You can also create speed changes that don’t cause the downstream clips to ripple. In this case, if you slow down a clip (which ordinarily makes the clip longer), the clip remains at its current length but a shorter piece of the action is seen. For example, if you slow down a 5-second shot of a football being thrown and caught to 50 percent, you see the ball being thrown (slowly), but because the action now takes twice as long, the clip ends before the ball is caught.
Note: If there’s a gap to the right of a clip that’s being slowed down, the clip’s duration is lengthened to cover the gap.
When a clip is sped up, the duration of the clip is shortened and a gap fills the space between the changed clip and the remainder of the project.
In the Final Cut Pro timeline, select a range, a whole clip, or a group of clips whose speed you want to change.
Click the Retime pop-up menu below the viewer and choose Custom.

Select a direction (Forward or Reverse), deselect the Ripple checkbox, then type a percentage in the Rate field.

Press Return.
The speed effect is applied to the clip, and the rest of the project remains in place.
Turn off Preserve Pitch for retimed clips
By default, Final Cut Pro is set to preserve the audio pitch of a clip that has been retimed. However, if you want to accentuate the retiming adjustment’s effect by allowing the pitch to change in accordance with the retiming adjustment, you can turn this feature off.
In the Final Cut Pro timeline, select a range, a whole clip, or a group of clips whose speed you want to change.
Click the Retime pop-up menu below the viewer and choose Preserve Pitch.

Choose Preserve Pitch again to turn it back on. A checkmark to the left of the command name indicates that Preserve Pitch is turned on.
Create speed effects by maintaining a clip’s original frame rate
If you’ve applied speed effects using your camera (for example, by shooting with a high frame rate), the native speed of the source media may not match the native speed of the source media for the rest of the clips in your project in the timeline. If you shoot video at a different frame rate to create a speed effect, you can use the Automatic Speed option to maintain the clip’s original frame rate.
For example, suppose you shoot a scene at 120 fps and then add the shot to a 30 fps project. If you apply Automatic Speed to that clip, every frame in the original clip plays back at the project’s frame rate of 30 fps, so the action takes longer and a slow-motion effect is created. You can use this method to create high-quality speed effects, because every frame in the original clip is played back—no frames are skipped or duplicated.
Smooth out a slow-motion clip with video quality presets
To smooth out the apparent motion of a clip playing back in slow motion, you can apply frame blending or optical flow analysis to the retimed clip.
Note: Final Cut Pro 10.2 or later uses an advanced optical flow algorithm that can accommodate a wide range of source footage. Any new projects created with Final Cut Pro 10.2 or later will benefit from these improvements (if they include an optical flow video quality setting). If you have projects created in earlier versions of Final Cut Pro that have optical flow settings, you can reanalyze them for improved quality by choosing Optical Flow in step 2 below.
In the Final Cut Pro timeline, select a range, a whole clip, or a group of clips set to play in slow motion.
Click the Retime pop-up menu below the viewer and choose Video Quality, then choose a setting from the submenu.

Normal (Floor): The default setting. Final Cut Pro duplicates frames or rounds down to the nearest whole frame. For the highest-quality playback, rendering is recommended.
Nearest Frame: Final Cut Pro rounds up or down to the nearest whole frame. This setting reduces artifacts but may cause visual stuttering. Rendering is required.
Frame Blending: Creates in-between frames by blending individual pixels of neighboring frames. Slow-motion clips created with Frame Blending appear to play back more smoothly than those created with the Normal (Floor) or Nearest Frame setting. This setting provides better reduction of visual stuttering, but there may be some visual artifacts. Rendering is required.
Optical Flow: A type of frame blending that uses an optical flow algorithm to create new in-between frames. Final Cut Pro analyzes the clip to determine the directional movement of pixels and then draws portions of the new frames based on the optical flow analysis. Rendering is required, and takes longer than for the other frame-sampling methods. Only the portion of the clip used in the project (the media between the clip start and end points) is analyzed.
Tip: Before using Optical Flow, try using Frame Blending and experiment with various slow-motion settings until you’re satisfied with the clip speed. Then, if you see artifacts or want the very best image quality, try using Optical Flow.
Download this guide: PDF