Adjust volume in Final Cut Pro for iPad
You can increase or decrease the volume of clips in the timeline in several ways:
Use the Volume Offset control in the Audio tab
 of the inspector to adjust the overall volume of a single timeline clip.
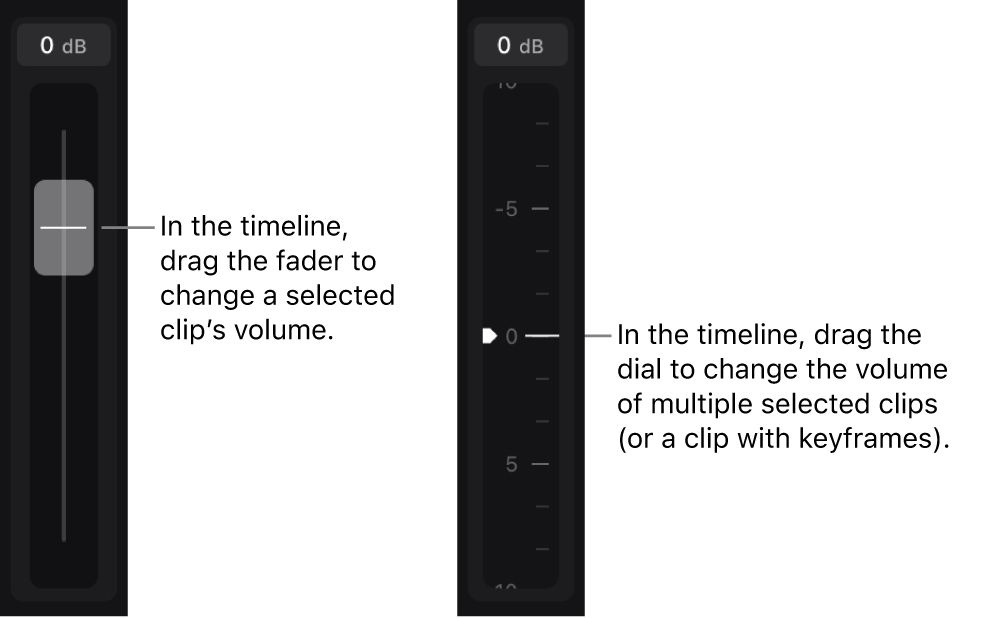
Use the volume control on the left side of the timeline to adjust the volume of multiple timeline clips, a range in one or more timeline clips, or a keyframed segment of a timeline clip.

The inspector and timeline volume controls work independently of one another, but their combined volume adjustments are additive. For example, selecting an audio keyframe in the timeline, then increasing the Volume Offset dial in the inspector by 1 dB and increasing the volume fader in the timeline by 1 dB raises the clip’s volume at the keyframe to 2 dB. (If the clip has no audio keyframes, the entire clip’s volume is raised to 2 dB.)
Tip: As you make volume adjustments, use the audio meters in the timeline to make sure the volume doesn’t exceed maximum allowable levels, which may result in audible distortion, or clipping.
Adjust the volume of a selected clip
In Final Cut Pro for iPad, open a project.
In the timeline, tap a clip whose volume you want to adjust.
Tap Inspect in the lower-left corner of the screen, then tap
 at the top of the inspector.
Do one of the following:
Drag the Volume Offset dial left or right to decrease or increase the volume.
Tap the Volume number field above the dial, then use the keypad to enter a new value.
As you make volume adjustments in the inspector, the amplitude (height) of the audio waveform changes in the timeline clip.
Adjust the volume of multiple selected clips
In Final Cut Pro for iPad, open a project.
Tap
 under the timeline, tap the timeline clips you want to select, then tap Done in the lower-right corner of the screen.
Tap Volume in the lower-left corner of the screen.
Drag the volume control (on the left side of the timeline) up or down to increase or decrease the volume.
The audio waveforms and volume curves in the selected clips become taller or shorter as you drag the volume control, and the volume for all selected clips is adjusted relative to each clip’s original volume.
Adjust volume across a selected range in one or more clips
You can select a portion, or range, of a clip (or multiple consecutive clips) and adjust the volume within that range only. This method is useful when you need to duck the audio (momentarily lower its volume).
In Final Cut Pro for iPad, open a project.
Tap Volume in the lower-left corner of the screen.
Tap the yellow Select control in the top-left corner of the timeline, then tap Range.
Do one of the following:
Drag in a portion of a timeline clip to select a range.
Drag across multiple consecutive clips to select a range that spans more than one clip.
Drag the volume fader (on the left side of the timeline) up or down to increase or decrease the volume.
Keyframes are added at the beginning and end of the range, and the audio waveform and volume curve in the range become taller or shorter. You can adjust the keyframes individually, if necessary.
Use keyframes to make volume changes over time
You can make volume changes over time by adding and adjusting volume keyframes in the timeline.
In Final Cut Pro for iPad, open a project.
Tap Volume in the lower-left corner of the screen.
In the timeline, tap the clip you want to adjust.
Note: You can also tap a specific audio channel within a clip. See Expand the audio component of a clip and Separate interleaved audio channels.
Drag the playhead to the spot where you want to add a keyframe, then tap
 under the timeline.
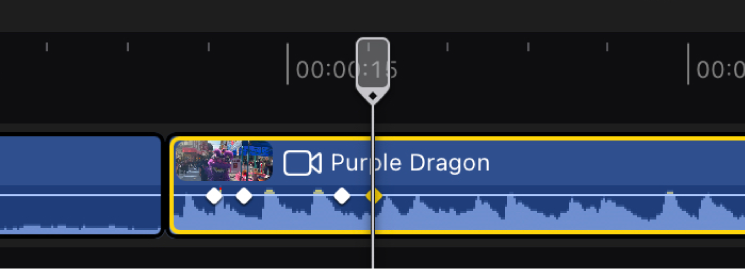
Keyframes appear as small diamond shapes on the volume curve of a timeline clip. Selected keyframes appear as yellow diamonds. Repeat this step to add as many keyframes as necessary.

Do any of the following:
Adjust the volume level for a selected keyframe: Tap a keyframe to select it, or tap
 or
or  under the timeline. Then drag the volume dial (on the left side of the timeline) up or down to increase or decrease the volume. The slope of the volume curve on either side of the keyframe changes as you drag the volume dial. During playback, the volume ramps up or down as the playhead approaches the keyframe, then ramps up or down after the keyframe.
Adjust the volume level for two keyframes at once: Drag the playhead between two keyframes to select them (and the volume curve segment between them), then drag the volume dial (on the left side of the timeline) up or down. The segment of the volume curve between the two keyframes increases or decreases uniformly, and the segments outside the keyframes slope up or down to the beginning and end of the clip (or to the next nearest keyframes). During playback, the volume ramps up or down until the playhead reaches the selected curve segment, where the volume holds steady for the duration of the segment, then ramps up or down again.
Reposition a keyframe: Drag it to a new position.
Nudge a selected keyframe’s position in the timeline: Open the jog wheel, tap
 next to the jog wheel, then drag in the jog wheel.
Note: Audio keyframes are nudged frame by frame at most timeline zoom levels. However, when you zoom in to the timeline far enough, subframe units appear in the timecode display below the viewer, and the jog wheel nudges audio keyframes at the subframe level.
Navigate to other keyframes: If you’ve added multiple keyframes, tap
 or
or  under the timeline to select an adjacent keyframe.
Tip: To make keyframes larger and easier to tap and drag, increase the clip height.
Change the volume level for multiple keyframes at once
You can modify multiple volume keyframes at once.
In Final Cut Pro for iPad, open a project.
Tap Volume in the lower-left corner of the screen.
Tap the yellow Select control in the top-left corner of the timeline, then tap Range.
In the timeline, drag the range handles to either side of the keyframes you want to adjust.
The selected keyframes are highlighted in yellow.

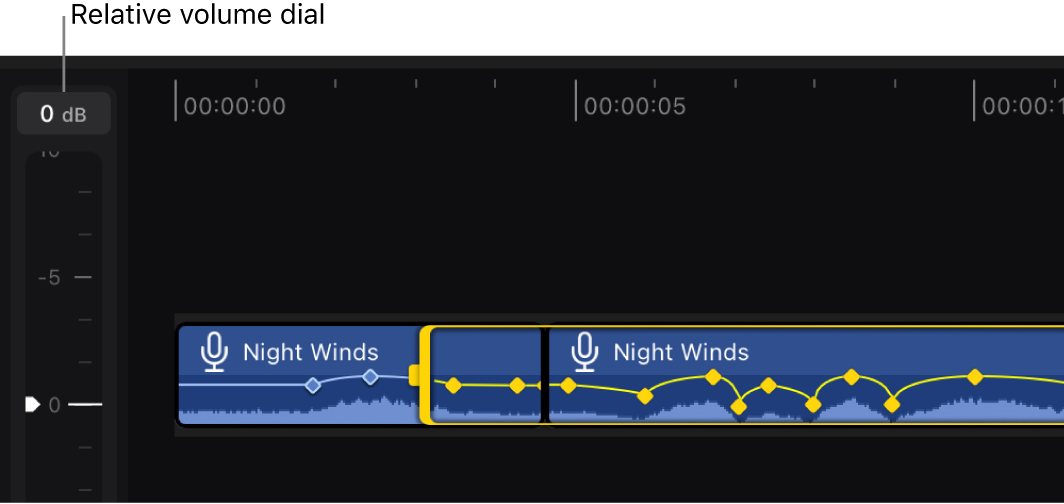
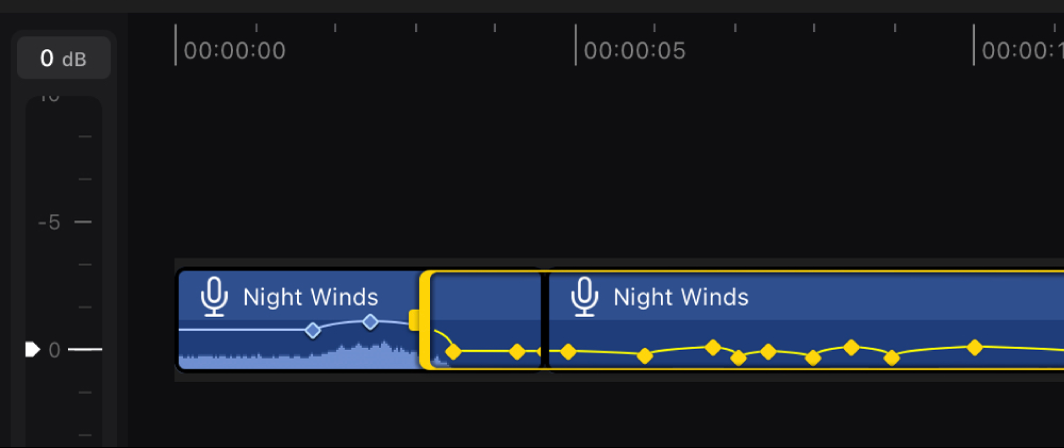
Drag the relative volume dial (on the left side of the timeline) up or down to increase or decrease the volume.
The volume level for the selected keyframes is adjusted relative to each keyframe’s original volume. The keyframes and audio waveforms adjust in the timeline to reflect your changes.
