Final Cut Pro User Guide for Mac
- Welcome
- What’s new
-
- Intro to effects
-
- Intro to transitions
- How transitions are created
- Add transitions and fades
- Quickly add a transition with a keyboard shortcut
- Set the default duration for transitions
- Delete transitions
- Adjust transitions in the timeline
- Adjust transitions in the inspector and viewer
- Merge jump cuts with the Flow transition
- Adjust transitions with multiple images
- Modify transitions in Motion
-
- Add storylines
- Use the precision editor
- Conform frame sizes and rates
- Use XML to transfer projects
- Glossary
- Copyright

Create custom roles in Final Cut Pro for Mac
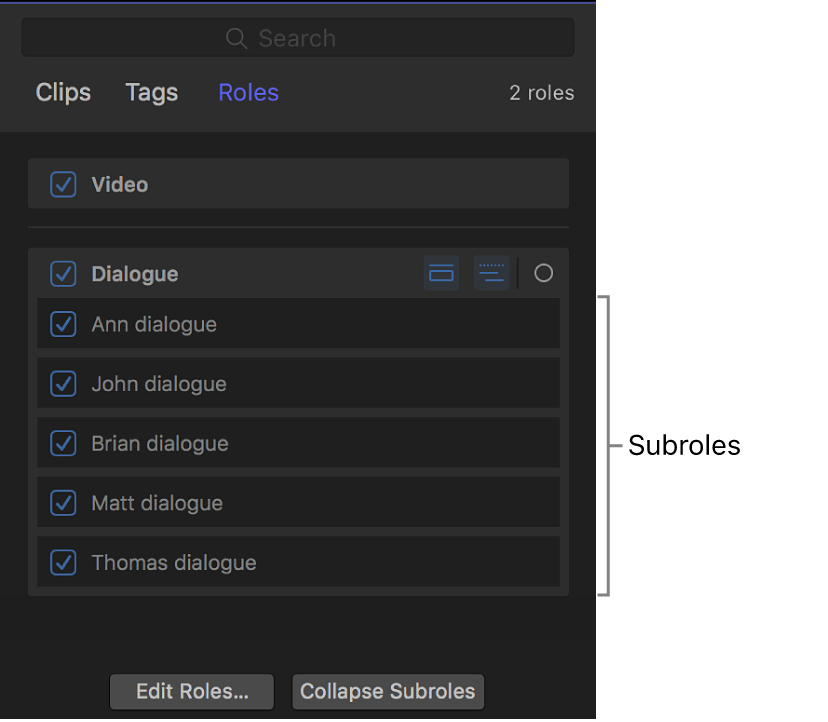
You can create custom roles and subroles in addition to the five default roles (Video, Titles, Dialogue, Music, and Effects). For example, you might create a separate Dialogue subrole for each actor (or microphone) in your video project, so that you can quickly find and adjust all the clips with that subrole.
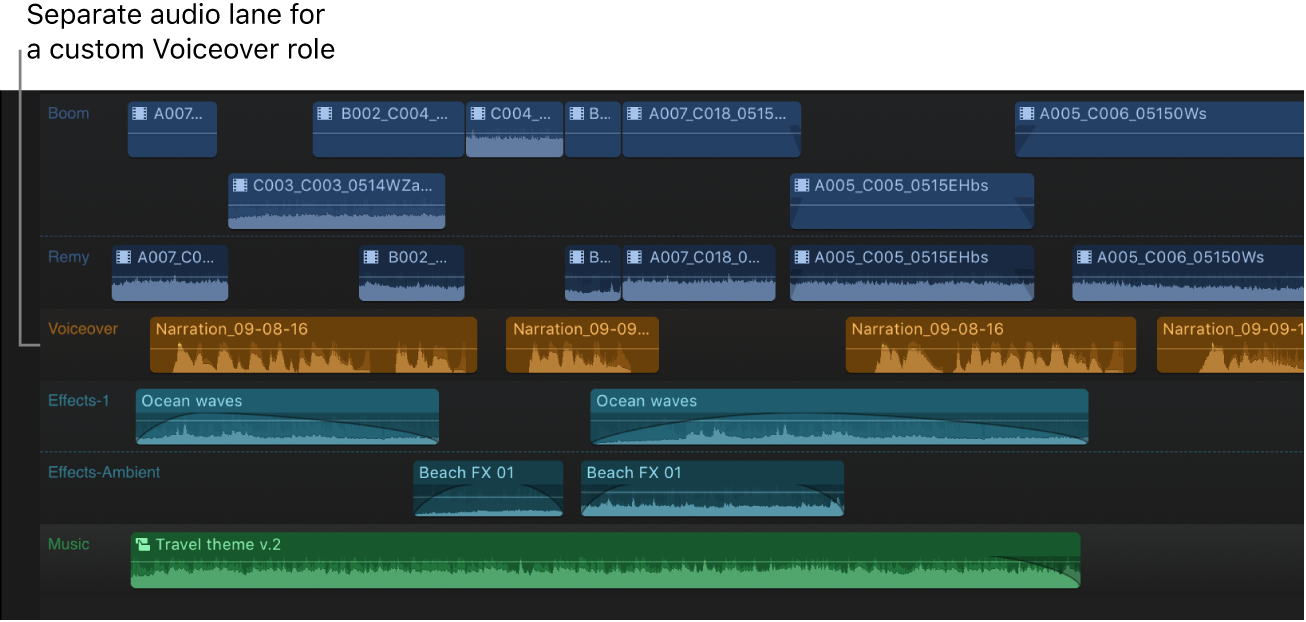
You can also use custom roles and subroles to create different language versions of a project, so you can export a version of the project with titles, captions, and narration in each language. For example, you could organize voiceover narration clips into a separate audio lane in the timeline by first creating a custom Voiceover role and then assigning subroles (one for each language) to your voiceover narration clips.
Note: Custom roles and subroles are specific to a library. This means that a custom role that you create for one library is not automatically available in another library. However, if you copy or move clips between libraries, any custom roles and subroles assigned to those clips are also available in the destination library.
Create custom roles
To open the role editor in Final Cut Pro, do one of the following:
Choose Modify > Edit Roles.
In the Roles pane of the timeline index, click Edit Roles.
Control-click a clip and choose either Assign Audio Roles or Assign Video Roles, then choose Edit Roles from the submenu.
With a clip selected in the browser or the timeline, open the Info inspector, then click either the Video Roles pop-up menu or the Audio Roles pop-up menu and choose Edit Roles.
Do one of the following:
Create a video role: Click the Add Video Role button
 at the top of the Video Roles section.
Create an audio role: Click the Add Audio Role button
 at the top of the Audio Roles section.
The new role appears at the bottom of the section and contains a default subrole with the same name. New roles are automatically assigned a distinct color. To change the color, see Change role colors or names in Final Cut Pro for Mac.
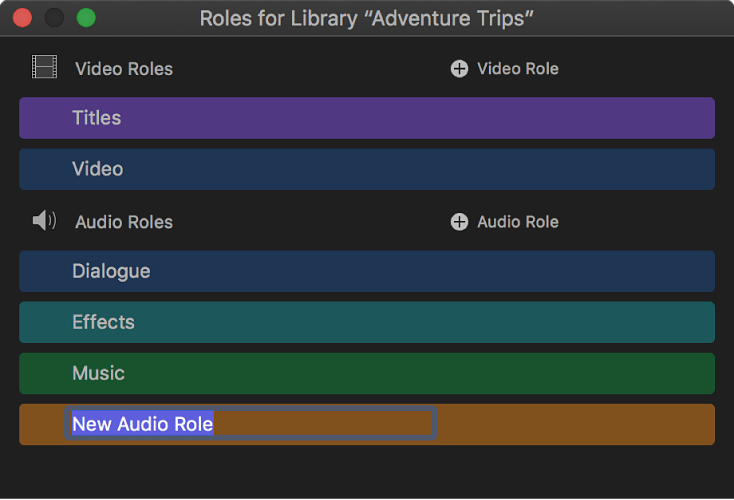
Type a name for the new role.
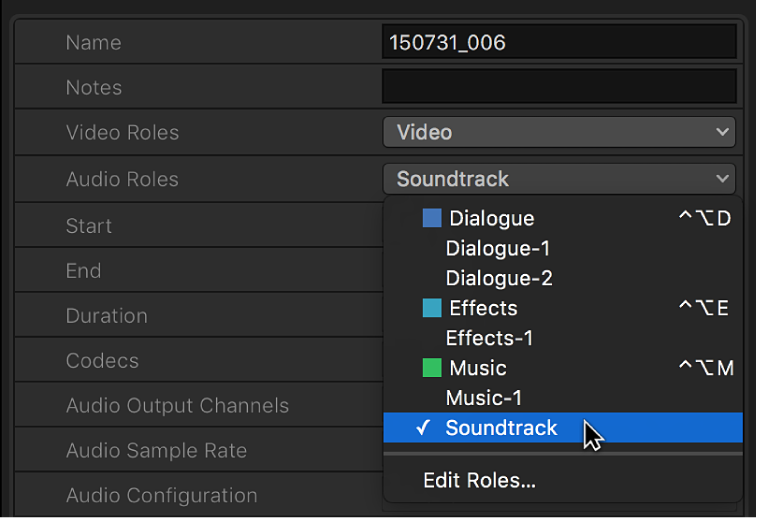
After you create a new role, it appears in the roles list so that you can assign its subroles to any clip.
Create custom subroles
Subroles allow you to organize clips and components within a role. For example, you could create a Foley Effects subrole within the Effects role, or a Spanish Subtitles subrole within the Titles role.
To open the role editor in Final Cut Pro, do one of the following:
Choose Modify > Edit Roles.
Control-click a clip and choose either Assign Audio Roles or Assign Video Roles, then choose Edit Roles from the submenu.
In the Roles pane of the timeline index, click Edit Roles.
With a clip selected in the browser or the timeline, open the Info inspector, then click either the Video Roles pop-up menu or the Audio Roles pop-up menu and choose Edit Roles.
In the role editor, move the pointer over one of the roles and click the Add Subrole button.

The new subrole appears in the list below the role.
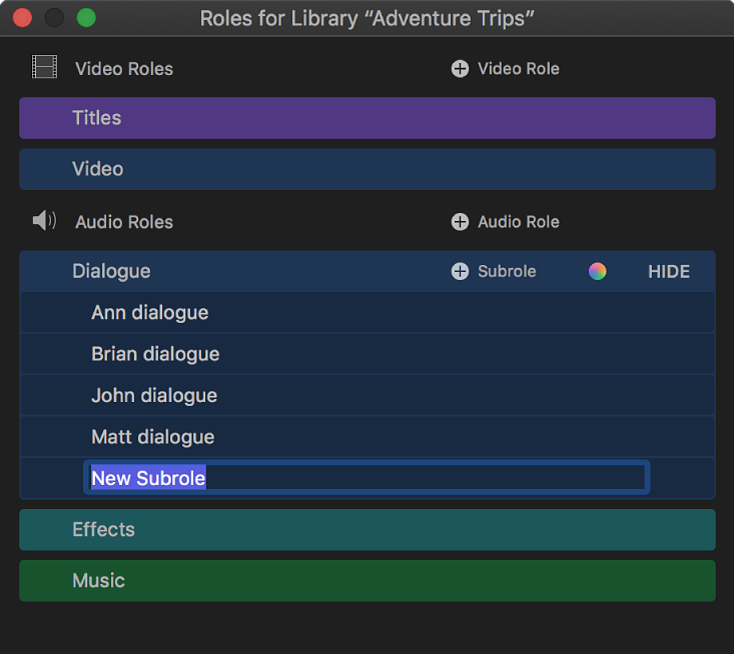
Type a name for the new subrole.
The new subrole appears below its parent role in roles lists throughout Final Cut Pro. When you assign subroles to clips in the timeline, the subroles also appear in the timeline index.
Change the name of a custom role or subrole
In the role editor in Final Cut Pro, move the pointer over the name of a custom role or subrole.
To show subroles, click Show to the right of the role name.

Select the name of the role or subrole, then enter the new name.
Delete a custom role or subrole
Important: Deleting a role or subrole may update existing edits, which can cause changes to your project’s audio. For example, deleting a custom subrole causes components with that subrole assignment to revert to a default subrole.
In Final Cut Pro, open the role editor.
In the role editor, move the pointer over the name of a custom role or subrole, then click the Delete button that appears to the left of the role name.

To show subroles, click Show Subroles to the right of the role name.
The role or subrole is removed from the list. Any clips that had the role or subrole assigned revert to their default roles and subroles.
Merge custom subroles
You can merge a subrole with another subrole (in any role in your library). Any clips in the library that were assigned the original subrole are assigned the merged subrole instead.
In Final Cut Pro, open the role editor.
Move the pointer over the role with the subroles you want to merge, then click Show Subroles.
Move the pointer over one of the subroles you want to merge.
A handle (three horizontal lines) appears at the right end of the subrole.
Use the handle to drag the subrole to the subrole you want to merge it with.
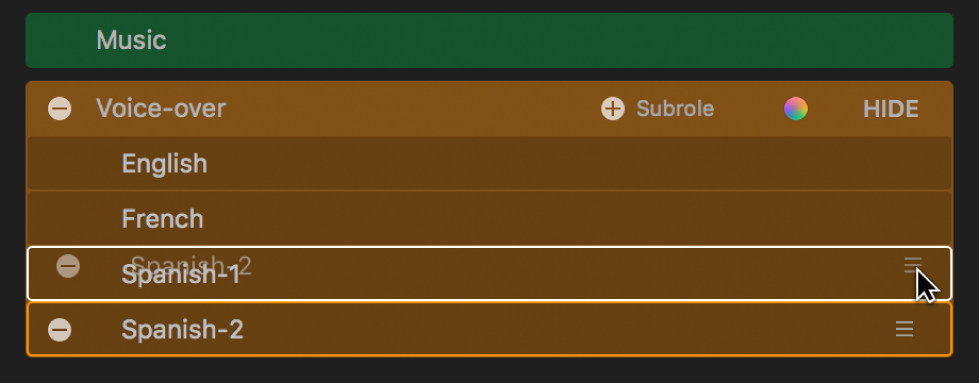
The subroles are merged into one subrole. The existing role assignments of the source subrole change to the target subrole across every clip in the library.
Move a subrole to another role
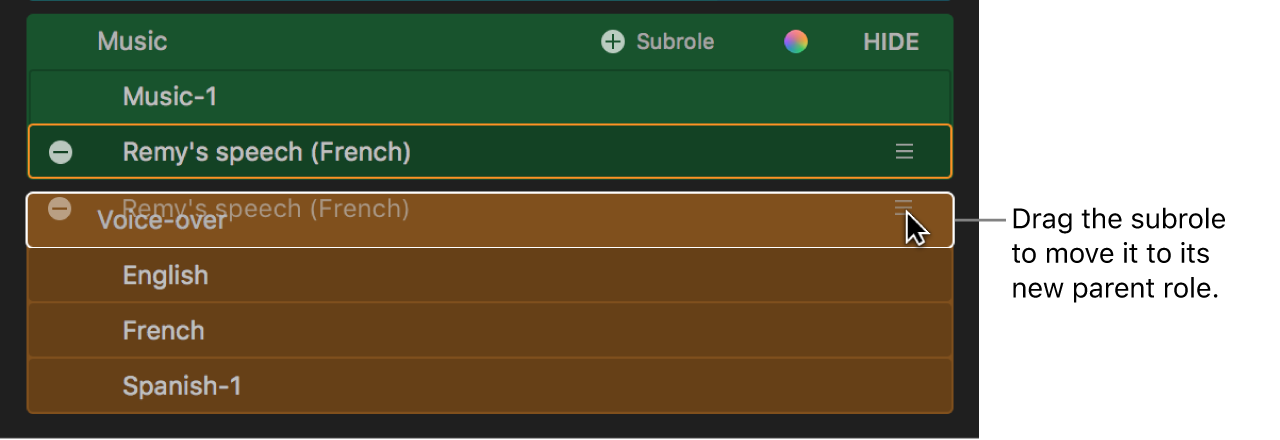
You can move a subrole from one role to another. All of the existing assignments of the subrole in the library are maintained but are updated to show the new parent role.
In Final Cut Pro, open the role editor.
Move the pointer over the role that contains the subrole you want to move, then click Show.
Move the pointer over the subrole you want to move.
A handle (three horizontal lines) appears at the right end of the subrole.
Use the handle to drag the subrole to the role you want to move it to.
For the most precise and powerful audio editing, you can also display all subroles for one or more roles.
Download this guide: PDF