Set up audio I/O and monitoring in Impulse Response Utility
You must set up the audio input and output device before you can use Impulse Response Utility.
The audio input selection determines the audio device used to record audio tracks. The audio output selection determines the audio device used to monitor the recorded signal and to play back the generated sine sweep.
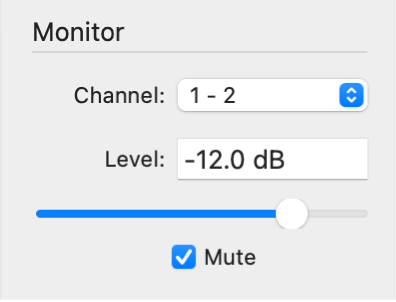
Once you have recorded sine sweep tracks in Impulse Response Utility, you can monitor them through a stereo output of your choice. The monitor controls determine the monitor channel and level. You can also mute the monitor section.
Choose an audio input device
In Impulse Response Utility, choose an audio interface from the Audio Input pop-up menu.

Choose an audio output device
In Impulse Response Utility, choose an audio interface from the Audio Output pop-up menu.
Note: The Hardware I/O Assignment area also contains a Sample Rate pop-up menu. You can change the sample rate of your impulse response project in Impulse Response Utility. However, in order to avoid mismatched sample rates, you cannot change the sample rate after the first recording.
Set monitor output channels
In Impulse Response Utility, in the Monitor area at the top left, choose the stereo output pair you want to use for monitoring from the Channel pop-up menu.

Adjust the output level of the monitored signal
In Impulse Response Utility, in the Monitor area at the top left, do one of the following:
Click the Level field, then drag left (or down) to reduce the volume, or right (or up) to raise the volume.
Click the Level field, then enter a numeric value for the monitor level (any value above 0 dB sets the monitor level at 0 dB).
Drag the Level slider to set the level.
Important: To avoid audio feedback when recording, be sure to mute the monitor output.
Mute the monitor output
In Impulse Response Utility, in the Monitor area at the top left, select the Mute checkbox or press the M key.
Download the guide:
Impulse Response Utility User Guide: Apple Books