MainStage User Guide
- Welcome
-
- Overview of Edit mode
-
- Select patches and sets in the Patch List
- Copy, paste, and delete patches
- Reorder and move patches in the Patch List
- Add patches
- Create a patch from several patches
-
- Overview of the Patch Settings Inspector
- Select patch settings in the Patch Library
- Set the time signature for patches
- Change the tempo when you select a patch
- Set program change and bank numbers
- Defer patch changes
- Instantly silence the previous patch
- Change patch icons
- Transpose the pitch of incoming notes for a patch
- Change the tuning for a patch
- Add text notes to a patch
-
- Overview of channel strips
- Add a channel strip
- Change a channel strip setting
- Configure channel strip components
- Show signal flow channel strips
- Hide the metronome channel strip
- Create an alias of a channel strip
- Add a patch bus
- Set channel strip pan or balance positions
- Set channel strip volume levels
- Mute and solo channel strips
- Use multiple instrument outputs
- Use external MIDI instruments
- Reorganize channel strips
- Delete channel strips
-
- Overview of the Channel Strip Inspector
- Choose channel strip settings
- Rename channel strips
- Change channel strip colors
- Change channel strip icons
- Use feedback protection with channel strips
- Set keyboard input for a software instrument channel strip
- Transpose individual software instruments
- Filter MIDI messages
- Scale channel strip velocity
- Set channel strips to ignore Hermode tuning
- Override concert- and set-level key ranges
- Add text notes to a channel strip in the Channel Strip Inspector
- Route audio via send effects
-
- Screen Control Inspector overview
- Replace parameter labels
- Choose custom colors for screen controls
- Change background or grouped screen control appearance
- Set screen controls to show the hardware value
- Set parameter change behavior for screen controls
- Set hardware matching behavior for screen controls
- Reset and compare changes to a patch
- Override concert- and set-level mappings
-
- Overview of mapping screen controls
- Map to channel strip and plug-in parameters
- Map screen controls to actions
- Map a screen control to multiple parameters
- Use screen controls to display PDF document pages
- Edit the saved value for a mapped parameter
- Set drum pads or buttons to use note velocity
- Map screen controls to all channel strips in a patch
- Undo screen control parameter mappings
- Remove screen control mappings
- Work with graphs
- Create controller transforms
- Share patches and sets between concerts
- Record the audio output of a concert
-
- Overview of concerts
- Create a concert
- Open and close concerts
- Save concerts
- How saving affects parameter values
- Clean up concerts
- Consolidate assets in a concert
- Rename the current concert
-
- Overview of the Concert Settings Inspector
- Set MIDI Routing to channel strips
- Transpose incoming note pitch for a concert
- Define the program change message source
- Send unused program changes to channel strips
- Set the time signature for a concert
- Change the tuning for a concert
- Set the pan law for a concert
- Add text notes to a concert
- Control the metronome
- Silence MIDI notes
- Mute audio output
-
- Layout mode overview
-
- Screen control parameter editing overview
- Lift and stamp screen control parameters
- Reset screen control parameters
- Common screen control parameters
- Keyboard screen control parameters
- MIDI activity screen control parameters
- Drum pad screen control parameters
- Waveform screen control parameters
- Selector screen control parameters
- Text screen control parameters
- Background screen control parameters
- How MainStage passes through MIDI messages
- Export and import layouts
- Change the aspect ratio of a layout
-
- Before performing live
- Use Perform mode
- Screen controls in performance
- Tempo changes during performance
- Tips for performing with keyboard controllers
- Tips for performing with guitars and other instruments
- Tune guitars and other instruments with the Tuner
- The Playback plug-in in performance
- Record your performances
- After the performance
- Tips for complex hardware setups
-
- Overview of keyboard shortcuts and command sets
-
- Concerts and layouts keyboard shortcuts
- Patches and sets (Edit mode) keyboard shortcuts
- Editing keyboard shortcuts
- Actions keyboard shortcuts
- Parameter mapping (Edit mode) keyboard shortcuts
- Channel strips (Edit mode) keyboard shortcuts
- Screen controls (Layout mode) keyboard shortcuts
- Perform in Full Screen keyboard shortcuts
- Window and view keyboard shortcuts
- Help and support keyboard shortcuts
-
- Learn about Effects
-
- Learn about Amps and Pedals
-
- Bass Amp Designer overview
- Bass amplifier models
- Bass cabinet models
- Build a custom combo
- Amplifier signal flow
- Pre-amp signal flow
- Use the D.I. box
- Amplifier controls
- Bass Amp Designer effects overview
- Bass Amp Designer EQ
- Bass Amp Designer compressor
- Bass Amp Designer Graphic EQ
- Bass Amp Designer Parametric EQ
- Bass Amp Designer microphone controls
-
- Learn about Delay effects
- Echo controls
-
- MainStage Loopback overview
- Add a Loopback instance in MainStage
- MainStage Loopback interface
- MainStage Loopback waveform display
- MainStage Loopback transport and function controls
- MainStage Loopback information display
- MainStage Loopback Sync, Snap To, and Play From parameters
- Use the MainStage Loopback group functions
- MainStage Loopback Action menu
- Sample Delay controls
- Stereo Delay controls
- Tape Delay controls
-
- Use MIDI plug-ins
-
- Arpeggiator overview
- Arpeggiator control parameters
- Note order parameters overview
- Note order variations
- Note order inversions
- Arpeggiator pattern parameters overview
- Use Live mode
- Use Grid mode
- Arpeggiator options parameters
- Arpeggiator keyboard parameters
- Use keyboard parameters
- Assign controller parameters
- Modifier MIDI plug-in controls
- Note Repeater MIDI plug-in controls
- Randomizer MIDI plug-in controls
-
- Use the Scripter MIDI plug-in
- Use the Script Editor
- Scripter API overview
- MIDI processing functions overview
- HandleMIDI function
- ProcessMIDI function
- GetParameter function
- SetParameter function
- ParameterChanged function
- Reset function
- JavaScript objects overview
- Use the JavaScript Event object
- Use the JavaScript TimingInfo object
- Use the Trace object
- Use the MIDI event beatPos property
- Use the JavaScript MIDI object
- Create Scripter controls
- Transposer MIDI plug-in controls
-
- Learn about included Instruments
-
- Alchemy overview
- Name bar
-
- Alchemy source overview
- Source master controls
- Import browser
- Source subpage controls
- Source filter controls
- Source filter use tips
- Source elements overview
- Additive element controls
- Additive element effects
- Spectral element controls
- Spectral element effects
- Pitch correction controls
- Formant filter controls
- Granular element controls
- Sampler element controls
- VA element controls
- Source modulations
- Morph controls
- Master voice section
- Alchemy extended parameters
-
- MainStage Quick Sampler overview
- Add content to MainStage Quick Sampler
- MainStage Quick Sampler waveform display
- Use Flex in MainStage Quick Sampler
- MainStage Quick Sampler Pitch controls
- MainStage Quick Sampler Filter controls
- Quick Sampler filter types
- MainStage Quick Sampler Amp controls
- MainStage Quick Sampler extended parameters
-
- MainStage Playback plug-in overview
- Add a MainStage Playback plug-in
- MainStage Playback interface
- Use the MainStage Playback waveform display
- MainStage Playback transport and function buttons
- MainStage Playback information display
- MainStage Playback Sync, Snap To, and Play From parameters
- Use the MainStage Playback group functions
- Use the MainStage Playback Action menu and File field
- Use markers with the MainStage Playback plug-in
-
- Sculpture overview
- Sculpture interface
- Global parameters
- Amplitude envelope parameters
- Use the Waveshaper
- Filter parameters
- Output parameters
- Assign MIDI controllers
- Extended parameters
-

MainStage Alchemy basic synthesis tweaks
Alchemy provides thousands of ready-made presets for you to explore. These are not only a great resource for musical inspiration but can also provide numerous insights into how sound designers have created them. Even if you’re not inclined to program your own sounds from scratch, some small tweaks to existing presets can provide that “perfect” sound for your projects or performances.
Note: Images shown in tutorials are not specific to presets used in tasks. They are included as a guide to help you find areas and parameters in the Alchemy interface.
Use performance and effect controls to tweak a sound in Alchemy
In MainStage, click the Preset name field in the Name bar and choose the 12 Strings preset. Make sure the Advanced view button is active.
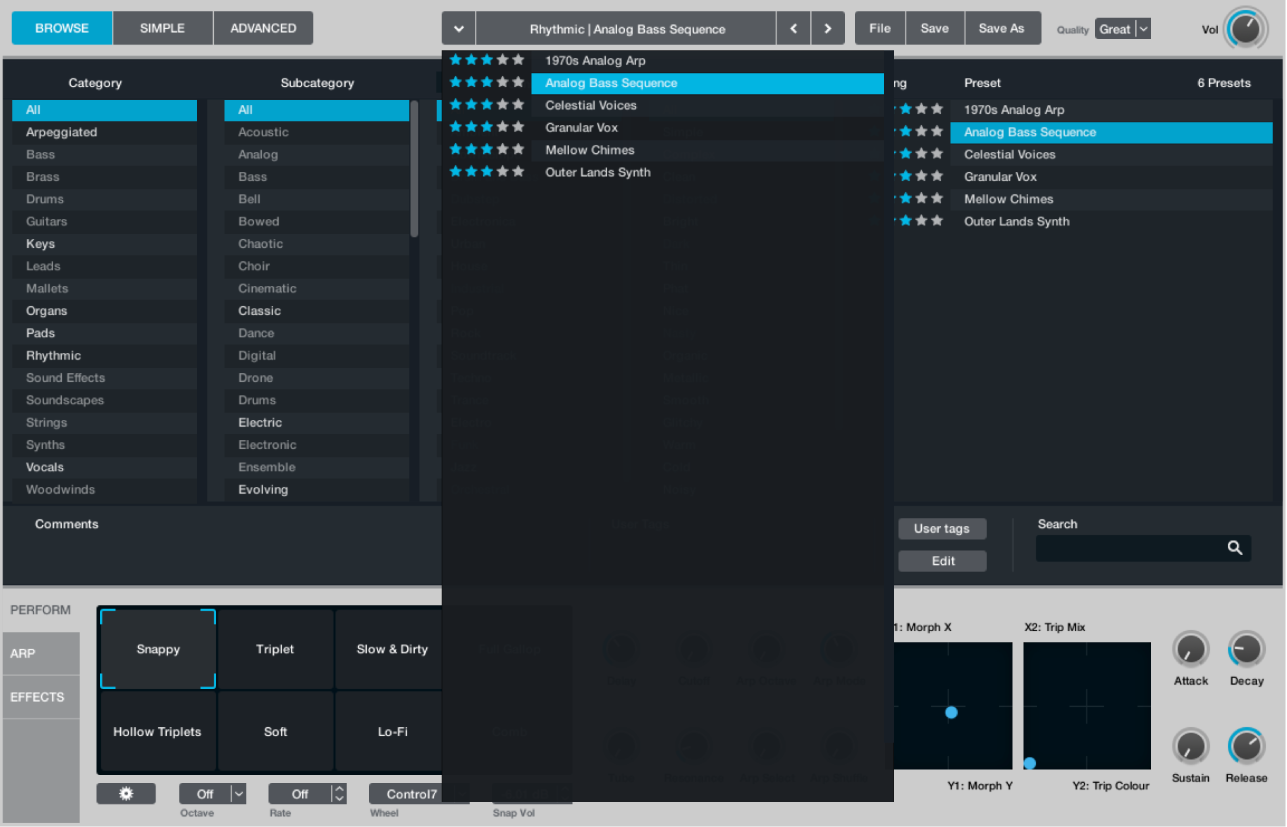
Click the Perform button to view the performance controls, then drag the framing bracket in the Transform pad while playing your keyboard.
The sound morphs between different sound variations. If you happen across something you like, you can use the Save As button in the Name bar to name and save a new preset.

Drag the framing bracket to the top left (Pluck + Pad in the preset), then set the Pad Cutoff and Pad Attack knobs to zero. Drag the Cutoff Env knob to the 100% position, and also set the Release knob to around 20%.
When you play the keyboard staccato you will hear a less sustained sound with a different harmonic makeup, and the delay effect is more easily heard. Play across a large range of the keyboard, and adjust the Cutoff Env knob to hear how this affects the filter response.
Click the Effects button to view the effects section, then choose the Slapback preset from the Delay plug-in File menu.
Play a few notes to hear the impact this has, then choose the Bandpass Ping Pong preset.

Return to the performance controls, and adjust the Resonance knob while playing both staccato and held notes.
Double-click both the Resonance and Cutoff Env knobs to reset them to the center position.
Swap the source to tweak a sound in Alchemy
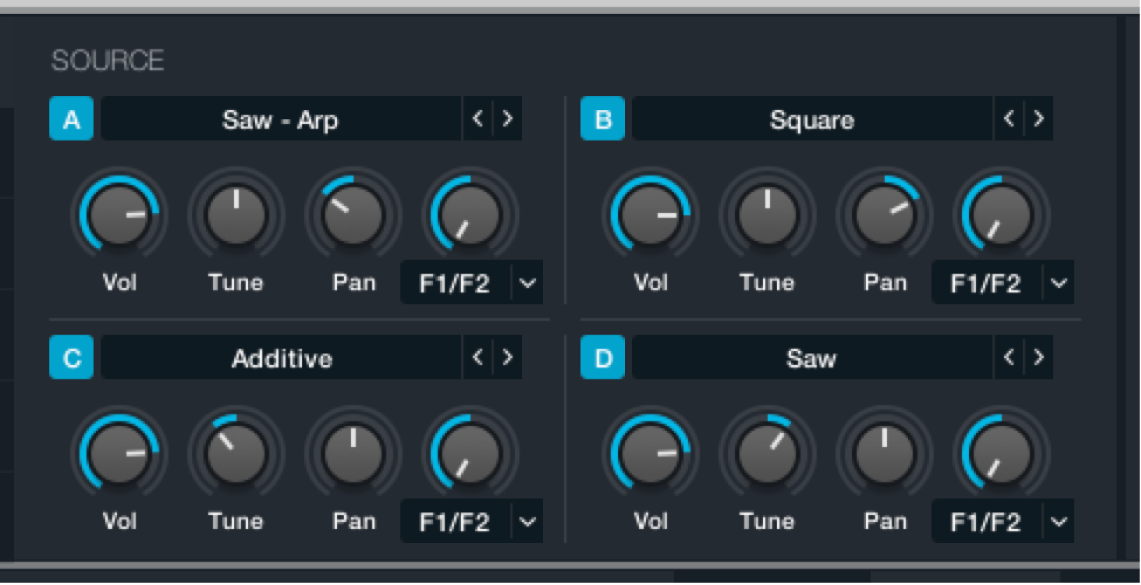
In MainStage, click the Global button toward the upper left to view sources A to D.
You can see that the 12 Strings preset uses three sources: A, B, and C.
Click the source select field for source A, then choose Load VA > Complex > Eighties Notch.
Play your keyboard to hear a more classic synth type sound. Feel free to repeat this step with sources B and C, using different waveforms, or perhaps import a drum loop.
Mute a source to use a partial preset in Alchemy
In MainStage, click the File button in the Name bar and choose Initialize Preset, then choose the 12 Strings preset from the Preset name field. Make sure the Global button is active in advanced view.
Click the source A button to mute this source. A lit A, B, C, or D button indicates the source is active.
Play the keyboard to hear a pad sound. The “pluck” sound has been silenced.
Tip: Muting sources in this way is also a good working practice when editing or adjusting source settings because it allows you to focus on the sonic characteristics you are trying to achieve for the source. You can unmute the source and adjust the Volume settings of each to set the balance between them once you’ve made your changes.

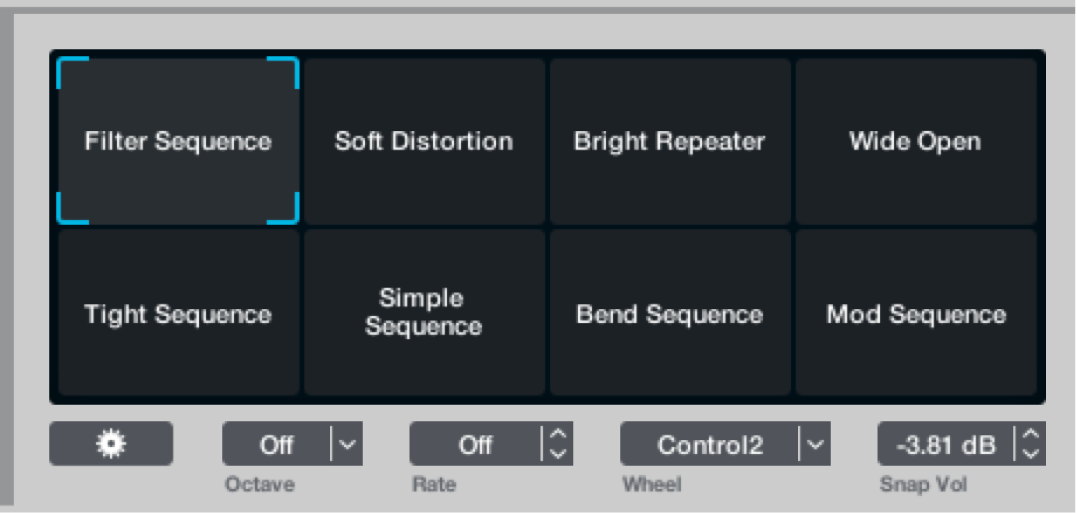
Click the Perform button to view the performance controls, then drag the framing bracket in the Transform pad while playing your keyboard.
You will hear the sound morphing between different sound variations. If you happen across something you like, you can use the Save As button in the Name bar to name and save a new preset. Return the framing bracket to the Pluck + Pad position when done.
Adjust the tuning and envelope of a source in Alchemy
In MainStage, drag the source B Tune knob to -24 semis.
Click the source B Vol knob.
The AHDSR envelope updates in the central modulation section.

Double-click the source B Pan knob to center it.
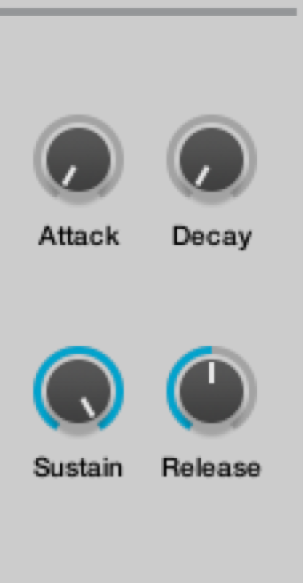
In the central modulation section, set the Attack, Hold, and Decay knobs to zero, set Sustain to around 75%, and Release to around 0.065. You may also want to adjust the Attack knob in the performance controls section if the attack phase of the sound is too slow or too quiet.
Play the keyboard to hear a simple synth bass sound.
Adjust filters to tweak a sound in Alchemy
In MainStage, change the filter 2 Cutoff and Resonance settings in the main filter section to the right of the sources while playing.
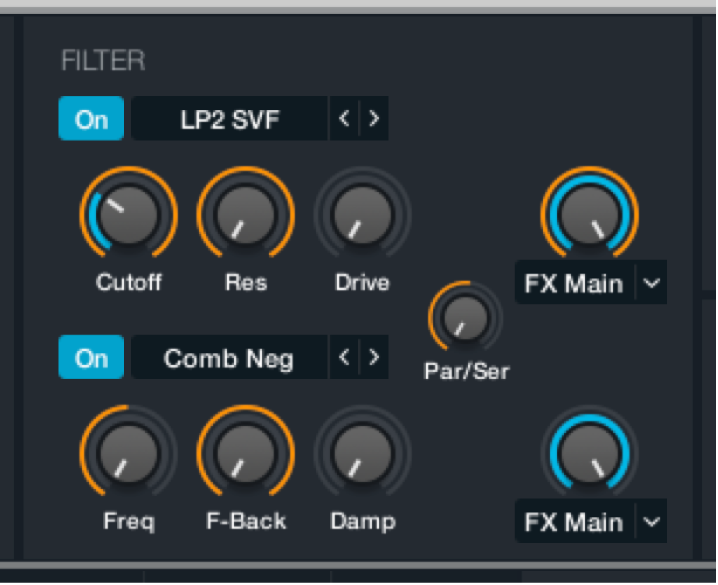
Click the Filter type menu to experiment with different filters.
Enable filter 1, and try different settings.
Adjust the Par/Ser knob to hear how this affects the sound when the filters are used in series or in parallel.
Drag the framing bracket in the performance controls to hear variations of your tweaked sound.
Recycle sources and sound settings from other presets in Alchemy
This is less of a tweak and more of a shortcut for sound creation. Alchemy provides thousands of presets that can be partially used for new sounds, sequences, modulation settings, arpeggios, effects settings, and more.
In any loaded MainStage preset, click the source name field and choose Save Source from the pop-up menu.
Give the source a name in the file dialog, and click Save.
This source is automatically saved in the Alchemy > Source subfolder.
In a new instance of Alchemy, click the Source select field and choose Load Source from the pop-up menu, then choose the saved source.
The source (or sources) from up to four presets can be recycled in this way.
Steps 1-3 can be repeated for any Alchemy element that provides a File pop-up menu, such as modulation settings, arpeggiator settings, effects settings, and so on.
Make use of existing presets as sources of raw material for your own sounds.