MainStage User Guide
- Welcome
-
- Overview of Edit mode
-
- Select patches and sets in the Patch List
- Copy, paste, and delete patches
- Reorder and move patches in the Patch List
- Add patches
- Create a patch from several patches
-
- Overview of the Patch Settings Inspector
- Select patch settings in the Patch Library
- Set the time signature for patches
- Change the tempo when you select a patch
- Set program change and bank numbers
- Defer patch changes
- Instantly silence the previous patch
- Change patch icons
- Transpose the pitch of incoming notes for a patch
- Change the tuning for a patch
- Add text notes to a patch
-
- Overview of channel strips
- Add a channel strip
- Change a channel strip setting
- Configure channel strip components
- Show signal flow channel strips
- Hide the metronome channel strip
- Create an alias of a channel strip
- Add a patch bus
- Set channel strip pan or balance positions
- Set channel strip volume levels
- Mute and solo channel strips
- Use multiple instrument outputs
- Use external MIDI instruments
- Reorganize channel strips
- Delete channel strips
-
- Overview of the Channel Strip Inspector
- Choose channel strip settings
- Rename channel strips
- Change channel strip colors
- Change channel strip icons
- Use feedback protection with channel strips
- Set keyboard input for a software instrument channel strip
- Transpose individual software instruments
- Filter MIDI messages
- Scale channel strip velocity
- Set channel strips to ignore Hermode tuning
- Override concert- and set-level key ranges
- Add text notes to a channel strip in the Channel Strip Inspector
- Route audio via send effects
-
- Screen Control Inspector overview
- Replace parameter labels
- Choose custom colors for screen controls
- Change background or grouped screen control appearance
- Set screen controls to show the hardware value
- Set parameter change behavior for screen controls
- Set hardware matching behavior for screen controls
- Reset and compare changes to a patch
- Override concert- and set-level mappings
-
- Overview of mapping screen controls
- Map to channel strip and plug-in parameters
- Map screen controls to actions
- Map a screen control to multiple parameters
- Use screen controls to display PDF document pages
- Edit the saved value for a mapped parameter
- Set drum pads or buttons to use note velocity
- Map screen controls to all channel strips in a patch
- Undo screen control parameter mappings
- Remove screen control mappings
- Work with graphs
- Create controller transforms
- Share patches and sets between concerts
- Record the audio output of a concert
-
- Overview of concerts
- Create a concert
- Open and close concerts
- Save concerts
- How saving affects parameter values
- Clean up concerts
- Consolidate assets in a concert
- Rename the current concert
-
- Overview of the Concert Settings Inspector
- Set MIDI Routing to channel strips
- Transpose incoming note pitch for a concert
- Define the program change message source
- Send unused program changes to channel strips
- Set the time signature for a concert
- Change the tuning for a concert
- Set the pan law for a concert
- Add text notes to a concert
- Control the metronome
- Silence MIDI notes
- Mute audio output
-
- Layout mode overview
-
- Screen control parameter editing overview
- Lift and stamp screen control parameters
- Reset screen control parameters
- Common screen control parameters
- Keyboard screen control parameters
- MIDI activity screen control parameters
- Drum pad screen control parameters
- Waveform screen control parameters
- Selector screen control parameters
- Text screen control parameters
- Background screen control parameters
- How MainStage passes through MIDI messages
- Export and import layouts
- Change the aspect ratio of a layout
-
- Before performing live
- Use Perform mode
- Screen controls in performance
- Tempo changes during performance
- Tips for performing with keyboard controllers
- Tips for performing with guitars and other instruments
- Tune guitars and other instruments with the Tuner
- The Playback plug-in in performance
- Record your performances
- After the performance
- Tips for complex hardware setups
-
- Overview of keyboard shortcuts and command sets
-
- Concerts and layouts keyboard shortcuts
- Patches and sets (Edit mode) keyboard shortcuts
- Editing keyboard shortcuts
- Actions keyboard shortcuts
- Parameter mapping (Edit mode) keyboard shortcuts
- Channel strips (Edit mode) keyboard shortcuts
- Screen controls (Layout mode) keyboard shortcuts
- Perform in Full Screen keyboard shortcuts
- Window and view keyboard shortcuts
- Help and support keyboard shortcuts
-
- Learn about Effects
-
- Learn about Amps and Pedals
-
- Bass Amp Designer overview
- Bass amplifier models
- Bass cabinet models
- Build a custom combo
- Amplifier signal flow
- Pre-amp signal flow
- Use the D.I. box
- Amplifier controls
- Bass Amp Designer effects overview
- Bass Amp Designer EQ
- Bass Amp Designer compressor
- Bass Amp Designer Graphic EQ
- Bass Amp Designer Parametric EQ
- Bass Amp Designer microphone controls
-
- Learn about Delay effects
- Echo controls
-
- MainStage Loopback overview
- Add a Loopback instance in MainStage
- MainStage Loopback interface
- MainStage Loopback waveform display
- MainStage Loopback transport and function controls
- MainStage Loopback information display
- MainStage Loopback Sync, Snap To, and Play From parameters
- Use the MainStage Loopback group functions
- MainStage Loopback Action menu
- Sample Delay controls
- Stereo Delay controls
- Tape Delay controls
-
- Use MIDI plug-ins
-
- Arpeggiator overview
- Arpeggiator control parameters
- Note order parameters overview
- Note order variations
- Note order inversions
- Arpeggiator pattern parameters overview
- Use Live mode
- Use Grid mode
- Arpeggiator options parameters
- Arpeggiator keyboard parameters
- Use keyboard parameters
- Assign controller parameters
- Modifier MIDI plug-in controls
- Note Repeater MIDI plug-in controls
- Randomizer MIDI plug-in controls
-
- Use the Scripter MIDI plug-in
- Use the Script Editor
- Scripter API overview
- MIDI processing functions overview
- HandleMIDI function
- ProcessMIDI function
- GetParameter function
- SetParameter function
- ParameterChanged function
- Reset function
- JavaScript objects overview
- Use the JavaScript Event object
- Use the JavaScript TimingInfo object
- Use the Trace object
- Use the MIDI event beatPos property
- Use the JavaScript MIDI object
- Create Scripter controls
- Transposer MIDI plug-in controls
-
- Learn about included Instruments
-
- Alchemy overview
- Name bar
-
- Alchemy source overview
- Source master controls
- Import browser
- Source subpage controls
- Source filter controls
- Source filter use tips
- Source elements overview
- Additive element controls
- Additive element effects
- Spectral element controls
- Spectral element effects
- Pitch correction controls
- Formant filter controls
- Granular element controls
- Sampler element controls
- VA element controls
- Source modulations
- Morph controls
- Master voice section
- Alchemy extended parameters
-
- MainStage Quick Sampler overview
- Add content to MainStage Quick Sampler
- MainStage Quick Sampler waveform display
- Use Flex in MainStage Quick Sampler
- MainStage Quick Sampler Pitch controls
- MainStage Quick Sampler Filter controls
- Quick Sampler filter types
- MainStage Quick Sampler Amp controls
- MainStage Quick Sampler extended parameters
-
- MainStage Playback plug-in overview
- Add a MainStage Playback plug-in
- MainStage Playback interface
- Use the MainStage Playback waveform display
- MainStage Playback transport and function buttons
- MainStage Playback information display
- MainStage Playback Sync, Snap To, and Play From parameters
- Use the MainStage Playback group functions
- Use the MainStage Playback Action menu and File field
- Use markers with the MainStage Playback plug-in
-
- Sculpture overview
- Sculpture interface
- Global parameters
- Amplitude envelope parameters
- Use the Waveshaper
- Filter parameters
- Output parameters
- Assign MIDI controllers
- Extended parameters
-

Quickly create an instrument
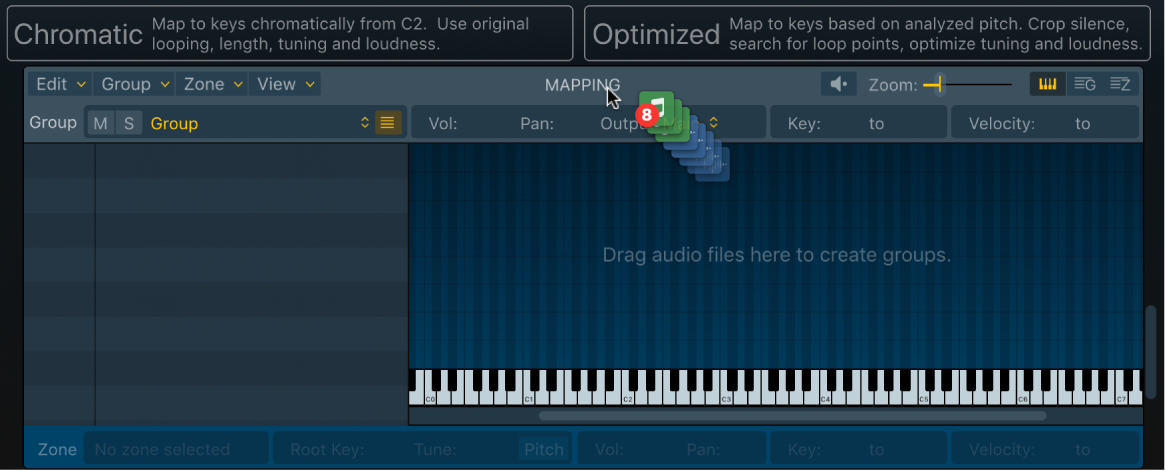
To quickly create an instrument in Sampler, just drag one or more samples onto the Navigation bar. Sampler analyzes the samples, creates zones containing the samples, and then maps the zones to keys.
To simplify instrument creation, the Navigation bar provides Chromatic and Optimized dropzones:
When you drag one or more samples onto the Chromatic dropzone, Sampler chromatically maps samples as zones across the keyboard range, starting from C2. Each zone is mapped to a single key on the keyboard. The original file length, tuning, and volume are used. Looping data is read from the file header, if present. The root key can also be read from the filename.
Note: The Read Root Key from preference has a significant impact on chromatic import behavior. For details, see the Sampler Preferences section in the Logic Pro User Guide.
When you drag one or more samples onto the Optimized dropzone, Sampler automatically determines the root notes of the zones and maps the zones across the keyboard. If there are multiple zones with the same root note, Sampler creates velocity layers—a different sample is triggered depending on how hard you strike the key—based on the perceived loudness of the samples. Loop point data in the file header is used, if present. If the file header does not contain looping data a search is performed to find the best loop points, and the crossfade length and type are automatically set. The file is also analyzed to find the perceived loudness, and the volume is raised or lowered to achieve a perceived loudness of -12 LUFs. Start and end markers are also automatically set to crop silence that precedes or follows the analyzed audio.
Follow the steps in the task to create your own instruments in record time.
Create groups and zones by dragging audio content onto the Navigation bar
Choose Sampler from the Instrument slot pop-up menu on a software instrument channel strip.
Drag samples from the Logic Pro browsers, the Finder, a region or cell, or even from a marquee selection on a region to one of the import options in the Navigation bar: Chromatic or Optimized.
To make an instrument from multiple samples of pitched instrument notes, such as the different notes of a piano, or a single sample that contains multiple note pitches like a vocal sample or a bass line, choose an Optimized dropzone.
If you have multiple samples of sounds that don't have a particular pitch that you want assigned to MIDI notes, such as multiple drums in a kit, choose a Chromatic dropzone.
Tip: You can add any type of loop from the Loop Browser, including Software Instrument loops, Step Sequencer loops, and Drummer loops.

The Chromatic and Optimized import options in the Navigation bar divide into two further dropzones when you drag audio content onto them.
Zone per File: Creates a group containing one zone for each file dropped on the dropzone.
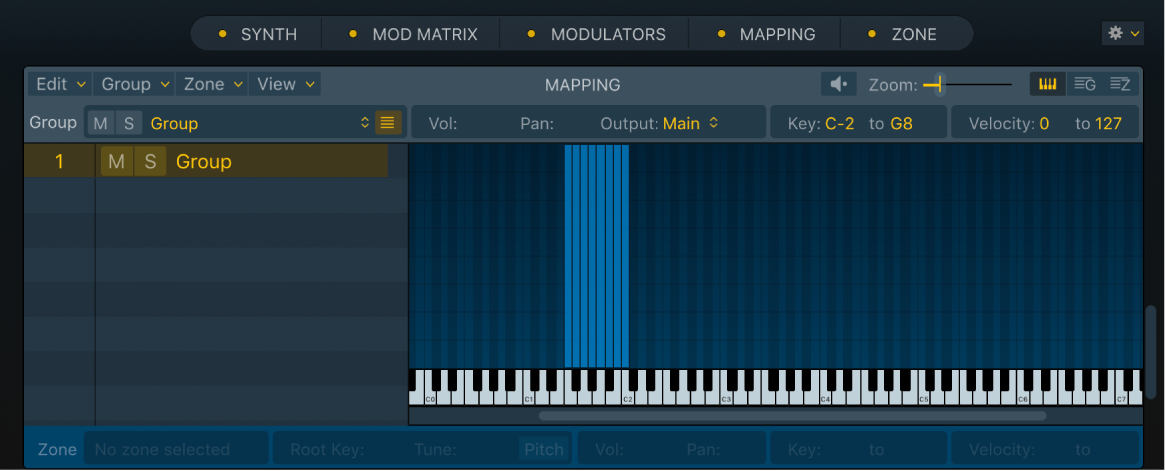
Split at Silence: Creates a new group for each file dropped on the dropzone. Each file is split into segments at extended periods of silence, and a new zone is created in the associated group for each segment. These segments are mapped chromatically from C2.
If you import more samples than the number of available keys, Sampler automatically creates additional groups, which start mapping samples chromatically from C2 in each new group.
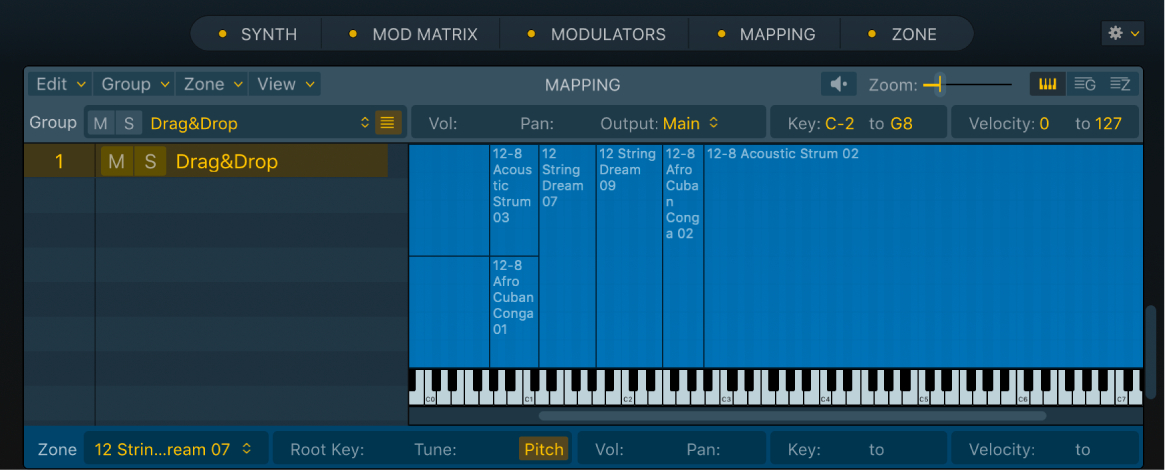
Depending on the audio material and existing zones, using the Zone per File option to import several audio files may result in an onscreen view similar to the following image:

Depending on the audio material and existing zones, using the Zone per Note option to import a single audio file may result in an onscreen view similar to the following image:

Depending on the audio material and existing zones, using the Zone per Note option to import multiple audio files may result in an onscreen view similar to the following image:
