Intro to the Audio Editor in GarageBand on Mac
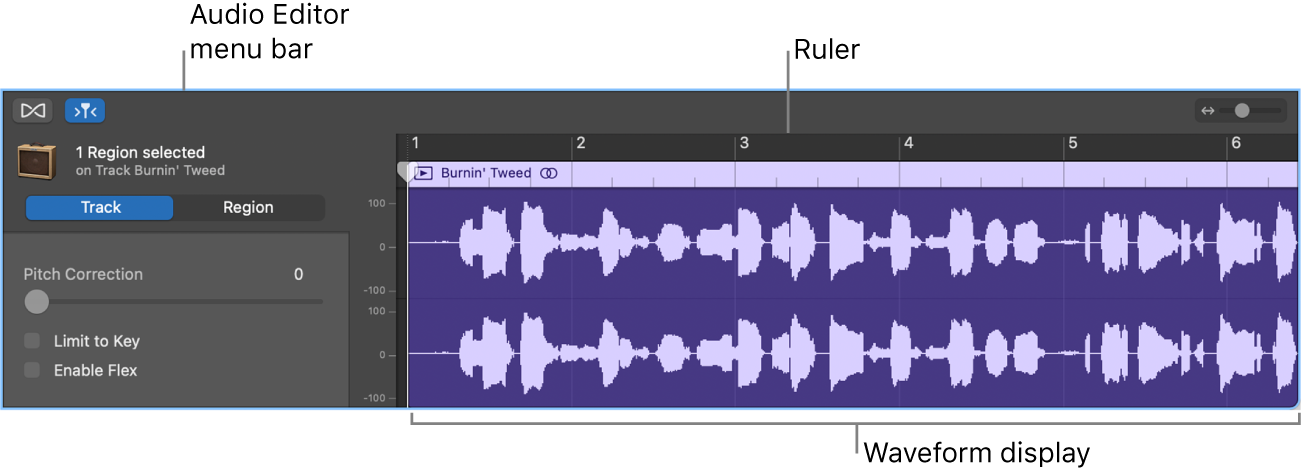
The Audio Editor shows a close-up view of part of an audio track, displaying the audio waveform of the track’s regions in a time grid.

In the Audio Editor, you can move and trim audio regions, split and join them, and edit them in other ways. You can scroll and zoom the Audio Editor, and zoom the amplitude of the waveforms in audio regions. Edits you make in the Audio Editor are nondestructive, so you can always return to your original recordings.
You can also correct the pitch of audio material in the Audio Editor. For more information, see Correct the pitch of all regions on an audio track in GarageBand on Mac. Using Flex Time, you can edit the timing of audio material in the Audio Editor. For more information, see Edit the note and beat timing in GarageBand on Mac.
Open the Audio Editor
In GarageBand on Mac, do one of the following:
Select an audio track in the Tracks area, then click the Editors button
 .
.Select an audio track in the Tracks area, then choose View > Show Editor.
Double-click an audio region to open it in the Audio Editor.
The Audio Editor opens below the Tracks area. Along the top of the Audio Editor is a ruler showing time divisions, and a menu bar with Flex, Catch, and zoom controls. The main area of the Audio Editor shows the audio waveform of the regions in the selected audio track.
Vertically resize the Audio Editor
In GarageBand on Mac, place the pointer in the bar at the top of the Audio Editor, then drag upward.
Drag downward to make the Audio Editor smaller again.
Zoom the Audio Editor horizontally
In GarageBand on Mac, drag the zoom slider in the Audio Editor menu bar left or right.
Close the Audio Editor
In GarageBand on Mac, click the Editors button
 in the control bar.
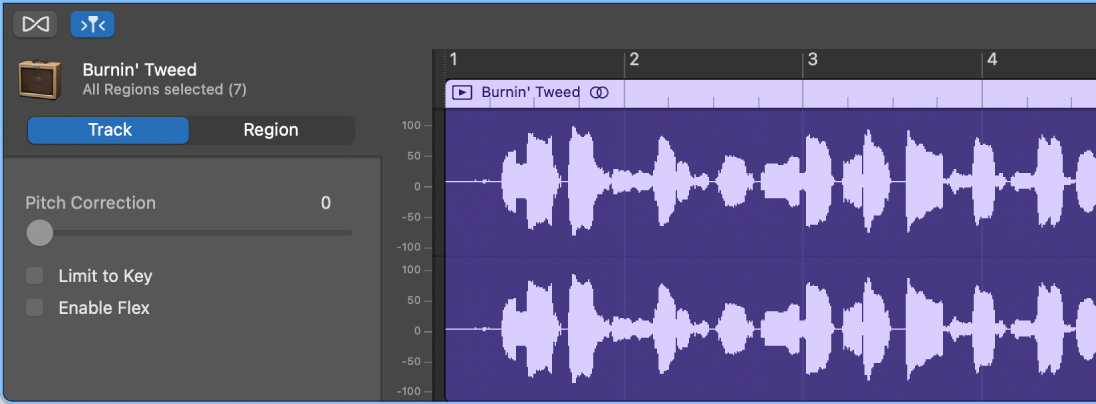
When the track is selected (and no individual region is selected), the following controls appear in the Audio Editor inspector:
Pitch Correction slider: Determines the amount of pitch correction applied to regions in the track.
Limit to Key checkbox: Limits pitch correction to notes in the project key.
Enable Flex checkbox: Turns on flex editing for the track.

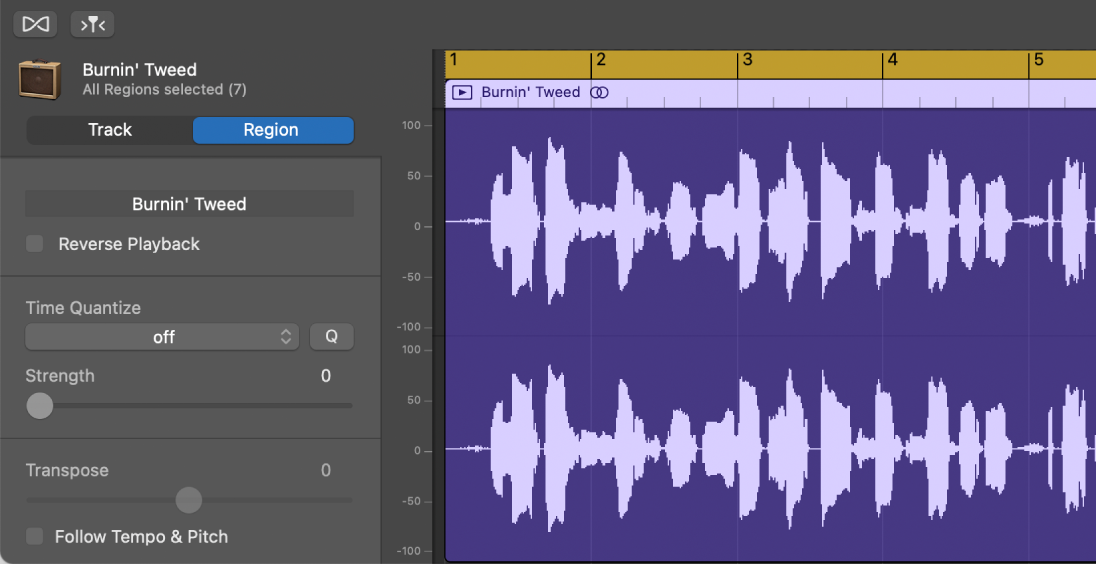
When one or more regions are selected, the following controls appear in the Audio Editor inspector to the left of the waveform:
Region Name field: Edit the name of the selected regions.
Reverse Playback checkbox: Play the audio region backwards.
Time Quantize pop-up menu (with Strength slider): Quantize the timing of notes, beats, and other events in the selected regions.
Transpose slider: Change the pitch of notes in the selected regions.
Follow Tempo and Pitch checkbox: Sets whether the regions match the project tempo and key.
