
Create multicam clips in Final Cut Pro for Mac
Creating multicam clips is similar to creating auditions and compound clips in the browser. Multicam clips can be made up of diverse media sources (different formats, frame rates, and so on). There can be multiple clips in any given angle of a multicam clip.
You can have Final Cut Pro create multicam clips for you automatically, or you can create the clips manually.
If you know what kind of metadata your multicam media has, you can create multicam clips using manual methods faster than with the automatic methods. The automatic methods use sophisticated automatic audio sync technology to ensure sync accuracy (but at the expense of processing time). You can turn off automatic audio sync if it’s not needed. For example, if you’ve recorded accurate timecode in every clip, Final Cut Pro can create your multicam clip automatically without the audio sync feature.
Create a multicam clip automatically
In the Final Cut Pro browser, select the clips you want to include in the multicam clip.
Do one of the following:
Choose File > New > Multicam Clip.
Control-click the selection and choose New Multicam Clip.
If the multicam automatic settings aren’t shown in the window that appears, click Use Automatic Settings in the lower-left corner of the window.
The multicam automatic settings appear.
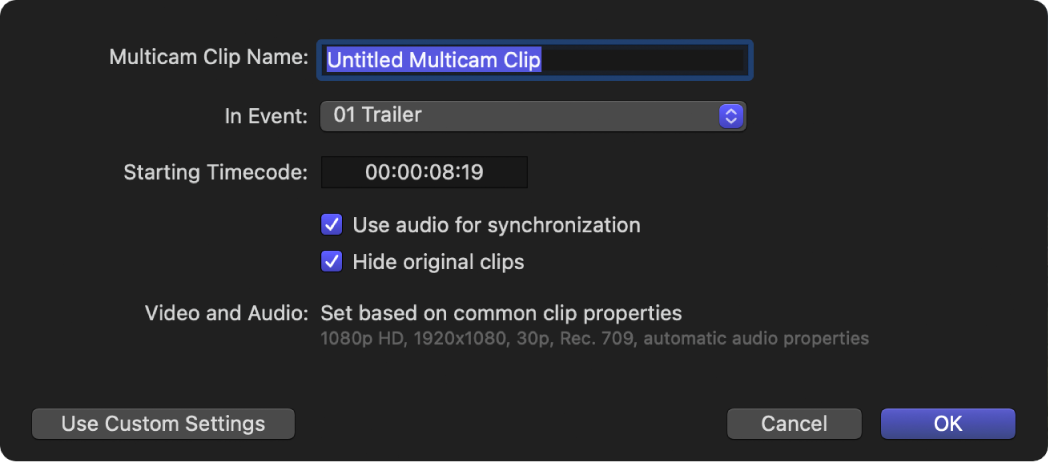
Note: The automatic settings are shown by default, but if the last multicam clip you created used custom settings, those settings are shown.
Type a name for the multicam clip in the Multicam Clip Name field.
Click the In Event pop-up menu and choose the event in which you want to create the new multicam clip.
If you want the multicam clip’s timecode to start at a value other than the earliest timecode value in the selected clips (the default), type a timecode value in the Starting Timecode field.
To sync angles automatically using audio waveform data, select “Use audio for synchronization.”
This option makes precision sync adjustments using audio waveforms in each angle. This is the same audio sync technology that you can use to automatically sync clips together into a compound clip.
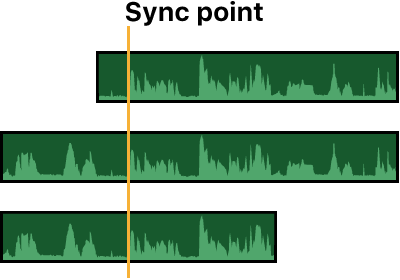
Note: Some audio recordings are not suited for use with this feature. Selecting this option may result in long processing times during which Final Cut Pro is not available for editing.
If you want to continue to see the source clips in the browser after you create the multicam clip, deselect “Hide original clips.”
By default, source clips are hidden from view to reduce clutter. See Hide clips in the browser in Final Cut Pro for Mac.
Click OK.
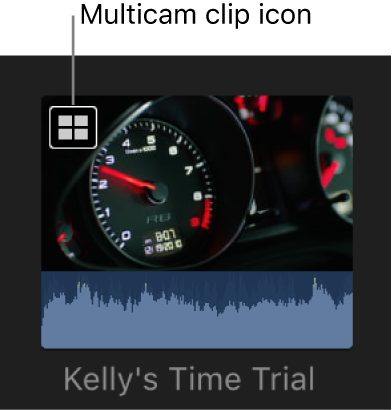
Final Cut Pro creates a new multicam clip in the event you chose and places duplicates of the selected clips in the new multicam clip.
Create a multicam clip with custom settings
In the Final Cut Pro browser, select the clips you want to include in the multicam clip.
Do one of the following:
Choose File > New > Multicam Clip.
Control-click the selection and choose New Multicam Clip.
In the window that appears, type a name for the multicam clip in the Multicam Clip Name field.
Click the In Event pop-up menu and choose the event in which you want to create the new multicam clip.
If you want the multicam clip’s timecode to start at a value other than the earliest timecode value in the selected clips (the default), type a timecode value in the Starting Timecode field.
To sync angles automatically using audio waveform data, select “Use audio for synchronization.”
This option makes precision sync adjustments using audio waveforms in each angle. This is the same audio sync technology that you can use to automatically sync clips together into a compound clip.

Note: Some audio recordings are not suited for use with this feature. Selecting this option may result in long processing times during which Final Cut Pro is not available for editing.
If you want to continue to see the source clips in the browser after you create the multicam clip, deselect “Hide original clips.”
By default, source clips are hidden from view to reduce clutter. See Hide clips in the browser in Final Cut Pro for Mac.
If the multicam custom settings aren’t shown, click Use Custom Settings.
The custom settings appear.
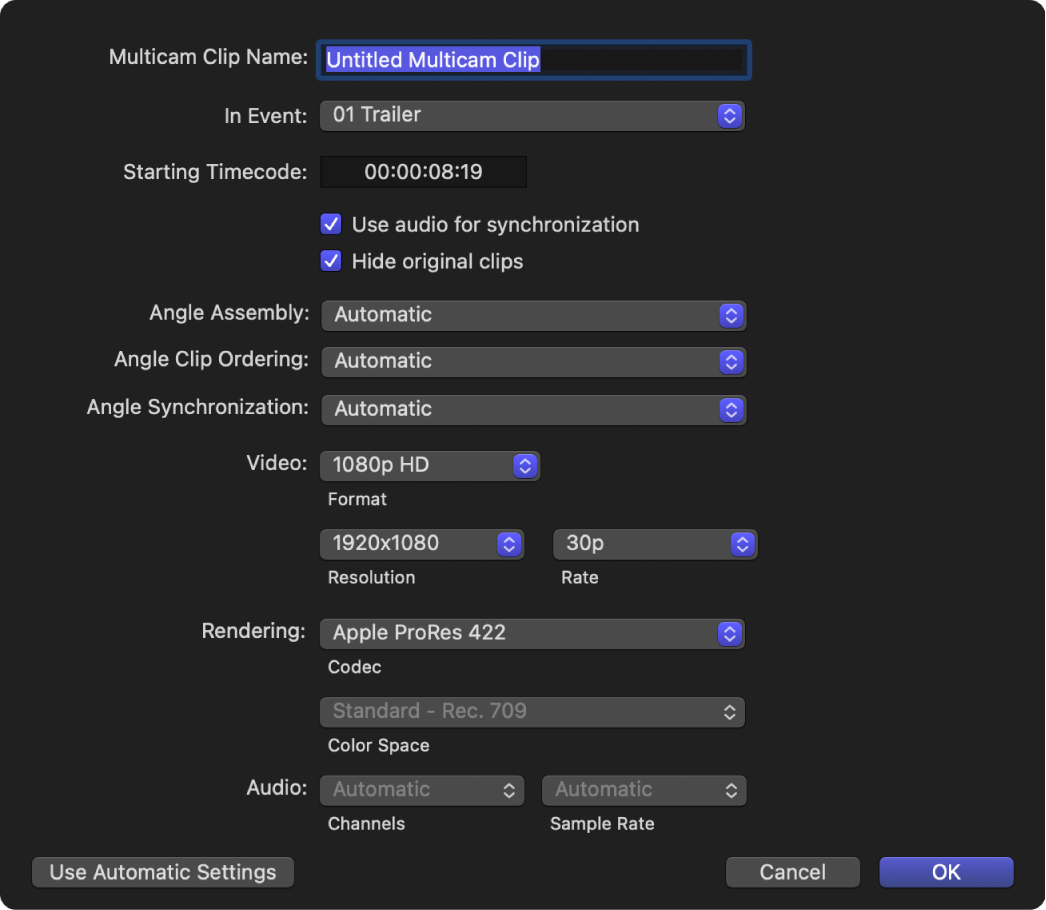
Note: The automatic settings are shown by default, but if the last multicam clip you created used custom settings, those settings are shown.
Click the Angle Assembly pop-up menu and choose how the angles in the multicam clip are created:
Automatic: Final Cut Pro creates the angles automatically.
Camera Angle: Final Cut Pro creates angles in the multicam clip based on the Camera Angle property of the selected clips.
Camera Name: Final Cut Pro creates angles in the multicam clip based on the Camera Name property of the selected clips.
Clips: Final Cut Pro creates a separate angle for each selected clip, using the Name property in each clip to name the angle.
Click the Angle Clip Ordering pop-up menu and choose how angles are ordered within the multicam clip:
Automatic: Final Cut Pro orders the clips within each angle automatically. If there’s more than one clip per angle, Final Cut Pro inserts gap clips between the clips, as needed, to achieve the correct timing and spacing.
Timecode: Final Cut Pro orders the clips within each angle using timecode recorded in the clips. If you recorded timecode in your clips, choose this option. It’s the fastest and most frame-accurate method of ordering clips.
Content Created: Final Cut Pro orders the clips within each angle using the date and time information recorded by your camcorder or video recording device.
The Content Created method can position clips within 1-second accuracy (because in most camcorders the smallest unit in date and time information is 1 second). If you choose this clip-ordering method, consider making your multicam clip frame-accurate by selecting “Use audio for synchronization” (described in step 6) or manually syncing your angles in the angle editor.
Tip: At any time, you can change the Content Created date and time of your source clips in the browser. Just select one or more clips and choose Modify > Adjust Content Created Date and Time.
Click the Angle Synchronization pop-up menu and choose how angles are synced in the multicam clip:
Automatic: Final Cut Pro syncs the angles automatically (using one or more of the following methods).
Timecode: Final Cut Pro syncs the angles based on the timecode recorded in the clips. For more information about recording timecode, see Multicam editing workflow in Final Cut Pro for Mac.
Note: This option is not available when the drop frame patterns in the selected clips do not match.
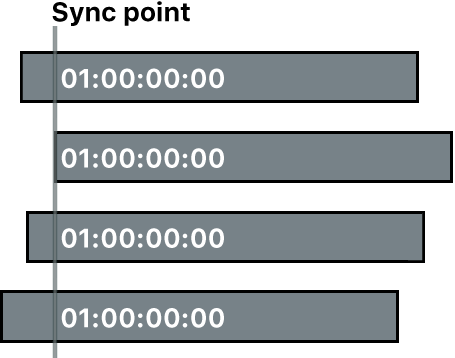
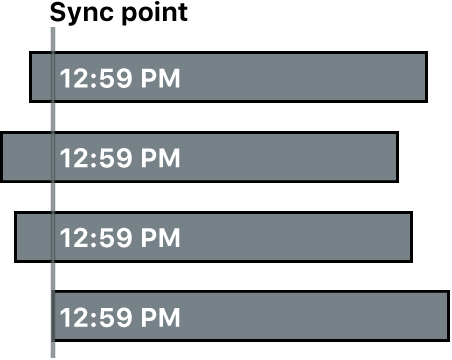
Content Created: Final Cut Pro syncs the angles based on the date and time information recorded by your camcorder or video recording device.
Start of First Clip: Final Cut Pro uses the first frame in each angle as the sync point.
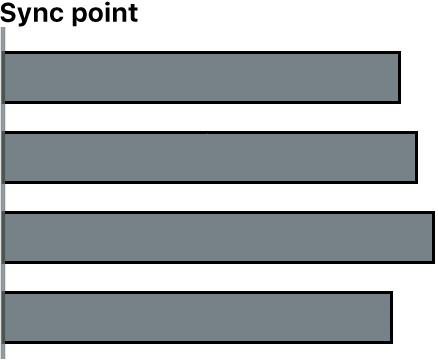
Tip: The Start of First Clip method is useful if you want to use specific range selections of your source clips only. In the browser, add keywords or the favorite rating to the range selections you want to use, then filter or search for the clips. When you create your multicam clip, Final Cut Pro uses only the media showing in the filtered view.
First Marker on the Angle: Final Cut Pro uses the first marker in each angle as the sync point.
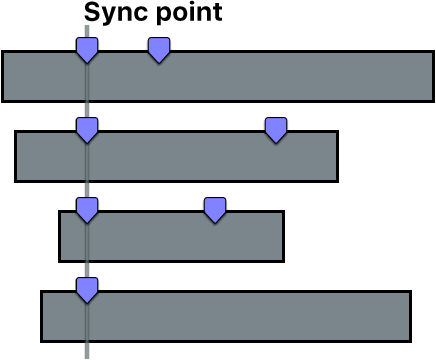
Tip: With this method, you can use the first marker to define a region that can be fine-tuned with the “Use audio for synchronization” option (described above). In other words, you don’t need to place the marker exactly—just close enough so that the automatic audio sync feature can sync the angles the rest of the way.
If you want to change the video properties settings, click the Video pop-up menu, choose Custom, then change the settings as appropriate.
Note: By default, Final Cut Pro analyzes the selected clips and configures these settings according to the most common clip properties among those clips.
If you want to change the rendering codec, click the Rendering pop-up menu and choose a different codec.
To change the rendering color space for your project, click the Color Space pop-up menu and choose a color space.
When the Color Processing setting in the Library Properties inspector is set to Wide Gamut, you can choose either Standard - Rec. 709 or Wide Gamut - Rec. 2020. Otherwise, the rendering color space is chosen for you based on other settings, such as Video Format. For example, setting the video format to NTSC SD automatically sets the color space to Standard - Rec. 601 (NTSC).
If you want to change the audio channel configuration or sample rate, use the Channels pop-up menu or the Sample Rate pop-up menu, respectively.
Click OK.
Final Cut Pro creates a new multicam clip in the event and places duplicates of the selected clips in the new multicam clip.

Download this guide: PDF