
Record and transcribe audio in Notes on Mac
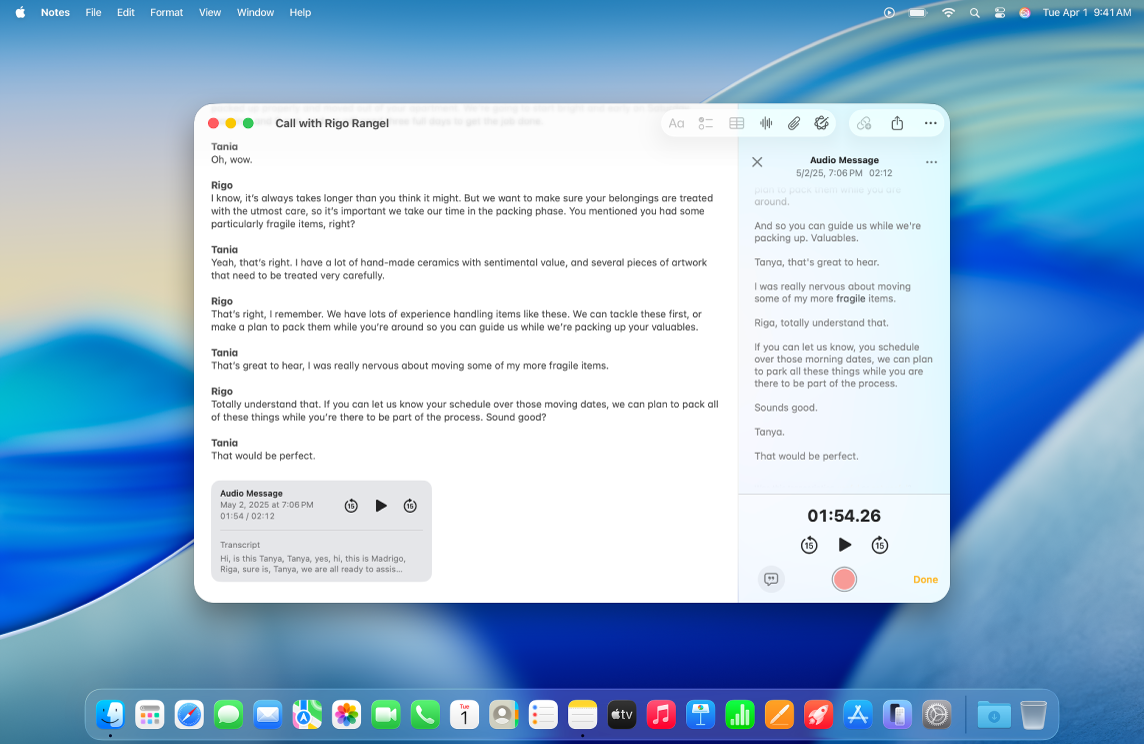
Record and transcribe audio right from your note, and keep recordings in your note body with related comments, checklists, and documents. You can even edit your note while recording, so you’re always able to jot down something important.
Note: All Notes features described in this guide are available when using iCloud notes. Some features aren’t available when using accounts from other providers.
Record audio
You can record audio, pause, and resume recording, all from within your note.
Go to the Notes app
on your Mac.Open a note, or click
 to create a new note.
Click
 in the toolbar, then click
  Record Audio.
When you’re ready to record, click
 in the audio details section.
Do any of the following:
Pause recording: Click
 to temporarily pause your recording.
Resume recording: Click
 to resume recording.
When you’re finished recording, click
.Optionally, click the boldfaced title and type a name for your recording, then press Return.
Click Done.
Changes save automatically as you work.
Play an audio recording
Go to the Notes app
on your Mac.Open a note with an audio recording.
Click
 on the audio recording in the note body.
While the audio recording is playing, do any of the following:
Pause and resume: Click
 to pause. Click to resume playing.
Skip backward or forward: Click
 to go back or
  to go forward (in 15 second increments).
Make changes to an audio recording
After you make a recording, you can make changes—such as adding on to the end of a recording or changing the title.
Go to the Notes app
on your Mac.Open a note with the audio recording you want to change.
Double-click the audio recording to open the audio details section.
Do one of the following:
Add onto a recording: Go to the end of the recording, then press
.Change the title of the recording: Click the boldfaced title, type a name for your recording, then press Return.
When you’re finished making changes, click Done.
Changes are automatically saved to your note.
Transcribe audio
You can view, search in, and copy live audio transcripts.
Note: Audio transcription is available on Mac computers with M1 or later when the device language is set to English, Spanish, Portuguese, Italian, French, German, Japanese, Korean, Simplified Chinese, and Traditional Chinese.
Go to the Notes app
on your Mac.Open a note with an audio recording.
Double-click the audio recording to open the audio details section with the transcript. You can then do any of the following:
Search the transcript: Click
 , then click “Find in Transcript.”
Copy the transcript: Click
, then click Copy Transcript. To paste the transcript in your note, click in the note body, then press Command-V.
If Apple Intelligence* is turned on, you can summarize an audio recording. See Use Apple Intelligence in Notes.
Save, share, or delete an audio recording
Save audio recordings to your Documents folder, or share them with others.
Go to the Notes app
on your Mac.Open a note with an audio recording.
Control-click the audio recording to open the pop-up menu, then do any of the following:
Share an audio recording: Click Share Audio, then choose an option.
Save an audio recording: Click Save Attachment, choose the location you want the recording saved, enter the title (if you haven’t already), then click Save.
Delete an audio recording: Click Delete.