Record voiceovers in Final Cut Pro for iPad
You can record voiceover narration or other live audio directly into the timeline from input sources such as built-in and external microphones.
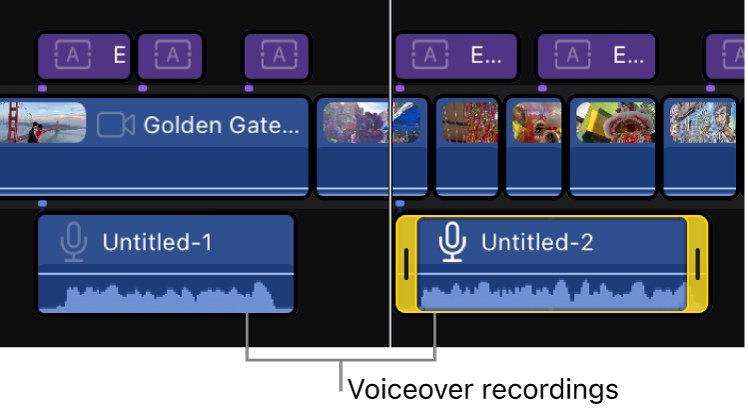
By default, Final Cut Pro includes an automatic countdown when you record a voiceover. The recorded audio clip appears in both the timeline and the browser.

Record a voiceover
Go to the Final Cut Pro app on your iPad.
Open a project.
In the timeline, position the playhead where you want to start recording.
Tap
 in the toolbar (or press Shift-V on a connected or paired keyboard).
 The first time you do this, you’re prompted to allow Final Cut Pro to access the microphone.
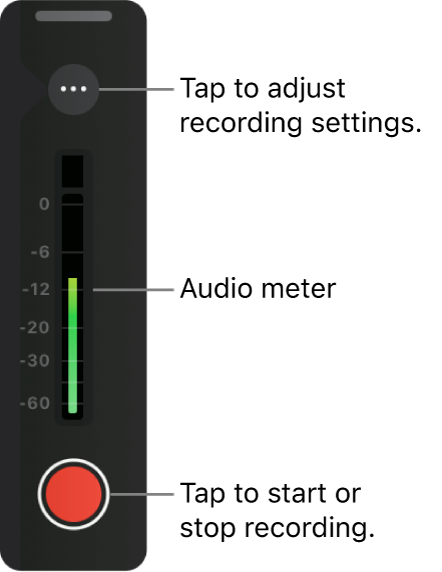
The voiceover controls appear. You can drag the handle at the top to position the controls anywhere on the screen.

To adjust settings before you record, see Adjust voiceover recording settings, below.
To start recording, tap
 in the voiceover controls.
Use the voiceover audio meter to make sure the volume doesn’t exceed peak levels (shown in red), which may result in audible distortion. If a red peak indicator appears at the top of the meter, tap anywhere in the meter to clear it, then re-record that audio clip.
To stop recording, tap
 in the voiceover controls.
When you stop recording, the playhead returns to the start point you set in step 2, and the audio recording appears directly under the primary storyline at the playhead position.

To close the voiceover controls, tap
 in the toolbar (or press Shift-V on a connected or paired keyboard).
Tip: You can start and stop recording repeatedly while playing through your project, creating multiple audio recordings in one pass. Tap ![]() below the viewer before tapping
below the viewer before tapping ![]() in the voiceover controls. The timeline plays continuously as you start and stop recording. When you’re finished recording, tap
in the voiceover controls. The timeline plays continuously as you start and stop recording. When you’re finished recording, tap ![]() below the viewer.
below the viewer.
Adjust voiceover recording settings
Go to the Final Cut Pro app on your iPad.
Open a project.
Tap
 in the toolbar (or press Shift-V on a connected or paired keyboard).
 Tap
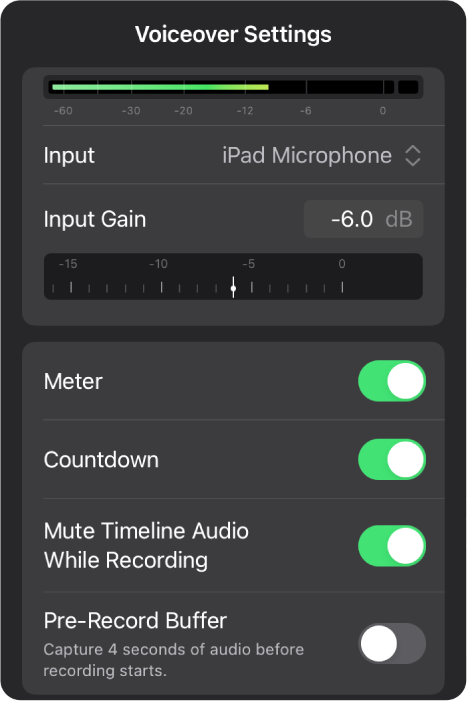
 in the voiceover controls to open the recording settings.
To adjust the microphone input level, do one of the following:
Drag the Input Gain dial.
Tap the Input Gain field, then use the keypad to enter a new value.
Tip: To reset the input level to its default value, double-tap the Input Gain dial.
Do any of the following:
Change the input device or input channels (mono or stereo): Tap
 to the right of Input and choose an option. If your input device has multiple inputs, choose an input from the Channel submenu.
Listen to your microphone input over headphones or a connected audio device as you record: Turn on Monitor. (The Monitor control appears only when a third-party device or headphones are connected.)
Note: The microphone audio plays from the output device currently selected in Sound settings (in iPad Settings).
Adjust the monitor level when monitoring is on: Drag the Monitor Gain dial, or tap the Monitor Gain field and use the keypad to enter a new value.
Hide the audio meter in the voiceover controls: Turn off Meter.
Turn off the automatic countdown before recording: Turn off Countdown.
Allow timeline audio to play while recording: Turn off Mute Timeline Audio While Recording.
Note: If you’re using the built-in microphone to record and playing the project audio through the iPad speakers, turning off this option will cause timeline audio to be recorded.
Capture 4 seconds of audio before the recording starts: Turn on Pre-Record Buffer.
This option records 4 seconds before the official start of the voiceover clip. This creates a media handle for flexibility in trimming the start point of the clip.