Final Cut Pro User Guide
- Welcome
-
- What’s new in Final Cut Pro 10.5.3
- What’s new in Final Cut Pro 10.5
- What’s new in Final Cut Pro 10.4.9
- What’s new in Final Cut Pro 10.4.7
- What’s new in Final Cut Pro 10.4.6
- What’s new in Final Cut Pro 10.4.4
- What’s new in Final Cut Pro 10.4.1
- What’s new in Final Cut Pro 10.4
- What’s new in Final Cut Pro 10.3
- What’s new in Final Cut Pro 10.2
- What’s new in Final Cut Pro 10.1.2
- What’s new in Final Cut Pro 10.1
- What’s new in Final Cut Pro 10.0.6
- What’s new in Final Cut Pro 10.0.3
- What’s new in Final Cut Pro 10.0.1
-
- Intro to effects
-
- Intro to transitions
- How transitions are created
- Add transitions
- Set the default transition
- Delete transitions
- Adjust transitions in the timeline
- Adjust transitions in the inspector and viewer
- Merge jump cuts with the Flow transition
- Adjust transitions with multiple images
- Modify transitions in Motion
-
- Add storylines
- Use the precision editor
- Conform frame sizes and rates
- Use XML to transfer projects
-
- Glossary
- Copyright

Add shape masks to a color mask in Final Cut Pro
Often when you create a color mask, more areas of the video are affected by it than you would like. For example, there might be a gray car on the right side of the screen that you want to color correct, and a gray car on the left that you don’t want to change. In this situation, you can add one or more shape masks to restrict the color mask to the areas defined by the shape masks.
You can set masks to interact in different ways using mask blend modes. For example, you can add mask shapes together to create a combined mask, subtract a mask shape from other masks, and intersect masks. For a complete description of ways masks can interact, see Combine multiple effect masks in Final Cut Pro.
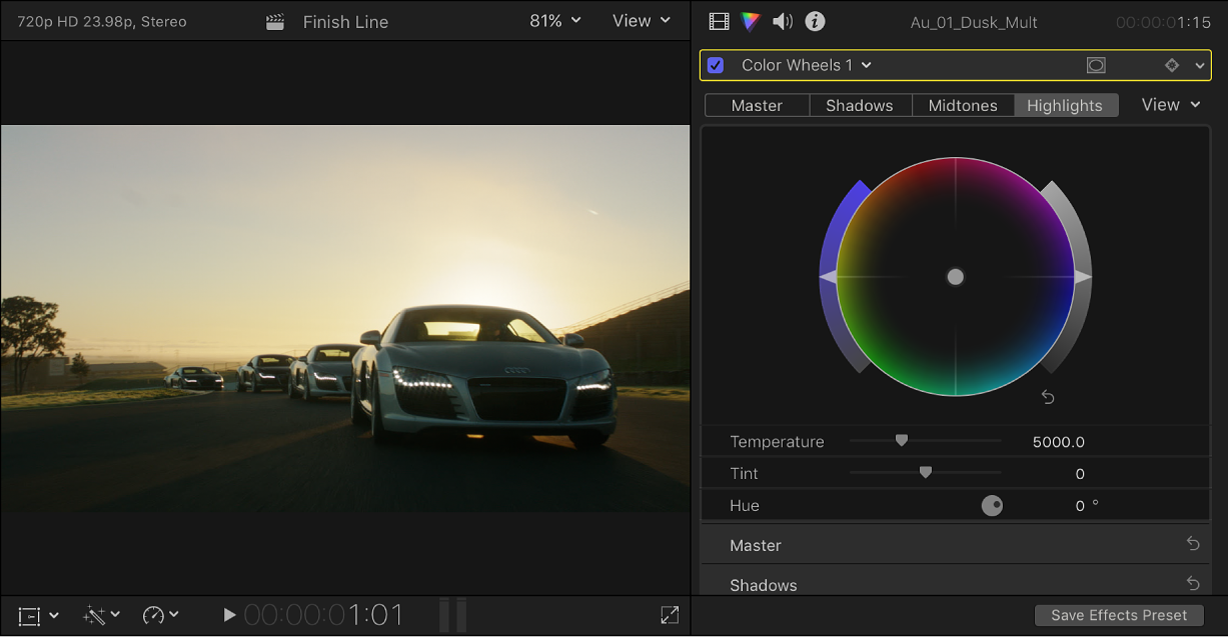
There are many ways to use multiple masks in a color correction. The example below shows how you might use a shape mask to isolate an area of a color mask: the dark gray body of one car in a line of four cars of similar color.
Example: Add shape masks to a color mask in a color correction effect
Add a color correction to a clip in the Final Cut Pro timeline, then select the clip.
Position the playhead in the timeline so that the clip appears in the viewer.
If the Color inspector isn’t already shown, do one of the following:
Choose Window > Go To > Color Inspector (or press Command-6).
Click the Enhancements pop-up menu below the viewer and choose Show Color Inspector.

Click the pop-up menu at the top of the Color inspector and choose the color correction you want to mask.
The color correction effect appears in the Color inspector.

Add a color mask to the color correction.
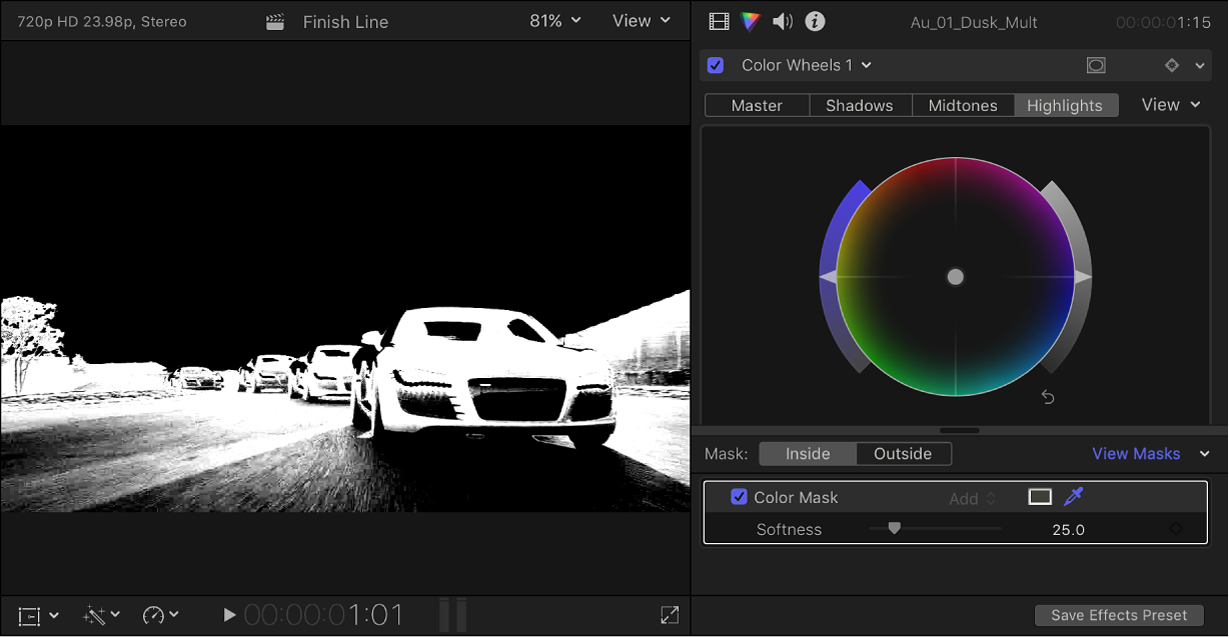
To view the mask alpha channel, click the View Masks pop-up menu in the inspector and choose Black and White, then click View Masks.

The color mask alpha channel appears in the viewer. White indicates fully opaque mask areas, black indicates areas outside the mask, and levels of gray indicate transparent mask areas.
Note: You can also view the visible areas of the masked image in color. See Ways to view masks in Final Cut Pro.

To invert the mask selection, see Invert effect masks in Final Cut Pro.
Add a shape mask to the same color correction.
Both masks appear in a list at the bottom of the Color inspector.
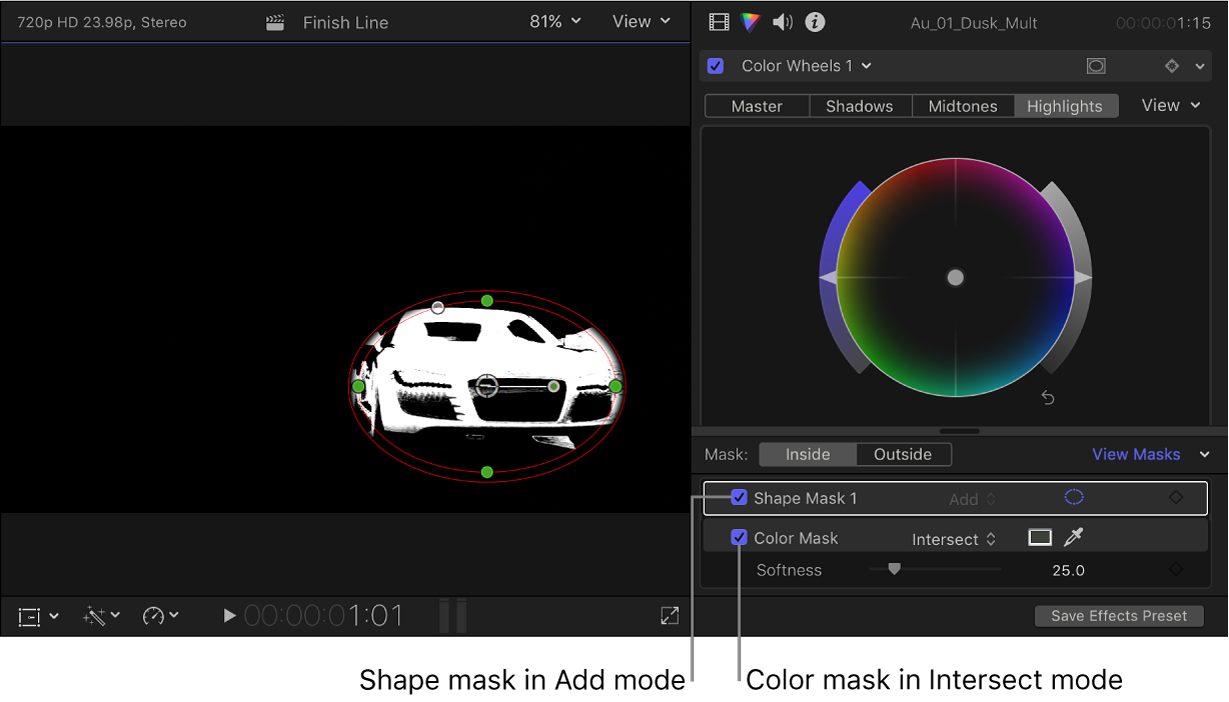
By default, the shape mask appears at the top of the list, set to the Add blend mode. The color mask’s blend mode is changed to Intersect. (In Intersect mode, only the area inside the mask shape that overlaps with other mask shapes is affected.)

Click the Shape Mask Onscreen Controls button
 so that the onscreen controls appear in the viewer.
Adjust the shape mask onscreen controls to isolate the area you want to correct (in this example, the dark gray tones of the first car).
The alpha channel in the viewer shows the isolated area only.

Add additional shape masks as needed to further isolate the area.
To correct color in the area isolated by the masks, adjust the controls of the color correction effect in the Color inspector.
For more information about the manual color correction effects, see Intro to color correction effects in Final Cut Pro.