Invite others to collaborate in Pages on Mac
You can invite others to work with you on a document in real time by sending them a link to it. Everyone working on the document can see changes as they’re made.
By default, only the people you invite to collaborate on the document can access and make changes to it. You can instead allow anyone who has the link to access the document. If you don’t want others to make changes, you can set the document permission to view only.
Invite people to collaborate
These instructions assume you’re signed in on your computer with your Apple ID and Pages is set up to use iCloud Drive.
Click
 in the Pages toolbar.
If the document isn’t stored in iCloud Drive, you see a prompt to move it there.
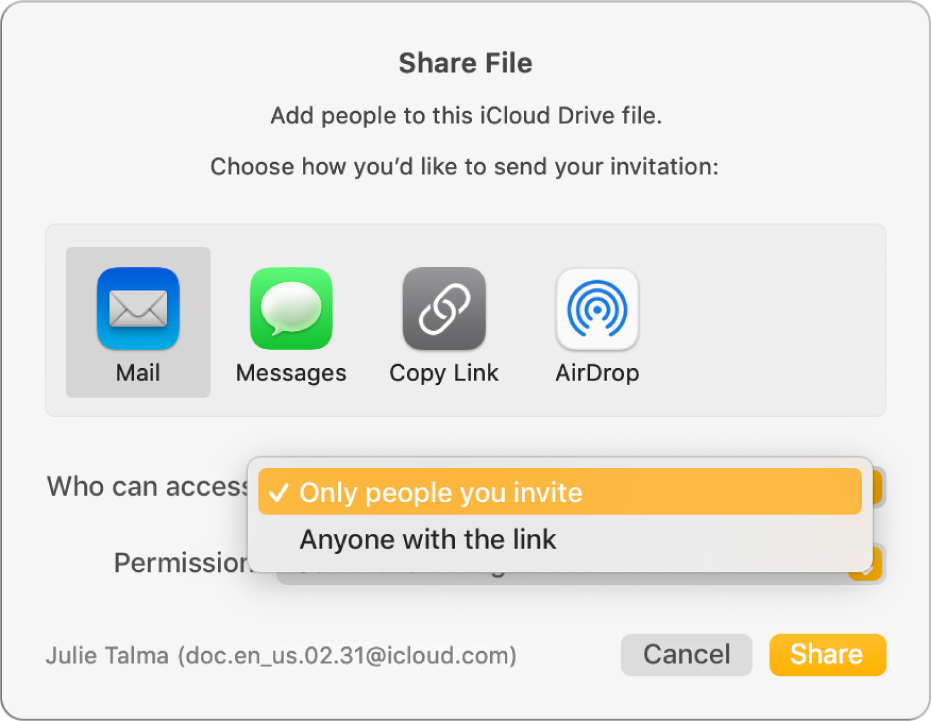
Click the “Who can access” pop-up menu, then choose an option:

Only people you invite: Only people who sign in with an Apple ID can open the document. People don’t need to have an Apple ID before you invite them; however, they need to create one before they can open your shared document.
If you invite someone using an email address or phone number that isn’t associated with their Apple ID, they won’t be able to accept the invitation until they add the email address or phone number to their Apple ID. Instructions are provided when they tap or click the link in the invitation.
Anyone with the link: Anyone who has the link to the shared document can tap or click the link to open the document. To protect it with a password, click Add Password.
If this document already has a password, it applies to the shared document as well, so you don’t need to enter a new one. If you want to change it, click Change Password.
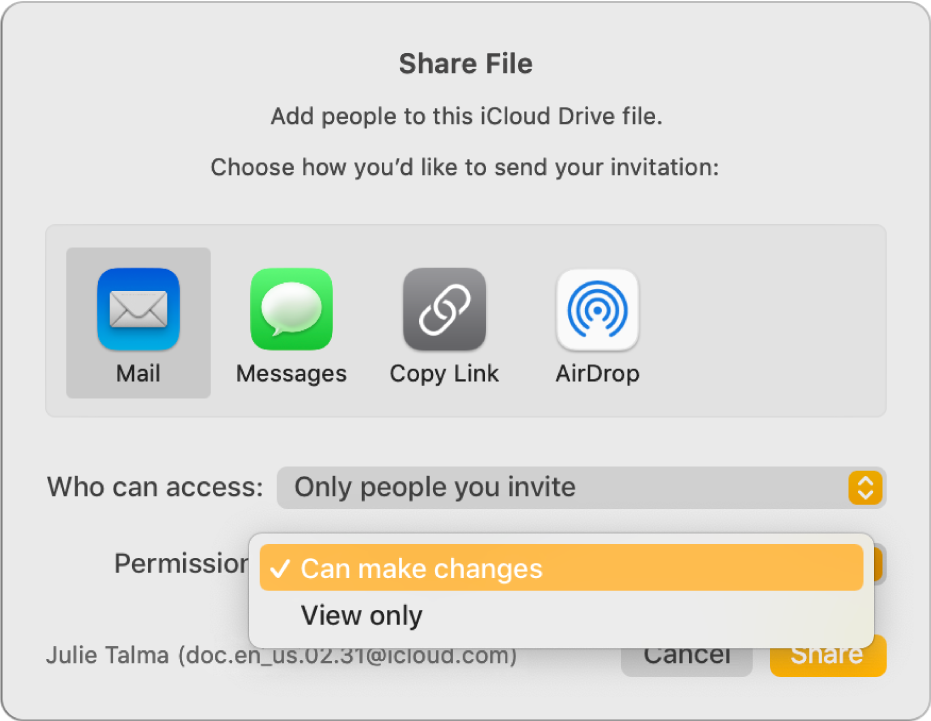
Click the Permission pop-up menu, then choose an option:

Can make changes: People can edit and print the shared document.
View only: People can view and print the shared document but not edit it.
If you set access to “Only people you invite” (in step 2), you can change individual permission settings after you share the document.
Click a method for sending the link:
Mail or Messages: Click Share, then type one or more email addresses or phone numbers. Add any information you want to include, then click Send.
An Internet service: To send the link using a service like Twitter, that account must already be set up on your Mac. Click the button for the service, then do one of the following:
If document access is set to “Only people you invite”: Enter the email addresses or phone numbers of people you want to invite, then click Share. Add any information you want to include, then click Post.
If document access is set to “Anyone with the link”: Click Share, enter the email addresses or phone numbers (if requested), then send or post the link.
Note: To set up a service, choose Apple menu > System Preferences, then click Internet Accounts. To use a service that’s not listed, click Copy Link, open the app where you want to share it, then choose Edit > Paste, or press Command-V on your keyboard.
Important: When you click Share, a link to the document (which includes its title) is created on iCloud. If the title or content of the document is confidential, make sure you ask recipients not to forward the link to anyone else.
The link appears in the body of the email, message or post along with the document title — make sure you don’t edit or delete it.
After you share a document, a tick appears on the Collaborate button ![]() to indicate the document is shared.
to indicate the document is shared.
Invite more people
If you’re the owner of a shared document whose access is set to “Only people you invite”, you can invite more people.
Note: If the document access is set to “Anyone with the link”, you can’t invite new people as described in this task. Instead, simply send them the link (see the next task).
Click
 in the toolbar, then click Add People at the bottom of the participant list.
Click the Permission pop-up menu, then set permission for the new people.
This setting affects only the new people you’re about to invite; it doesn’t change the permission of those you’ve already invited.
Click a method for sending the link, then click Continue.
The link may appear in the body of the email, message or post as a stylised graphic with the document title—be sure not to edit or delete it.
You can change individual permission for the new people after you send or post the link.
For details on setting permissions and sending the link, see “Invite people to collaborate” above.
Send the link to more people
If your document access is set to “Anyone with the link”, you can give new people access to the document simply by sending them the document link.
Note: If the document access is set to “Only people you invite”, you add new people by sending them an invitation to collaborate (see the task above).
Click
 in the toolbar, then click Send Link.
Click a method for sending the link, then click Continue.
Address the email, message or post, then send or post the link.
For details on sending the link, see “Invite people to collaborate” above.
Copy and paste the link
Any participant can copy a document link and paste it somewhere else. You might want to do this, for example, to save the link where you can easily access it.
If the owner limited access to only people they invite, the link only works for invited participants.
Click
 in the toolbar, then do one of the following:
Click Copy Link (or if you’re the owner, click Share Options, then click Copy Link). You see this option if the document was shared only by invitation.
Click Send Link, click Copy Link, then click Continue. You see this option if the document was shared with anyone who has the link.
Click where you want to paste the link, then choose Edit > Paste (from the Edit menu at the top of your screen), or press Command-V on your keyboard.
Tip: If the document is protected by a password, for security reasons, don’t send the password with the link.