Logic Pro User Guide for iPad
- Welcome
-
- What is Logic Pro?
- Working areas
- Work with the menu bar
- Work with function buttons
- Work with numeric values
- Undo and redo edits in Logic Pro for iPad
-
- Intro to tracks
- Create tracks
- Create tracks using drag and drop
- Choose the default region type for a software instrument track
- Select tracks
- Duplicate tracks
- Reorder tracks
- Rename tracks
- Change track icons
- Change track colors
- Use the tuner on an audio track
- Show the output track in the Tracks area
- Delete tracks
- Edit track parameters
- How to get help
-
- Intro to recording
-
- Before recording software instruments
- Record software instruments
- Record additional software instrument takes
- Record to multiple software instrument tracks
- Record multiple MIDI devices to multiple tracks
- Record software instruments and audio simultaneously
- Merge software instrument recordings
- Spot erase software instrument recordings
- Replace software instrument recordings
- Route MIDI internally to software instrument tracks
- Record with Low Latency Monitoring mode
- Use the metronome
- Use the count-in
-
- Intro to arranging
-
- Intro to regions
- Select regions
- Cut, copy, and paste regions
- Move regions
- Remove gaps between regions
- Delay region playback
- Trim regions
- Loop regions
- Repeat regions
- Mute regions
- Split and join regions
- Stretch regions
- Separate a MIDI region by note pitch
- Bounce regions in place
- Change the gain of audio regions
- Normalize audio regions in the Tracks area in Logic Pro for iPad
- Create regions in the Tracks area
- Convert a MIDI region to a Session Player region or a pattern region
- Replace a MIDI region with a Session Player region in Logic Pro for iPad
- Rename regions
- Change the color of regions
- Delete regions
-
- Intro to chords
- Add and delete chords
- Select chords
- Cut, copy, and paste chords
- Move and resize chords
- Loop chords on the Chord track
- Color chords on the Chord track
- Edit chords
- Work with chord groups
- Use chord progressions
- Change the chord rhythm
- Choose which chords a Session Player region follows
- Analyze the key signature of a range of chords
- Use Chord ID to analyze the chords in an audio or MIDI region
- Create fades on audio regions
- Extract vocal and instrumental stems with Stem Splitter
- Access mixing functions using the Fader
-
- Intro to Step Sequencer
- Use Step Sequencer with Drum Machine Designer
- Chords and pitch in Step Sequencer
- Record Step Sequencer patterns live
- Step record Step Sequencer patterns
- Load and save patterns
- Modify pattern playback
- Edit steps
- Edit rows
- Edit Step Sequencer pattern, row, and step settings in the inspector
- Customize Step Sequencer
-
- Intro to mixing
-
- Channel strip types
- Channel strip controls
- Peak level display and clipping
- Set channel strip volume
- Set channel strip input format
- Set the output for a channel strip
- Set channel strip pan position
- Mute and solo channel strips
- Reorder channel strips
- Replace a patch on a channel strip using drag and drop
- Work with plug-ins in the Mixer
- Search for plug-ins in the Mixer
-
-
- Effect plug-ins overview
-
- Instrument plug-ins overview
-
- ES2 overview
-
- Modulation overview
- Use the Mod Pad
-
- Vector Envelope overview
- Use Vector Envelope points
- Use Vector Envelope solo and sustain points
- Set Vector Envelope segment times
- Vector Envelope XY pad controls
- Vector Envelope Actions menu
- Vector Envelope loop controls
- Vector Envelope point transition shapes
- Vector Envelope release phase behavior
- Use Vector Envelope time scaling
- Modulation source reference
- Via modulation source reference
- Use macro controls
-
- Sample Alchemy overview
- Interface overview
- Add source material
- Save a preset
- Edit mode
- Play modes
- Source overview
- Synthesis modes
- Granular controls
- Additive effects
- Additive effect controls
- Spectral effect
- Spectral effect controls
- Filter module
- Low, bandpass, and highpass filters
- Comb PM filter
- Downsampler filter
- FM filter
- Envelope generators
- Mod Matrix
- Modulation routing
- Motion mode
- Trim mode
- More menu
- Sampler
- Studio Piano
- Copyright and trademarks
Retro Synth modulation in Logic Pro for iPad
Retro Synth Glide/Autobend, LFOs, and envelopes are known as modulation generators. These modulation sources are used to control modulation targets, such as oscillator pitch or filter cutoff.
Glide—also known as portamento—and Autobend are hardwired to control oscillator pitch. See Retro Synth Glide and Autobend.
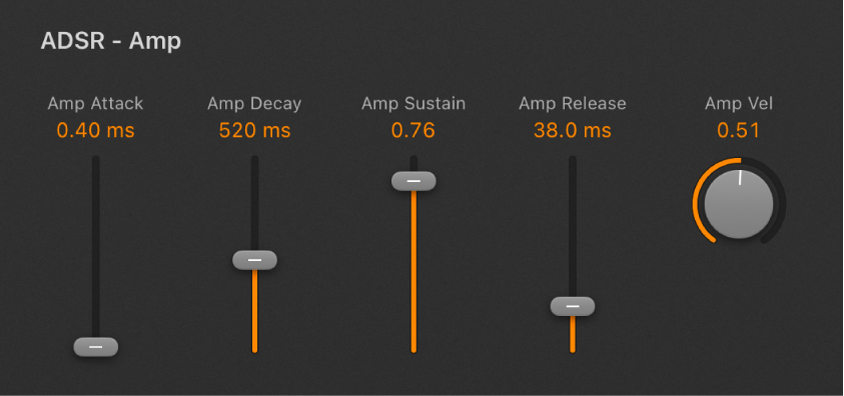
The Amp Envelope is dedicated to control of the sound level over time. The Filter Envelope controls the filter over time. See Retro Synth envelopes.
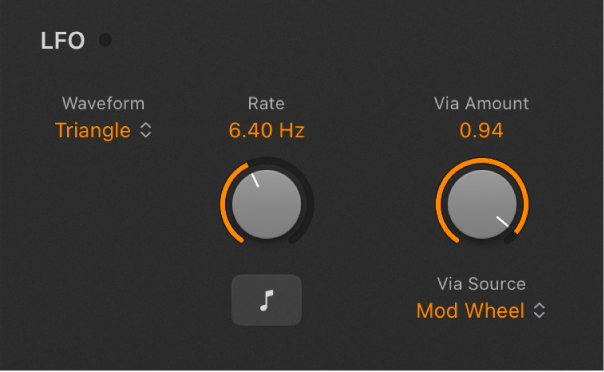
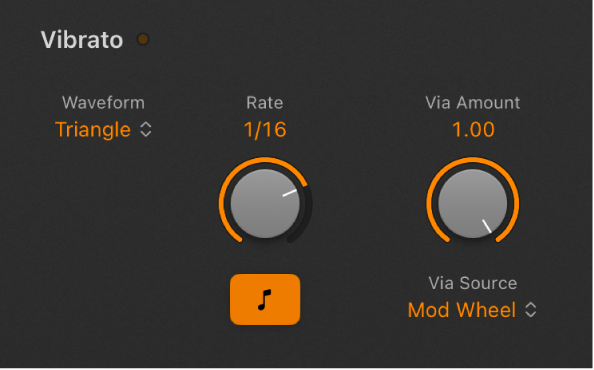
The LFO is used as a source for multiple modulation targets. The Vibrato modulation source is dedicated to control of oscillator pitch. See Retro Synth LFO and Vibrato.
You can also use your keyboard modulation wheel, aftertouch, and velocity as realtime control sources. See Retro Synth global and controller settings.
You should make use of all modulation options because they can help you to create expressive performances.
If you’re new to synthesizers and the concepts behind modulation generators, such as LFOs and envelopes, see Intro to synthesizers.
Modulate the oscillator waveform
The Analog, Sync, and Wavetable oscillator waveform shapes can be modulated by following these steps. In the FM synth engine, you can modulate the FM or Harmonic amount (or both).
In Logic Pro, move the Shape Mod control to a position away from the centered (off) position.
Adjust the controls of the LFO and ADSR - Filter sections. See LFO and Vibrato and envelopes.
If you’re using the LFO, select a waveform.

If the (LFO) Sync switch is turned off:
Adjust the LFO Via Amount knob to set the maximum modulation intensity.
Move your MIDI keyboard modulation wheel to change the LFO depth. If you don’t want to use your keyboard modulation wheel, tap the LFO Via Source pop-up menu to assign a different MIDI controller.
If you’re using the Filter Envelope (ADSR - Filter), drag the handles to set the filter attack, decay, sustain, and release values. Drag the Filt Vel knob to set the sensitivity of envelope modulation by velocity.

Use vibrato to modulate oscillator pitch
In Logic Pro, rotate the Via Amount knob to set the amount of vibrato (pitch modulation).

Select a vibrato waveform.
If the Sync switch is turned off, adjust the Rate knob to set the vibrato speed. If the Sync switch is turned on, vibrato speed is controlled by the project tempo. See Retro Synth LFO and Vibrato.
If the (Vibrato) Sync switch is turned off:
Adjust the Via Amount knob to set the maximum modulation intensity.
Move your MIDI keyboard modulation wheel to change the vibrato depth. If you don’t want to use your keyboard modulation wheel, tap the Via Source pop-up menu to assign a different MIDI controller.
Download this guide: PDF