Final Cut Pro User Guide
- Welcome
-
- What’s new in Final Cut Pro 10.5.3
- What’s new in Final Cut Pro 10.5
- What’s new in Final Cut Pro 10.4.9
- What’s new in Final Cut Pro 10.4.7
- What’s new in Final Cut Pro 10.4.6
- What’s new in Final Cut Pro 10.4.4
- What’s new in Final Cut Pro 10.4.1
- What’s new in Final Cut Pro 10.4
- What’s new in Final Cut Pro 10.3
- What’s new in Final Cut Pro 10.2
- What’s new in Final Cut Pro 10.1.2
- What’s new in Final Cut Pro 10.1
- What’s new in Final Cut Pro 10.0.6
- What’s new in Final Cut Pro 10.0.3
- What’s new in Final Cut Pro 10.0.1
-
- Intro to effects
-
- Intro to transitions
- How transitions are created
- Add transitions
- Set the default transition
- Delete transitions
- Adjust transitions in the timeline
- Adjust transitions in the inspector and viewer
- Merge jump cuts with the Flow transition
- Adjust transitions with multiple images
- Modify transitions in Motion
-
- Add storylines
- Use the precision editor
- Conform frame sizes and rates
- Use XML to transfer projects
-
- Glossary
- Copyright

Make roll edits in Final Cut Pro
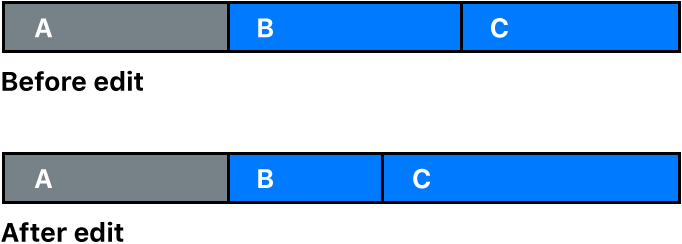
A roll edit adjusts the start point and the end point of two adjacent clips simultaneously. If you like where two clips are placed in the timeline but want to change when the cut point happens, you can use the Trim tool to roll the edit point between the two clips. No clips move in the timeline as a result; only the edit point between the two clips moves. No other clips in the project are affected.
When you perform a roll edit, the overall duration of the project stays the same, but both clips change duration. One gets longer, and the other gets shorter to compensate.

In the example above, clip B gets shorter while clip C becomes longer, but the combined duration of the two clips stays the same.
You can see a “two-up” display in the viewer as you trim edit points in the timeline. This display shows a more detailed view of each side of an edit point. See Show trimming details in the Final Cut Pro viewer.
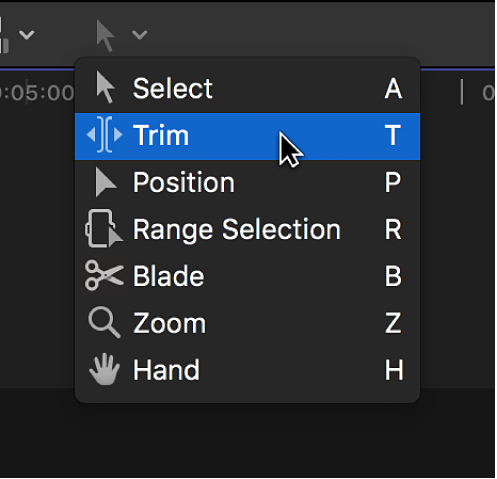
In Final Cut Pro, click the Tools pop-up menu in the top-left corner of the timeline and choose Trim (or press T).

The pointer changes to the Trim tool
 .
.Tip: To switch to the Trim tool temporarily, hold down the T key. When you release the T key, the tool reverts to the previously active tool.
In the timeline, click the center of the edit point you want to roll, so that both sides of the edit point are selected.

Do one of the following:
Drag the edit point left or right.
Press the Plus Sign (+) key or the Minus Sign (–) key followed by the timecode duration to add or subtract from the current edit, then press Return.
The timecode display below the viewer shows the duration of the trim.
For more information about entering timecode values, see Navigate using timecode in Final Cut Pro.
Position the playhead or the skimmer at a point in the timeline to which you want to move the edit point, then choose Trim > Extend Edit (or press Shift-X).
The edit point is rolled to the new location. The combined duration of the two clips stays the same.

If you can’t roll the edit point any farther and one side of the edit point appears red, you’ve reached the end of the media for one of the two clips.
